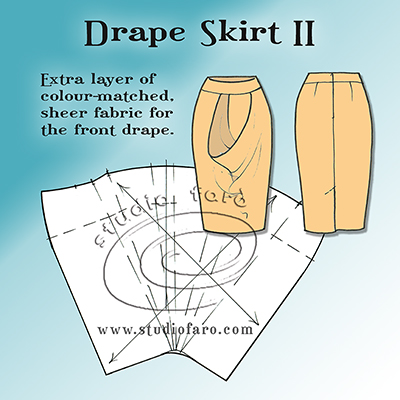
25 Sep Drape Skirt II
There have been a few of this variety of skirt gracing the catwalk for the past couple of years. I have also cut similar for local clients and the beauty of this design is its simplicity for a first attempt at cutting drape patterns. The drape shape is infact separate to the front and back patterns and acts as a decorative overlay for the front skirt. Start with my Skirt Block and follow the pattern making instructions in this post. Suggested fabrics: Crepe weaves with a transparent overlay for the front drape or a satin backed crepe where you are able to reveal the satin back in the cowl of the drape. If you are interested in more drape skirt patterns you can click through for all the other blog posts.
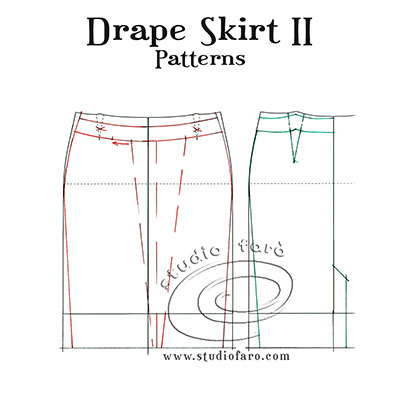
Start with my skirt block or a simple pencil skirt pattern that you know fits:
- Copy out a full front pattern and a half back pattern (as below) to develop this design.
- Lower the waistline slightly as you see in the diagram. i.e. 3cm at centre front, 2cm at both side seams and 1cm at the centre back seam.
- Mark in the 5-6cm wide waistband directly below the new waistline.
- Drop the skirt length below the knee to suit your own style.
- Taper the side seams, front and back: from 3cm at the hem to 0cm at the hip level.
- Add a vent to the centre back seam of the skirt: approximately 12-15cm long and 4-5cm wide to match your hem depth.
- On the front skirt mark in the location of the drape with dashed lines to show where you will add the extra fabric for the drape.
- Also, mark the notches you will need on the seam between the skirt and the waistband.
- Note there is the addition of a small pleat/turnback on the left side of the drape used to reveal the reverse side of the fabric.
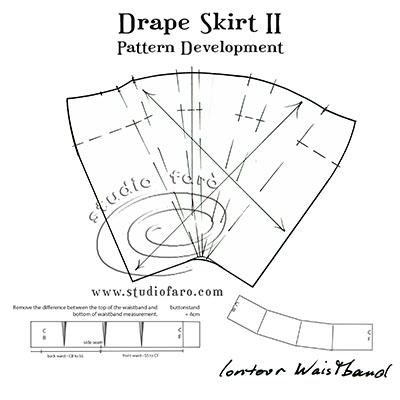
To make the front drape pattern:
- Make a copy of the full front skirt block with the drape cut lines clearly marked.
- Cut along the three drape lines and open up the top of the pattern to include the extra length for the cowl drape.
- Also, add extra fabric (4-5cm) for the turnback/pleat on the left side of the pattern.
- Be sure to mark all the relevant notches so this piece can go back into the waist with the right drape and turnback.
For the contour waistband, you can trace the waistband directly from the pattern plan (not including darts) or draft a clean symmetrical contour waistband pattern. To draft the pattern:
- Measure the finished length of the seam between the waistband and skirt to draft your contour waistband.
- Using half that measurement, draft a rectangle that is depth of waistband (5-6cm) by half waist seam circumference.
- Now measure the finished length of the top of the waistband (not including darts) and halve the measurement. The difference between the two is the amount to be subtracted from the top line of the rectangle.
- Note the inverted rectangles spread evenly along the half waistband pattern. Divide the difference in the two measurements by 3 or 4 to distribute the reduction in the top of the waistband evenly.
- Now fold out each of these tiny darts and you will have a contoured shape that fits the top of the skirt and is shaped to your waistline.
- Clean up the curves and add seam allowances.
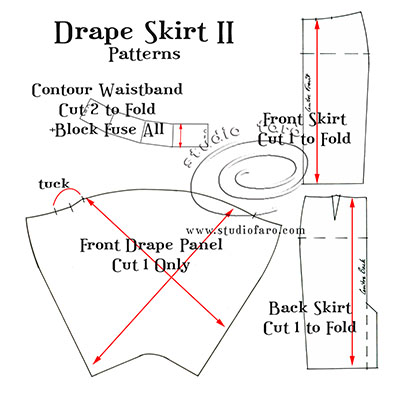
The remainder of the pattern pieces are a front and back skirt pattern. The front skirt to be cut on the fold and the back to be cut 1 pair. I suggest that the cowl edge of the front overlay be hemmed first before including int he waistband. And you may have to consider a front hem facing so you can deal with the extreme curve in the hemline of the overlay and match through to the deep back skirt hem (4-5cm).
I hope you enjoy the ideas and information in this post. Please ask away if you have any questions. Always happy to help. 🙂
If you’d like to buy a copy of these pattern making notes for your own personal use at home you’ll find them here: Drape Skirts – Pattern Making Instructions.
No Comments