25 Aug How to get your Sewing Patterns to Fit
Posted at 06:07h
in Fitting Patterns, Pattern Fitting Tutorials, Sewing, Sewing Pattern Alterations
2 Comments
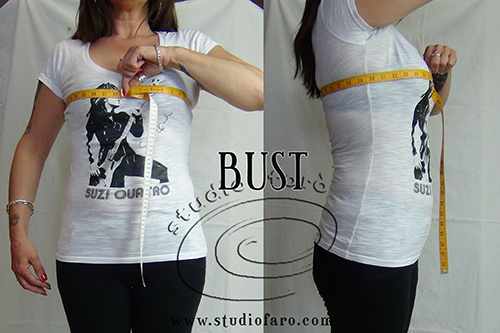
So often the greatest disappointments I hear about making your own clothes are about commercial sewing patterns not fitting how the maker imagined. What's not always clear is the complexity of size charts and the idea that all garments and sewing patterns use the same sizing system. Not so unfortunately. My own approach is to always ignore the sizing system offered on the back of sewing patterns (size 14 or S M L) and to focus solely on body measurements and desired garment measurements and how the sewing pattern compares. What follows is a description of the first steps, I use personally and teach to my students, to make sure they have the closest sewing pattern size before cutting a fitting toile.