09 Jan Decoding Vintage Patterns
Since I’ve been online (6 years now) I’ve become aware of an enormous love for vintage style out there, and in particular vintage patterns. And in some strange way, these patterns are so familiar to me. I must have used some of my grandmother’s patterns when I was younger because the lack of instructions and complete absence of print on these vintage patterns doesn’t confuse or put me off at all. Somehow it appears to me as a secret code I have to solve to uncover the exact intentions of the designer/pattern maker.
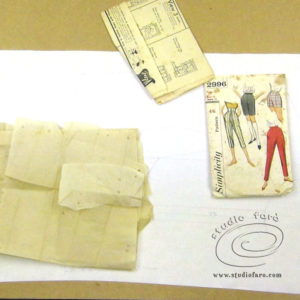
In a visit to Marrickville town hall (Sydney, Australia), during the stash and treasure market, I picked up some very interesting patterns. The one that caught my attention in particular, is this Capri style pant from the 1950’s. It has to be said that it’s often the illustrations that get us so excited. I’d just love it if my Capri pants looked like that on me. And for all us enthusiastic creatives, it’s so important to remember that sewing pattern illustrations are not promises of perfection in our sewing, but more likely an idealised image of the designer’s vision.
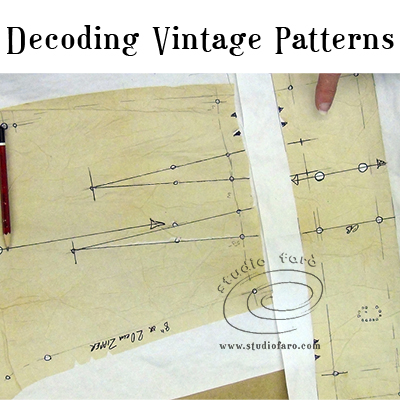
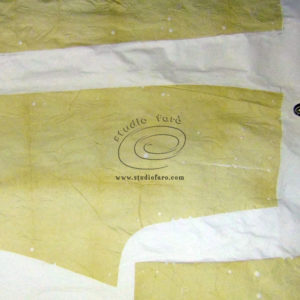
Now this vintage pattern is truly of the early kind, where there aren’t even any instructions or labels on the tissue paper. In this case the tissue was in fairly poor condition, because of the age, so I used a dilute PVA glue to bond it to some pattern making pattern, to make sure I could work with it and it would last the distance.
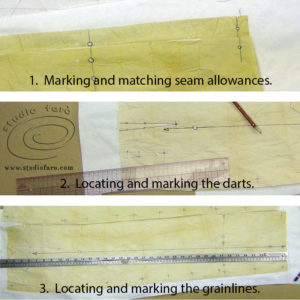
Then began the process of identifying the different hole punches, and there various functions. I’ve inked-in all the shapes and then I compared the front and back trouser patterns trying to work out how they go together:
- Some are clear and obvious as seam allowances on the leg seams.
- And the dart shapes are also clear and easily marked out.
- Running down the centre of each trouser leg are a series of holes that show the grain line.
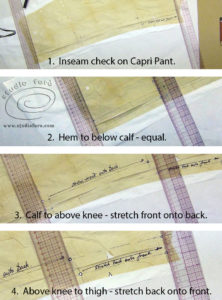
And finally, here comes the most interesting aspect of this pattern. I’m very familiar with trouser patterns and so the following is like finding treasure on the beach. When I worked my way down the trouser inseam (that’s the inside leg seam) I found the markings made for a very interesting set of instructions.
- When they are compared, the front and back inseam are exactly the same length. I know that isn’t so unusual, however when I make trouser patterns, the inside back leg is approx. 1cm shorter than the inside front leg. This difference occurs in the upper thigh section of the of the inseam and is meant to help the back thigh of the trouser to drape a little better. This feature has it’s origins in mens tailored trousers and I think it always makes for a much better drape in the trouser leg. The answer to this riddle is in the detail of the set of notches on this inseam.
- From ankle to the calf notches the fit is the same for the front and the back. As you would expect.
- Then comes something interesting: the notches from the calf to above the knee are not the same fit. The front is in fact shorter than the back so that you have to ‘stretch the front onto the back’. This is the first time ever that I have seen this feature in a trouser pattern!!
- From above the knee to the crotch level, the front is longer than the back, as I am used to in all my trouser patterns. This means your meant to ‘stretch the back onto the front’ as mentioned above.
This last aspect of the vintage pattern has made me so curious to see how they make up as wearable trousers. Before that can happen, I will have to grade them up to the my size. In my next blog post I’ll share with you how I manually grade my patterns, using a ‘Variator’ grading machine, that gives me millimetre accurate, graded patterns.
No Comments