Pattern Alterations Tag

After so many pattern alterations to the first sample pattern, I'm excited to show you how the second sample turned out.  Below you can see the pattern alterations (brown paper) I made to the first sample pattern.  And I've selected a cotton/linen blend for the second sample.  You will find all the first sample and pattern alteration detail in this post:  Sampling the Flare and Gather Dress and Pattern Alterations - Flare and Gather Dress Pattern.

Now that the first sample has been made and fitted I'm able to bring you all the pattern alterations I have made to get this new design to work.  I'm still fascinated with this design and hope the final pattern is something worthy of all this sampling effort.  If you'd like to see the original pattern puzzle post you'll find it here:  Flare & Gather Dress

So often I'm asked how I make my fitting toile's for Trouser Blocks, so I'd thought I'd put together a short post with some detail.  Many of the points are small but essential for a good #FirstFitting. You can access a download of my Trouser Block here.  I've also uploaded a worksheet that covers the detail for the first stage of fitting the trouser block.  The PDF worksheet includes detail instructions and technical diagrams to take you through every step of the process.

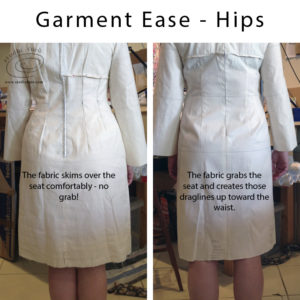
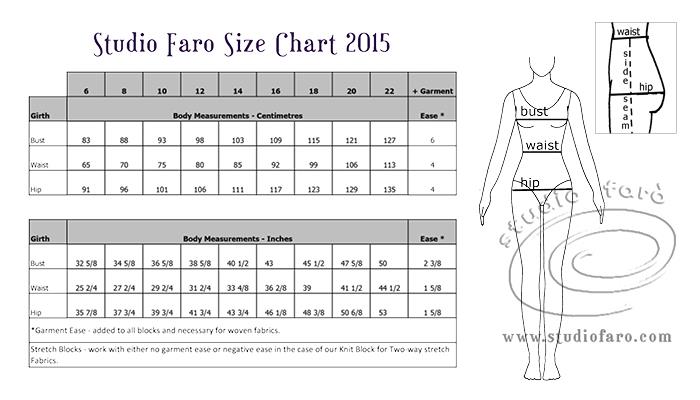
As a follow-on from Taking Body Measurements, this tutorial will help everyone understand garment ease, what it's for and how to use it in pattern making.  Garment ease is the minimum amount of fabric we add to our body measurements so that our woven garments are comfortable in wearing.  That is, enough extra fabric to sit comfortably, bend your elbow, reach forward to grip the steering wheel when you drive your car or use the computer, sit down, eat lunch, bend your knees, etc.  When fitting basics blocks for woven fabrics, you'll always include the full ease allowance and when you cut patterns from these blocks you can alter the ease to suit the design and fabric you're cutting.
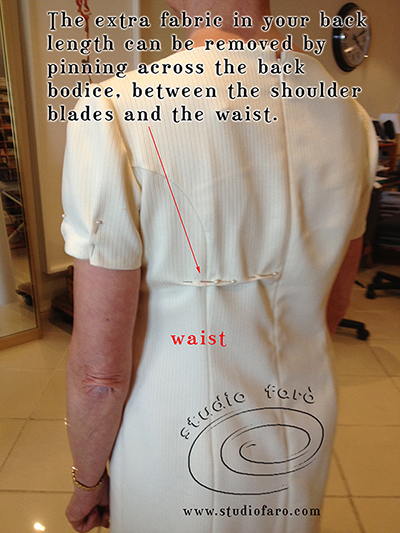
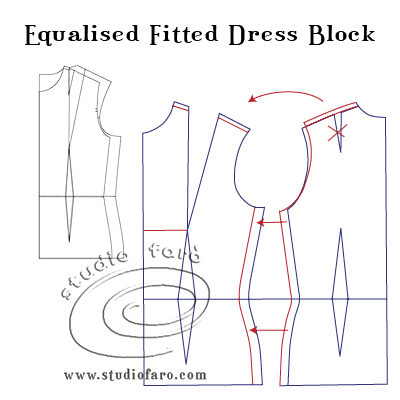
My women's fitted block is a tailored, rather formal fit with the side seam sitting towards the back of the body.  The front block is 4cm wider then the back block.  This is a more tailored fitting and entirely appropriate for many garment types.  It's especially fabulous when used to make a a corset block or tailored jacket block.  The PDF download from the website is the original block and ideal for your toile fittings before cutting any dress patterns.  However many designs will work better if you equalise your dress block, in particular drape dress designs.

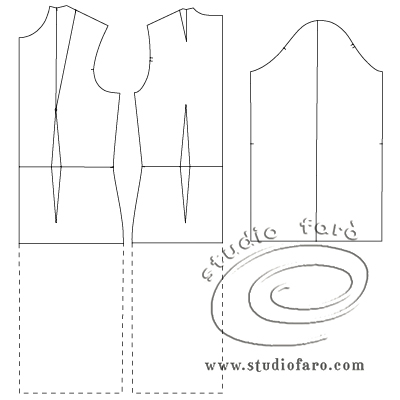
My women's fitted block is drafted past the waist, down to the hip level.  It's currently available as a pdf download here.  Although most drafting systems for a women's bodice blocks stop at the waist, it's essential for modern or commercial pattern making to have a bodice block that is fitted to the hip line and ready for both shirt and dress pattern making.  The addition of length past the hip line to the knee level renders this basic fitted block into a dress block.  Drop your centre front and centre back line and side seams straight down to your knee level and square across for the hemline.  Check the hip curve of your dress block, at the hipline, to make sure it has a clean curve after you have added the extra length to the knee level.

To begin the release of my blocks and patterns I'll be working with a size chart that covers sizes 6-22.  It's the chart that I have used for over 25 years and it has proved to be accurate to many aspects of the Australian market.  However venturing into making sewing patterns I feel the need to expand the sizes in the range.  Some designs will only come in sizes 6-16 while other designs will be graded 6-22.  Make sure you've subscribed to my website newsletter so you hear about new releases.

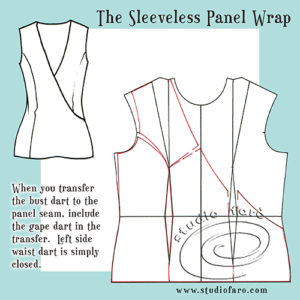
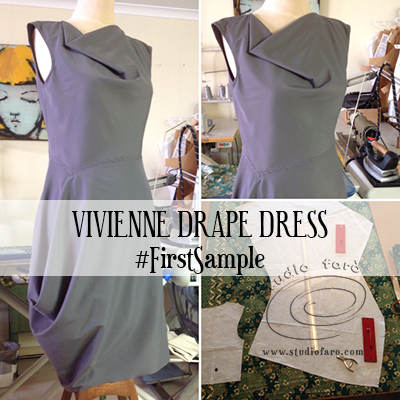
Back in the land of blogging and I've made a #FirstSample of the Vivienne Drape Dress.  Many of my pattern puzzles start with my Women's Fitted Dress Block (PDF available) and every student builds a pattern plan for the development of this special design.  All-in-all I think it turned out ok.  I will be moving the dip in the waistline a little closer to the centre front (CF) and taking the cut lines for the drape with it.  Checkout the revised pattern plan below.
×