02 Jun Mioara Cretu Outfit #2
Posted at 17:02h
in Pattern Making Instructions, Pattern Puzzles, Stretch Patterns, Womens Knit Block
0 Comments
This weeks #PatternPuzzle is a thing of genius from our regular contributor, Mioara Cretu, gifting us the most baffling #PatternPuzzle of all time last Saturday. You may remember her first contribution from last year, featured here. Mioara teaches pattern making at a Romanian university and has a weakness for jersey one-piece patterns!
And for all my fans, you’ve done a wonderful job this weekend finding the answers to such a challenging puzzle. Congratulations 🙂
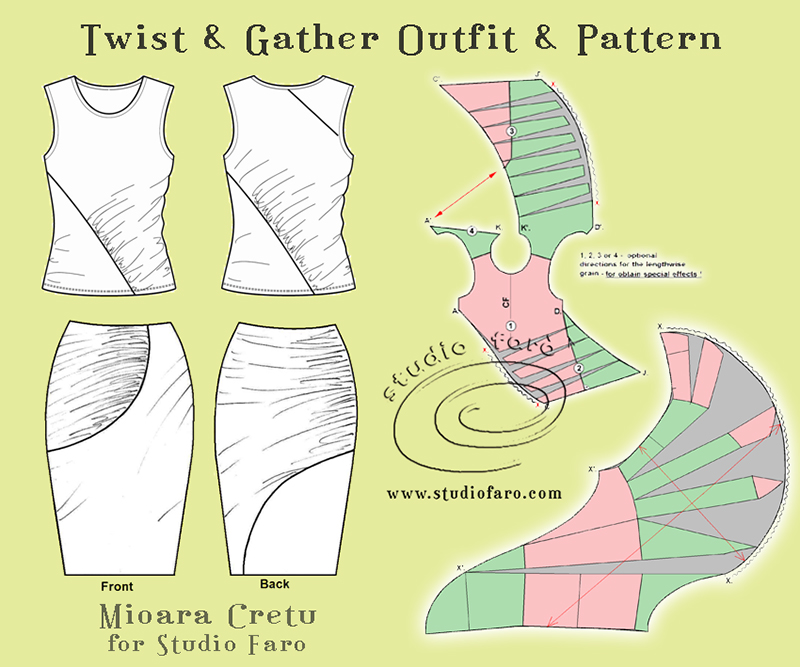
Now it’s time to confess that I stared blankly at this puzzle for days when it first arrived. The skirt I was able to work out but it was the twist in the top pattern that had me really confused.
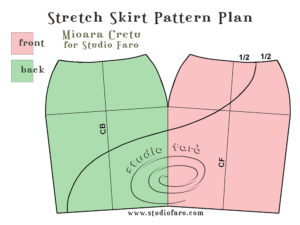
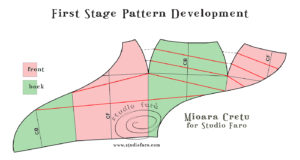
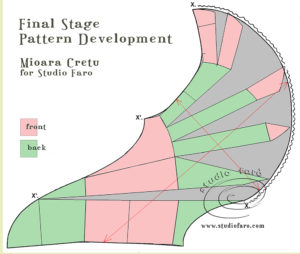
As soon as I tried the pattern making on the top myself I realised what was going on. I’ve included colour coding in the diagrams below to keep track of the front and back of the garments as you work your way through the pattern.
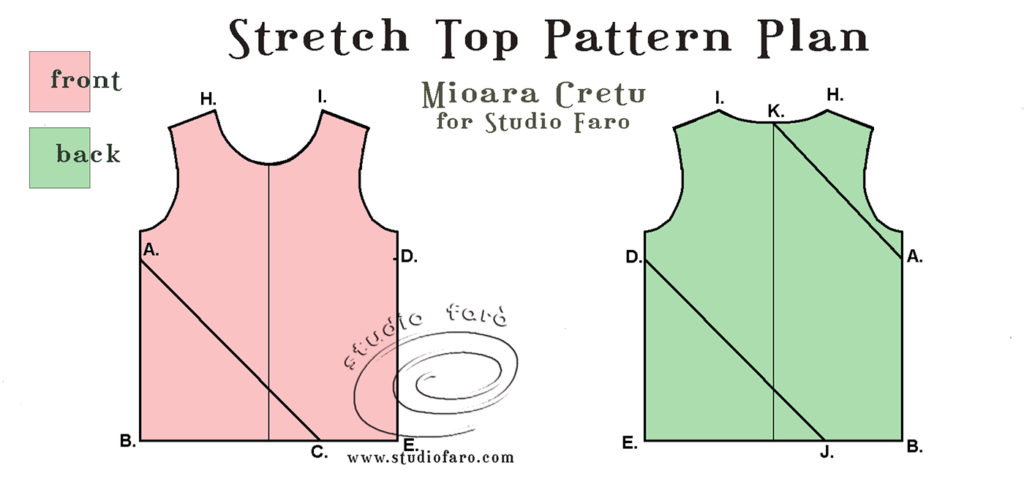
Firstly the top:
- Start with my women’s knit block, using a smaller size than usual with about 4-6cm negative ease.
- Straighten the side seams from underarm to hemline.
- In placing your diagonal lines, it is important they meet accurately at points A & D to create the twist or corkscrew seaming in the whole of the top.
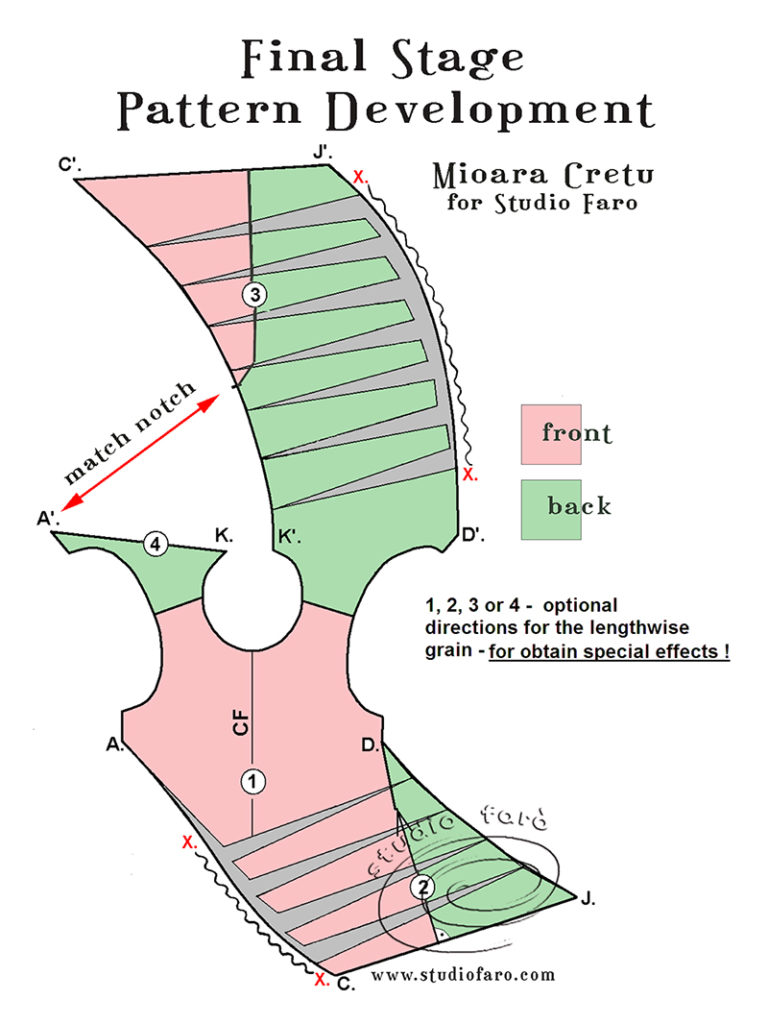
- Cut your pattern along the diagonal lines and glue together as one pattern as pictured below.
- Then mark in your dotted cut lines on both sections of the pattern where you will add extra fabric for ruching.
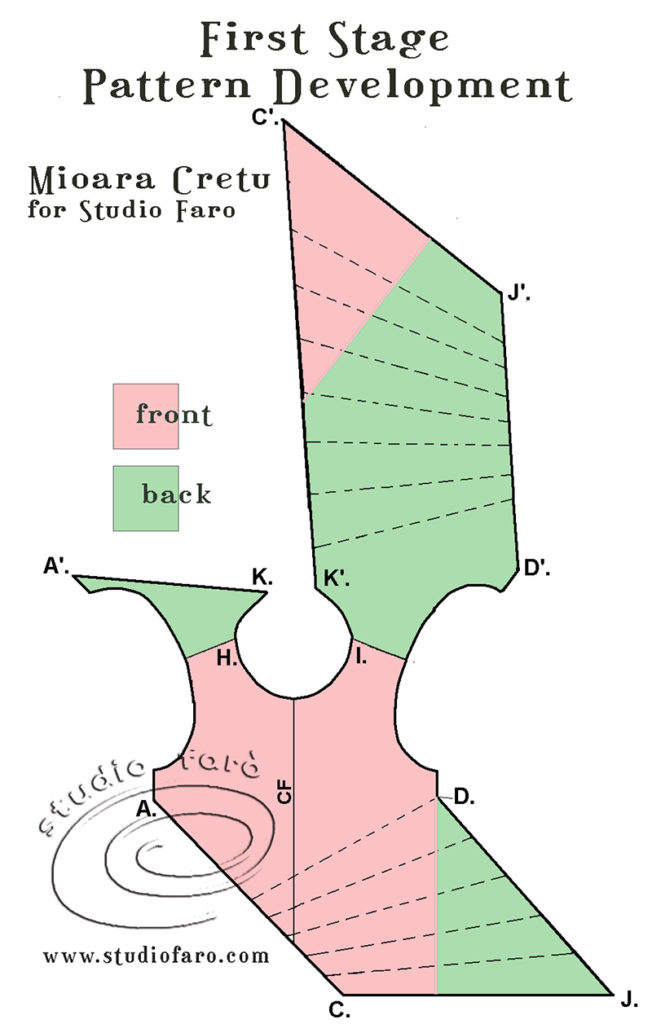
- Open up the cut lines in the front and back sections to add extra fabric.
- The guide is that if your fabric is light-weight you will need to add more, and if your fabric is heavier you will need to add less for ruching.
To begin the skirt draft:
- Using your body measurements, minus 4-6cm negative ease, draft a basic stretch skirt block.
- This draft is based on quarter measurements for the waist and hip.
- Please note how the waist curve lifts towards the side seam – usually 1-1.5cm.
- Taper from the hip to the hemline, reducing 2-3cm.
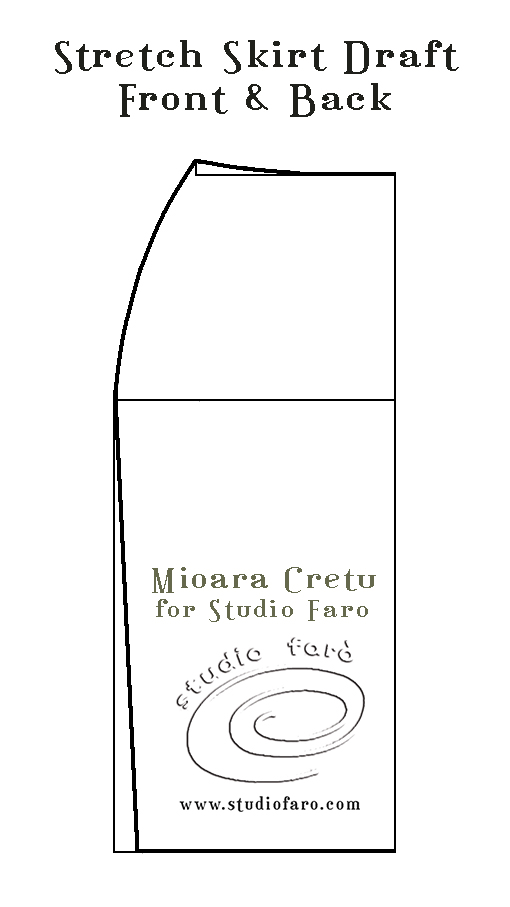
- Make full copies from the above draft for the front and back of the skirt.
- Place the side seams together, below the hip.
- Mark in the curved seam from the front left waist to the back left hemline.
- Mark in the cut lines as set out in the diagram below.
- Please note that the lines connect with important pivot points in the shaping of this pattern. e.g. hip level at the bottom of the side seam shaping.
- Cut along all the red lines and close up the side seam shaping to add extra fabric for ruching to the twisted seam.
- Notch to indicate the rucheing area and the seam it matches too.
We love to hear from you, so please feel free to leave your questions and comments below.
Enjoy 🙂
No Comments