20 Apr Gather Shirt
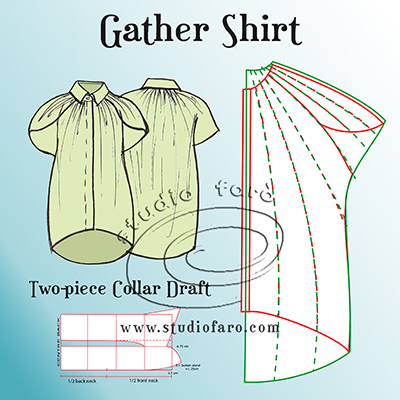
Once again I am attracted to the loose-fit silhouette that is such a staple in most fashion ranges at the moment. And somehow I think it may also indicate a desire to bring my own wardrobe up-to-date. This cocoon shaped, gathered drape shirt would behave at its best if you were to cut it in a light, drapey woven such as silk satin or a crepe de chine. The gathered drape flows out of the neckline, over the shoulders into a slightly restricted armhole. This is the one feature of the design that will most likely require tweaking in the first toile. The shirt design also features a Hi-Lo hemline and a concealed button front with two-piece shirt collar. This design can be made as either a tunic length or dress length according to personal taste.
Starting with either a loose-fit kimono block or loose-fit shirt pattern from your stash, trace off a half front and back pattern (ideally without seam allowances) to begin your pattern plan.
- Mark in a buttonstand on the centre front line for the full front length of the shirt.
- Mark in the sleeve length (front & back) along the top arm line with some shaping over the shoulder toward the top arm area.
- Mark in the front raglan seam from the neckline, shaping up to the shoulder seam and curving down to the front underarm point.
- Mark in the back sleeve opening shape from the end of the shoulder line to the underarm area.
- I have added extra designer ease on the side seam, from the bust through to hip area to make sure this style does not catch on the seat when wearing.
- Draw in the curves for the Hi-Lo hemline according to personal preference. In this case, the difference between the front and back hem is approx. 15-18cm with the side seam level at the half-way position.
- And finally, mark in the dashed lines where you will open up the pattern to add extra fabric for the gathered drape.
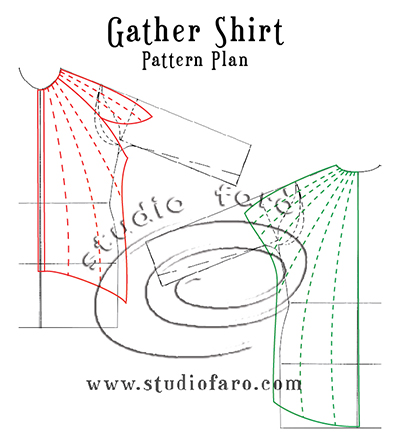
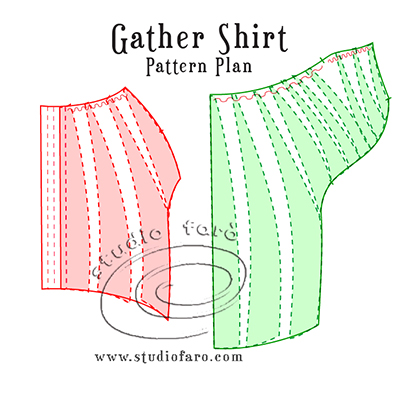
The main pattern development is the adding of drape to the front and back pattern pieces. I have already mentioned that the ideal fabric is a light, drapey woven and must also warn against the use of stiff or crisp fabrics. These fabrics will tend to stand away from the body and add unsightly bulk to the silhouette around the shoulders and upper body.
Note in the diagrams below that the front raglan sleeve has been added to the back pattern thus eliminating a raglan seam on the back. The pattern pieces have been opened up in the neckline and hemline to encourage a draped, flowing effect. It would be totally acceptable to leave the hemline as planned on the block and only add drape to the neckline and shoulder area. This will serve to emphasise the cocoon shape in the garment. Please note the addition of fold-back fabric at the centre front to build a concealed front opening into this shirt.
The final pattern pieces include a two-piece, tailored shirt collar to finish off the pattern making. Instructions for drafting this collar are available in the majority of pattern making books. You can also use a two-piece collar from another pattern in your stash to complete this pattern.
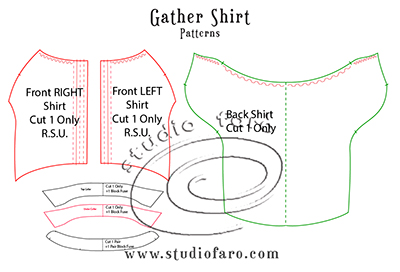
The diagram below demonstrates the difference between the right and left sides of the shirt front to make a concealed button opening. And the finessing of the collar patterns to achieve the most professional outcome in making.
Let me know if you have any questions about this puzzle or any pattern making issues in the comments section below. Always happy to help. 🙂 If you’d like to buy a copy of these pattern making notes for your own personal use at home you’ll find them here: Gather Shirt – Pattern Making Instructions.
A fabulous sample of the Gather Shirt Pattern Puzzle from Ludmila Piskunova 2017.

No Comments