30 Aug Retro Wrap Sewing Instructions
Posted at 11:11h
in Garment Construction, Pattern Puzzle Sewing Patterns, Pattern Puzzles, Sewing patterns, Stretch Patterns, Vintage Patterns
4 Comments
The Retro Wrap was one of my earliest Pattern Puzzle patterns and easily one of the all-time favourites. I’ve made the original pattern and all the adjustments necessary to prepare it for conversion into a PDF Sewing Pattern. And I do admit that working out the grading plan for this style was a huge challenge. When the grade document is returned I’ll let you know if it was successful.
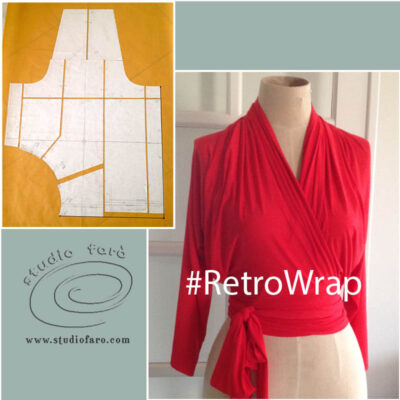
While we’re waiting for this pattern to be completed I’ll load the sewing instructions here for everyone’s use. As soon as the PDF pattern is available these instructions will be included in detail in the PDF sewing pattern download.
For the best performance the ideal fabric for this pattern is a two-way stretch knit (four-way stretch in the US) with some elastane content. The extra stretch makes a wonderful fit in the wrap and allows all the extra fabric drape around the neck to be soft and comfortable.
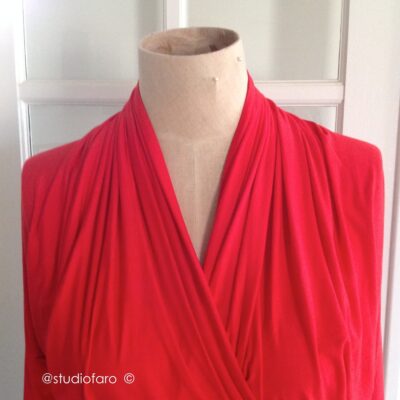
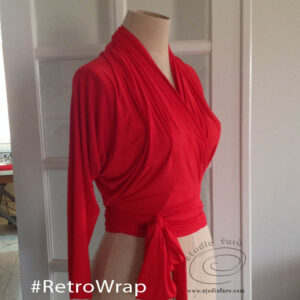
Retro Wrap Neckline Drape
If you have a look at the original post for the Retro Wrap you’ll see that the inspiration for the ideal is a vintage pattern that suggests you can wear the top back the front easily. I didn’t find that easy or comfortable. Not unless you enjoy an uncomfortable choking sensation.
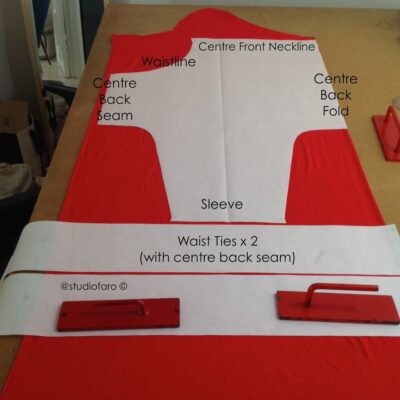
The lay-plan for the pattern is as above with the centre back (CB) on the fold (Cut 1 to fold) and the waist ties Cut 2 across the width of the cloth.
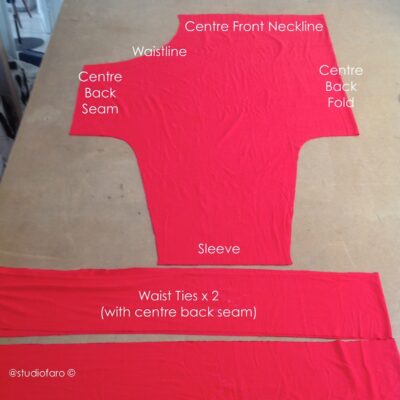
It’s worth noting that the waist ties on this pattern are very long. I’ve cut two across the width of the fabric and they’ll be joined on the CB seam so they wrap around the waist twice before being tied in a bow at the front. If that’s too much you can reduce the length to suit your fitting.
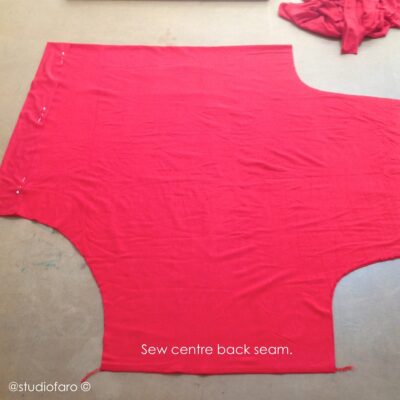
To begin sew the CB seam as indicated on the pattern. In this set of instructions I’ve used my four thread mock safety stitch machine for all the seams. If that’s not possible for you then the stretch stitch on your domestic machine will do the same job.
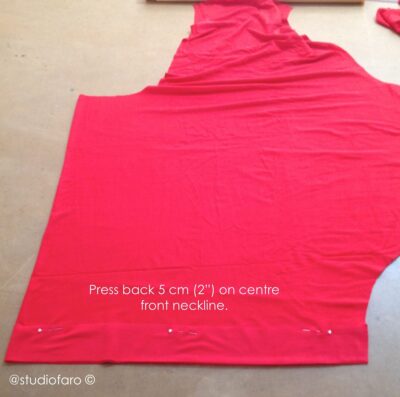
At the centre front (CF) neckline, press back the 5cm (2″) turning in place before stitching.
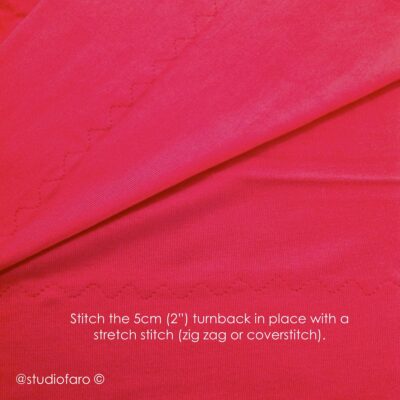
Stitch in place with a stretch stitch. In the image above I have used a decorative zig zag so the neckline will stretch without breaking the stitches. A lot of pressure in placed on this neckline when you wrap the top and secure the waist ties.
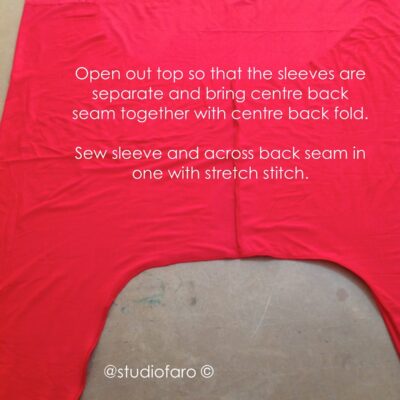
Open out the top to separate the sleeves and bring the CB seam and CB fold together.
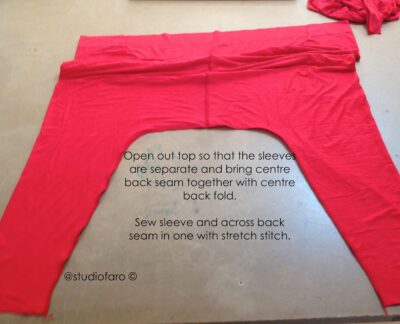
Stitch both sleeve seams, through the back seam as pictured above. Now I know this looks weird, almost like a pair of trousers. And that’s the perverse nature of the sewing patterns that really tweak my interest.
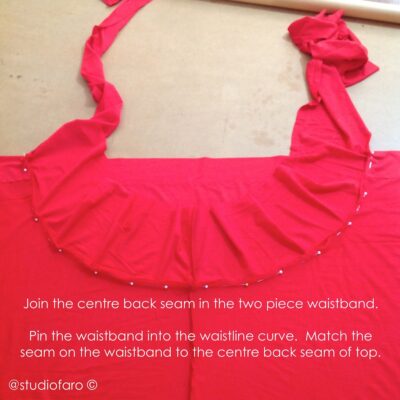
Sew the two waist tie pieces together. That becomes the CB seam on the waist tie. Match the CB seam of the top and the waist tie and pin through the complete waist seam.
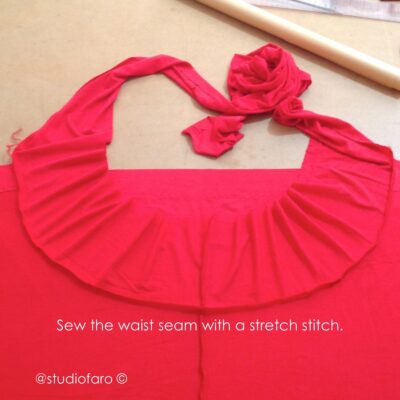
Stitch the waist seam using your stretch stitch or four thread mock safety stitch machine.
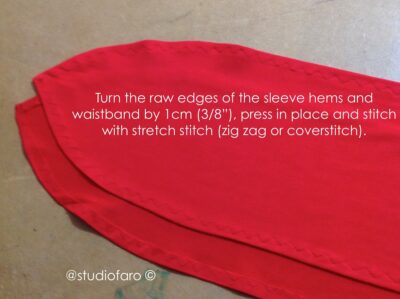
Turn and press the hem allowance (1cm/ 3/8″)on the waist tie and the sleeves (2cm/ 3/4″). Stitch these turnings in place using a stretch stitch or your four thread mock safety stitch machine. The waist tie secures this top in place so the stitching needs to stretch without breaking.
As retro styles goes this is a fabulous top that accentuates the waist and would look wonderful with any vintage style skirts and pants. I also think it would be easy to add a half circle skirt to the waist tie and turn this into a wonderful retro dress.
Drop any questions in the comments section below. You can also share your makes and pattern making questions with me in my private Facebook Group, STUDIO FARO MAKERS.
Take this moment to sign up for my fabulous newsletter! Every month or so I send an email newsletter with new website content and always, always an enormous discount code for all my sewing patterns, garment blocks and pattern making instructions.
This discount code is for subscribers only. Don't miss out!
Shelley McAfee
Posted at 11:40h, 08 JanuaryI’ve always loved this style of vintage wrap-top, it’s so elegant; I’m thrilled that You decided to figure-out a workable pattern — and to share it!
Thank-You!! 🙂
Most of the illustrations in the instructions don’t show-up on My screen., so I’m hoping that I can see them if/when I sign-up.
Your work is beautiful!!
Take-Care,
-Shelley
Studio Faro
Posted at 08:38h, 09 JanuaryHi Shelley, Thanks for dropping by. To be clear are you after the images in this post for sewing the Retro Top or are you after the images for the pattern making instructions in the original post here: https://www.studiofaro.com/retro-wrap/
Let me know and include an email address and I’ll send you what I can. 🙂 Anita
Christine Henderson
Posted at 22:51h, 31 MayThis top looks lovely and I would like to make it. May I ask, did you end up having a pdf pattern available in different sizes for this top? I know you had hoped to have one, however I’ve not found it. Thank you!
Studio Faro
Posted at 14:24h, 01 JuneHi Christine, thanks for asking. Unfortunately I haven’t finalised this pattern for the website yet. I currently between studios and not able to complete the work. I’m hoping to have it uploaded by the end of the year.