19 May Pinstripe Panel Skirt
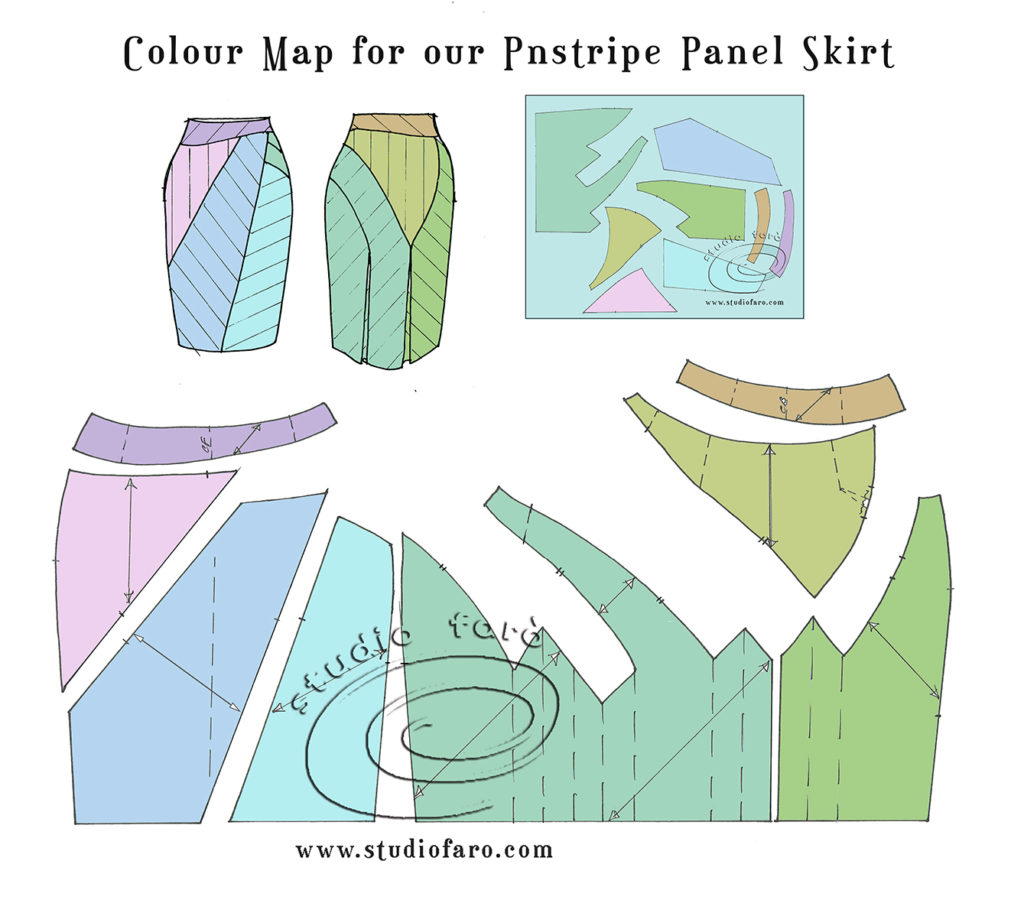
With some very clever spatial reasoning our fans we able to solve all the detail in Saturdays #PatternPuzzle. They were cutting up bits of paper and making impossibly small skirts into the wee hours to reveal all the answers. They make our Saturdays so much fun. 🙂 This weeks #PatternPuzzle was inspired by one of those pins without a link to the source but I’m pretty sure it’s a Donna Karan. I did leave off a bit of the frippery (small drape near the waist) as I prefer a cleaner style and there is already so much going on in this skirt. Pinstripe fabric is the driving force in this design, with the directional use making so much of the intricate panels. The Colour Map below will help make sense of all the pattern pieces and where they belong in the skirt.
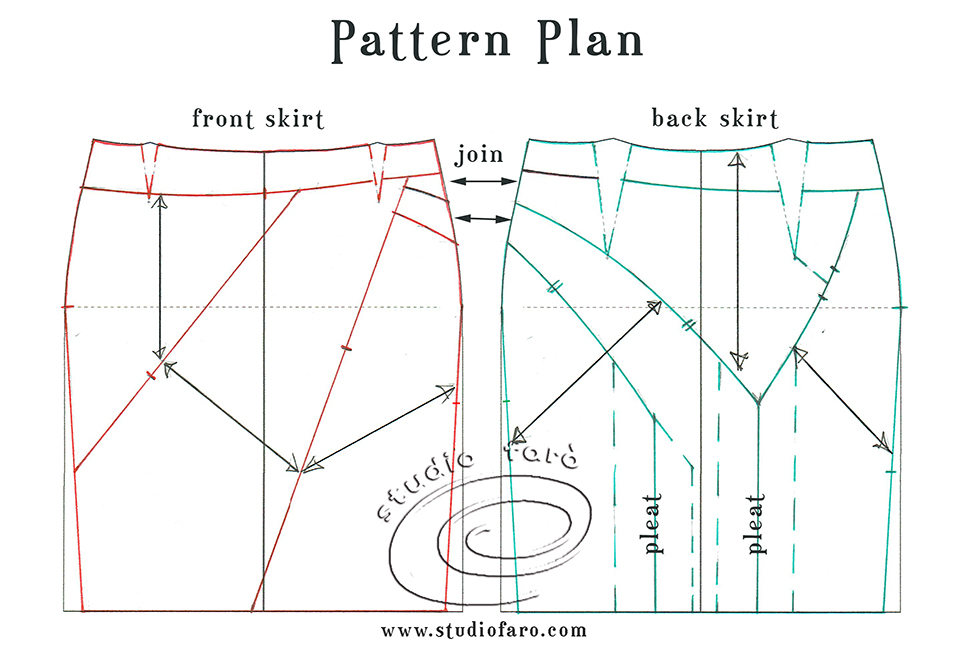
The pattern plan below is based on my basic skirt block for woven fabric. If you don’t have a skirt block and would like to draft your own to fit we have a Pattern Making Worksheet, with detailed instructions, available on the website.
When marking up your new design lines be careful to make sure the small sections on the front left skirt match up with the back panels they will be joined too in the final pattern. Because of the placement of the design lines the zip in this style will be in the right side seam. If that bothers you it is easy enough to flip the design detail for front and back to bring the zipper to the left hand side. The dashed lines on the back indicate the location and width of the inverted/box pleats.
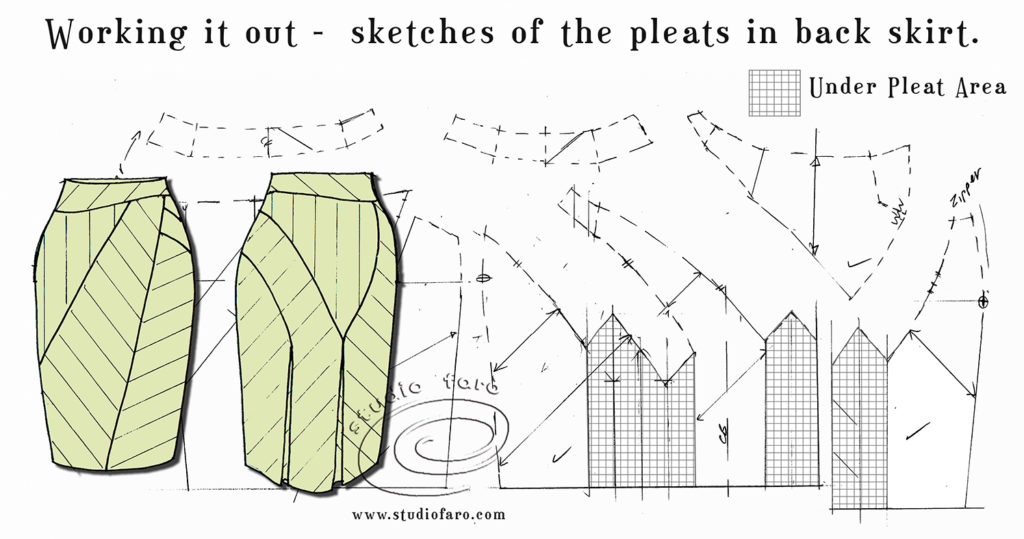
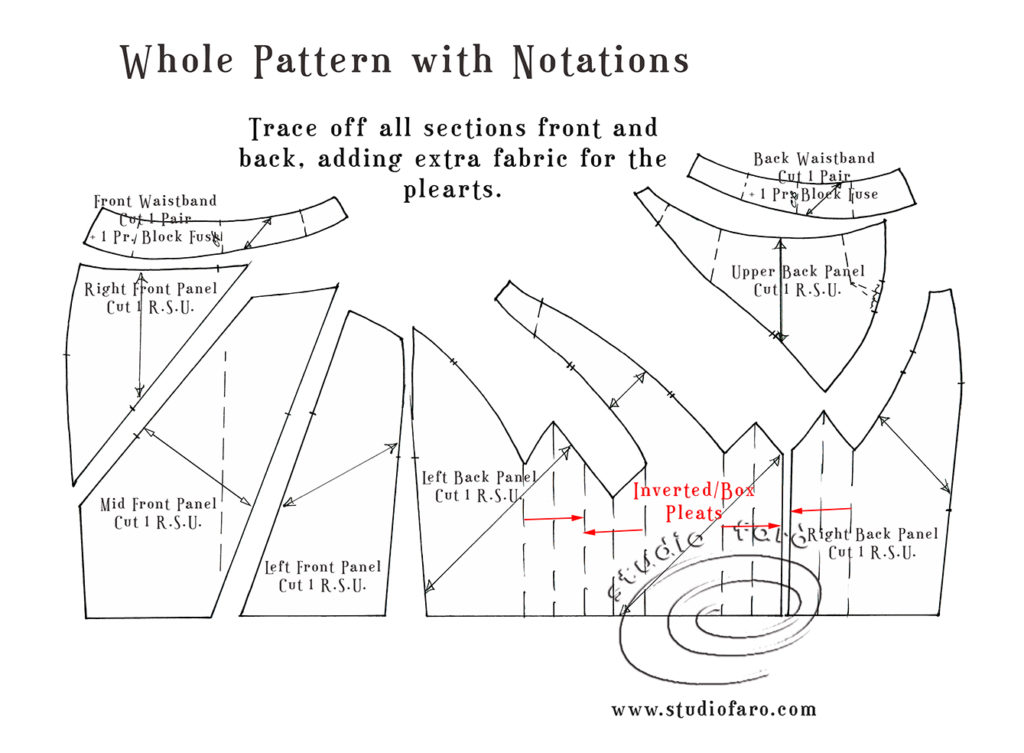
When tracing off the intricate back pattern pieces, make allowance for the inclusion of extra fabric for the under pleat areas. Be aware of the unusual placement of the grain line to maximise the effect of the pinstripe.
All the skirt pattern pieces are cut right side up (R.S.U.) with the exception of the front and back waistbands that need to be double and block fused (interlining).
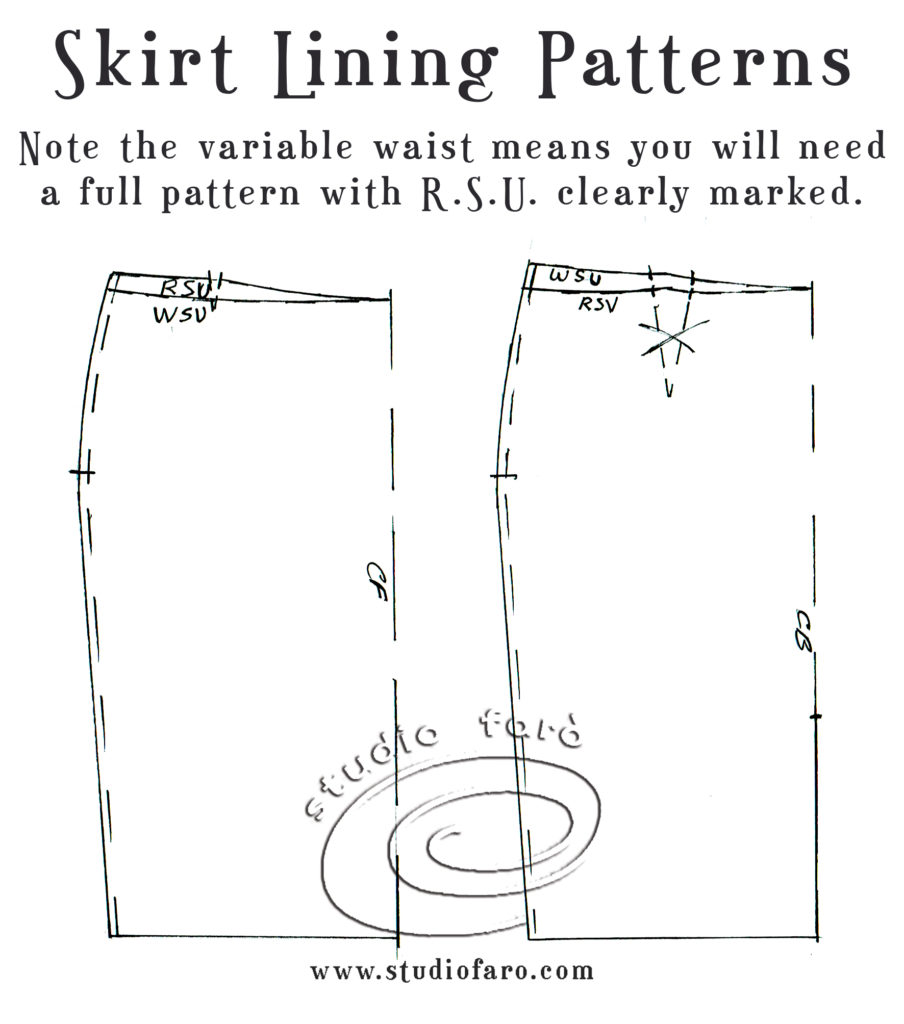
If you are thinking of using a more tailored fabric I think it would be a good idea to add lining patterns. They are always bigger (2cm) than the outside shell of the skirt so best to start by making a copy of the basic skirt shape from the pattern plan. On this lining pattern, turn the darts into tucks (sewn darts in lining split) and add 5mm to each side seam (total 2cm). Remember the waistline is not symmetrical so you will need full patterns for front and back lining with R.S.U. marked clearly.
This skirt design has great potential and doesn’t always have to be pinstripe. An eclectic mix of patterns, textures and weaves would make this skirt over to eveningwear in a flash. If you are thinking of making this design, don’t hesitate to email or comment below if you have any questions.
Enjoy 🙂
There’s now a First Sample post for you to see the making of this intricate skirt design – First Sample – Pinstripe Panel Skirt

Sally from Capital Chic Patterns
No Comments