19 Jul Pattern Magic Twist – ‘nejiri’ II
Posted at 16:51h
in Pattern Making Instructions, Pattern Puzzles, Stretch Patterns, Womens Knit Block
0 Comments
In this second stage, the ‘nejiri’ Twist evolves into something new. Continuing on from the earlier photo tutorial post about my investigations into yet more twist patterns. It’s important to remember that the success of these twists depends on using two-way stretch knit. Both the existing toiles in this test are merino and merino blends with elastane.
Alterations to the first sample included reducing the upper body length to refine the drape and tightening the hip fit so the twist will stay in place.
For my wearer trial I found that very quickly (first 30 mins) the seams migrate back to the twisted position and you find you are constantly having to push them back into place to maintain the twist. This is why the book suggests you add elastic to the hem to keep the twist in place. However, I would prefer my clothes stayed in place without a lot of handling – so back to the drawing board.
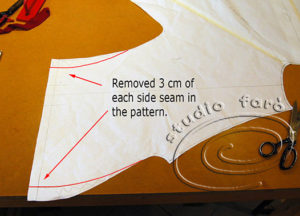
The first pattern alterations were removing extra width from the hips:
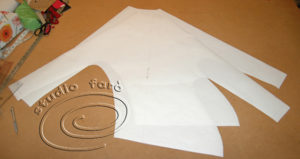
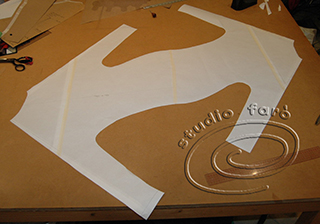
I then traced a clean copy of the pattern shape x 2 (remember the front and back are exactly the same in this style) so I can make the upper body alterations.
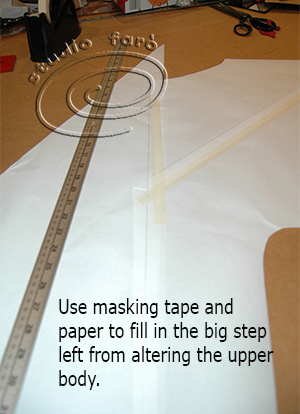
Then reducing the length of the pattern through the upper body by 5cm (2″):
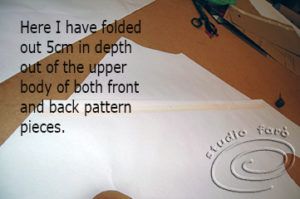
You can see in the pattern there are great steps created by folding this pattern to make the alteration. It’s a common factor with a straight forward solution. When redrawing the pattern lines it’s safest to go through the middle of the step, making the least change to the original pattern line.
Once altered I joined the back and front together at the hem. My idea here was to use the ‘nejiri’ twist style with the concept from my earlier Off-the-Shoulder twist top.
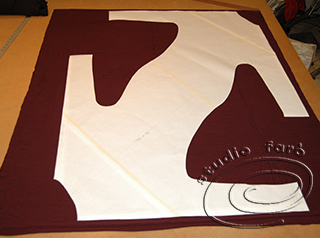
To make this work the top has to be cut double. The unusual shape of the pattern forces me to mess with the original grainline on the CF. The only way I can fit the pattern to the fabric pushes the grain so that the CF is now almost on the bias. However, I have no idea what impact this may have until the second toile is made.
Sewing this toile is really straight forward – you sew along the seams as they are together in the cutting (fabric already right sides together), then pull one top over the other and join the neck and hem edges.
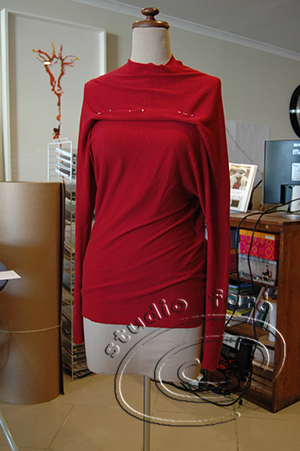
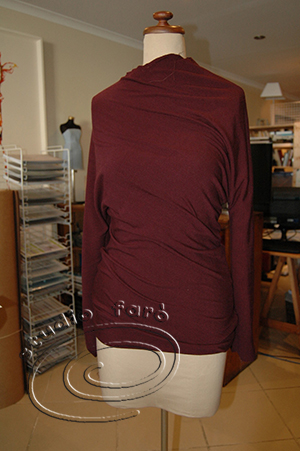
Now finally we have a second toile and I am generally pleased with the results.
The fit is better now that the length is reduced in the upper body and twist is held by the double layer.
My last thoughts are that I will need to find a way to finish the neck edge nicely from the inside. I think it will be one of those fabulous machinists tricks that I know so little about! And I haven’t even begun to think about how I might grade this style???
Please feel free to comment and send your questions via email if you prefer. Let me know if you’re interested in seeing more on this particular idea or any of the other Pattern Puzzle ideas on the blog.
Enjoy 🙂
No Comments