09 Apr Fitting Commercial Patterns – FBA
Posted at 11:36h
in Fitting Patterns, Pattern Fitting Tutorials, Pattern Making, Pattern Making Instructions, Sewing Pattern Alterations
4 Comments
Fitting Commercial Patterns is a very popular workshop for home sewers and textile teachers. This week I’ve been going all-out to improve the workbook materials for this workshop in preparation for some professional development training I’m delivering in Melbourne next week to the Victorian VET textile teachers. I’ve decided to share a section of that new workbook in this post, covering the Full Bust Adjustment (FBA) on an existing shirt pattern.
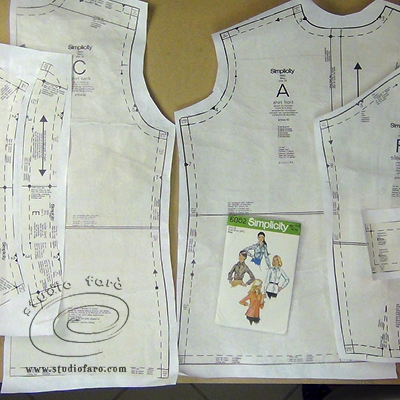
The shirt pattern in question has no bust dart included in the pattern. So for anyone with a cup size greater than B you’ll need an FBA alteration to create a better fit and a more balanced garment.
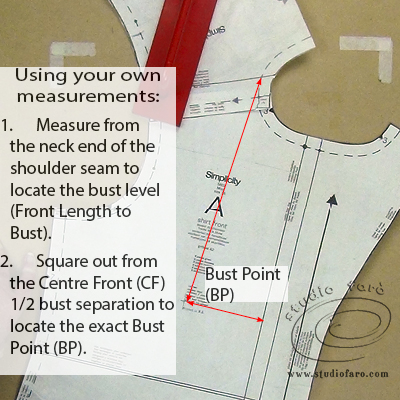
Bring the front and back shoulder seam together to find the original shoulder line as marked by the pattern company. Fortunately, in most cases, pattern companies leave enough information on each pattern to find the important parts of the pattern for alteration (i.e. shoulder lines, waist level, and hip level, etc.).
- Measure straight down from the original neck point of the shoulder line toward the bust area to mark the Front length to Bust Level.
- Square across from the Centre Front (CF) line for half the Bust Separation to find the exact Bust Point.
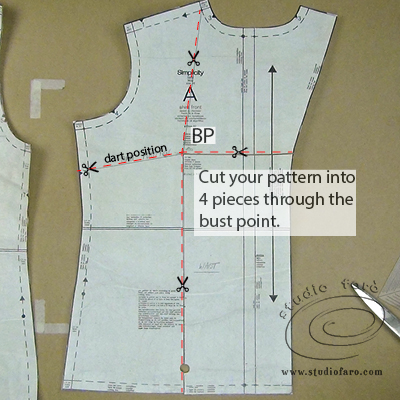
- Extend these lines, so they run in four directions from the bust point; toward the hem and the side seam.
- Cut your pattern into four pieces ready for the pattern alteration.
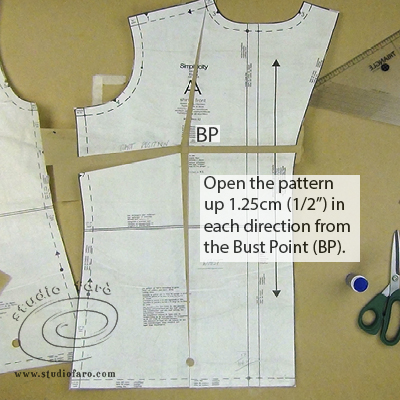
- In this example, I’ll be using craft paper to distinguish the original pattern from the alteration and I’ll be adding 1.25cm (½”) in front length and the same in bust circumference.
- Using the CF as a stable balance line for the placement of pattern pieces: begin by gluing down the top right section of the pattern.
- Mark a new line 1.25cm (½”) from the bottom of this pattern piece to add the extra length required over the bust. Match and glue the bottom right side pattern piece along the CF line.
- Keep the shoulder seam together, angle the top left pattern piece 1.25cm (½”) from the BP. this move adds extra width in the front pattern across the bust area.
- And finally, keeping the hem together, angle the bottom left pattern piece to include an extra 1.25cm (½”) at the BP.
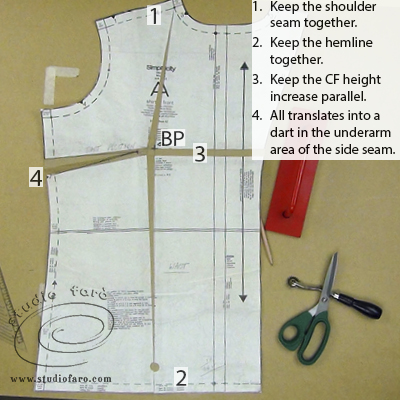
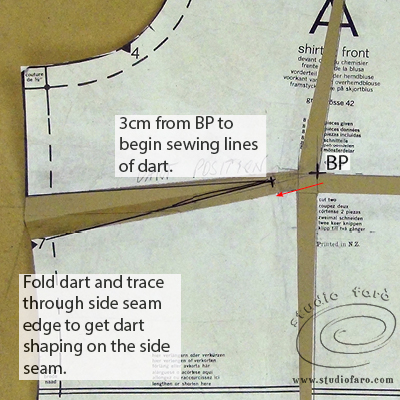
- All of these alterations have resulted in extra length on our front side seam. You’ll turn this extra length into a bust dart.
- Measure 3cm away from the BP, along the new dart area, to mark the start point for the stitching line for your dart.
- Join this new point to the outside edges of the extra fabric on the side seam to form a bust dart. These are the stitching lines for your dart.
Although these pattern alterations are not as exciting as creating new patterns, they are so valuable in our understanding of fit and how we can constantly improve the patterns in our stash. Let me know if you have any questions, I’m always happy to help. 🙂
Sarah T
Posted at 11:59h, 16 AugustI have spent ages trying to work out the first step of the instructions about finding the shoulder line. Does the shirt have a forward shoulder seam?
Studio Faro
Posted at 08:55h, 17 AugustHi Sarah, Yes that particular shirt pattern had a forward shoulder seam. That’s a common feature on a lot of shirt patterns. If you’re lucky the original shoulder position should be marked on the pattern.
Don’t hesitate to ask questions. I’m always happy to help. Anita
Sarah T
Posted at 12:01h, 16 AugustThe rest of the instructions look very clear so I dare say I am missing something – I do struggle with following these things sometimes as a beginner.
Studio Faro
Posted at 08:56h, 17 AugustNo problem Sarah. I’m always happy to answer questions. 👍😊