07 Oct Cowl Tee with Drape
Posted at 12:30h
in Pattern Making Instructions, Pattern Puzzles, Stretch Patterns, Womens Knit Block
0 Comments
I began the puzzle development with the idea that this jersey style would have a raglan sleeve cut in a stretch mesh. That is, to add a textural contrast and lighten the design. But the day was a bit of a scorcher and somehow the design morphed into a top with cutaway armholes. Too many thoughts of warm breezy days on the beach I think. Anyway, I didn’t notice and then posted the pattern shape as a one-piece pattern. It is important to note that the armholes would be very different for raglan and sleeveless, but all will be explained.
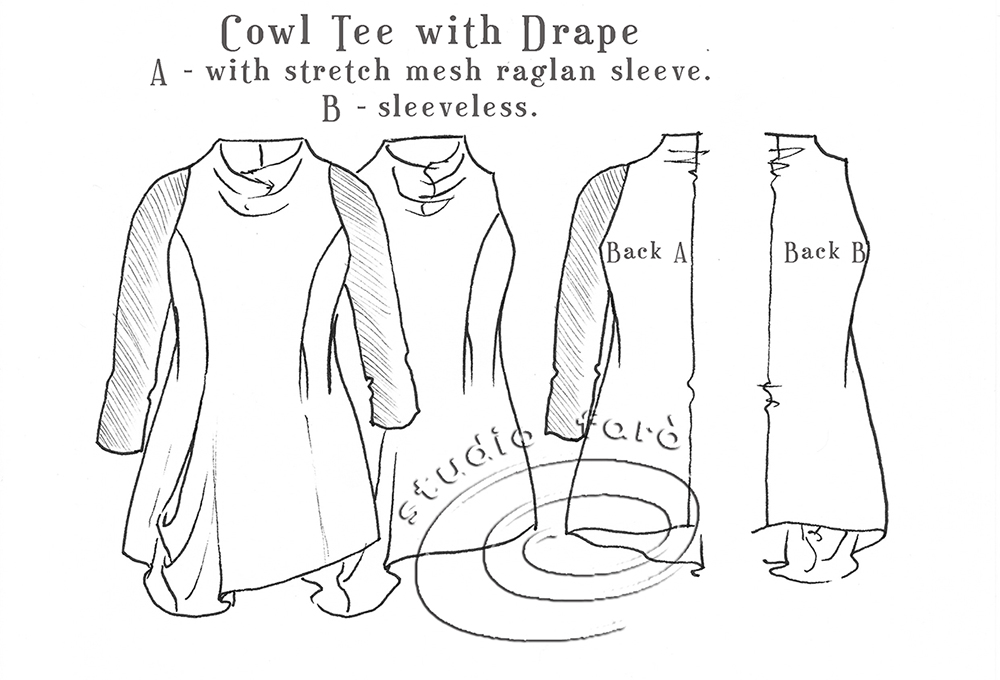
The sketch above features both styles, front and back. The post covers the raglan style in detail and at the end of the post, I have included the alterations required to the armhole for the sleeveless style. This will give you a clean armhole with out the peak. 🙂
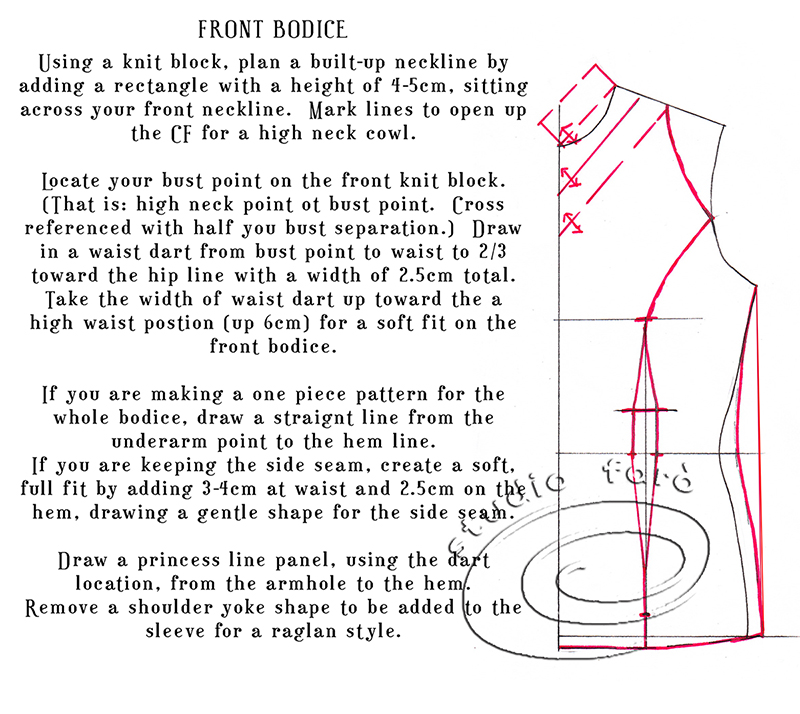
Below is the pattern plan for the front bodice that includes the following detail:
- A built up neckline with cutting lines to include drape.
- A line to separate the shoulder section for the raglan sleeve.
- A princess panel seam joining the armhole to the bust point, through to the hemline.
- Dart shaping on this panel line to create a high waist fit.
- On the right side of the garment we will use the panel seam line to create the drape.
- On the left side of the garment we will use the panel line to create a panel dart with pleat.
- A straight side seam from the underarm point to he hemline to join to back bodice (no side seam).
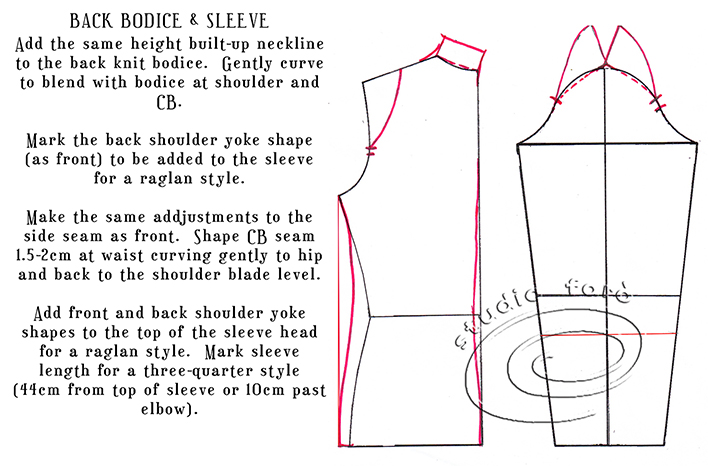
The pattern plan for the back bodice includes:
- A built up neckline as front.
- Shoulder section for raglan as front.
- CB seam shaping at waist.
- Straight side seam to join to front bodice (no side seam).
For the raglan sleeve:
- Add the front and back shoulder sections to the sleeve head.
- Shoulder shaping has dart end finish.
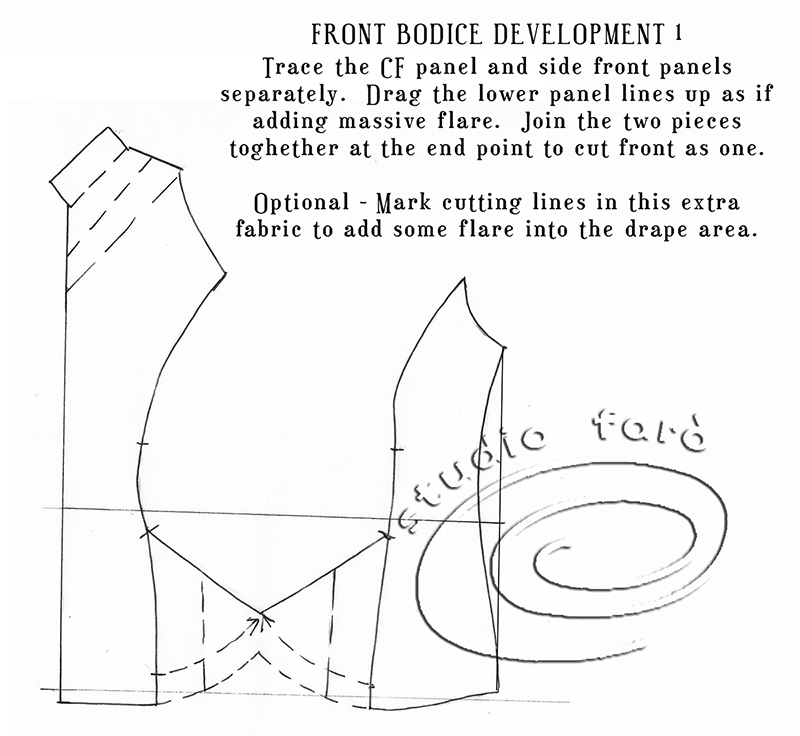
Drape development happens in two stages:
- To begin trace-off separate CF panel and side front panel.
- Drag the lower panel lines up as if adding massive flare.
- Join the two panels at this point to form one pattern.
- Optional: Mark cutting lines in this extra fabric to add some flare into the drape area.
For stage two of the drape development:
- Open up the front built-up neckline to add a small amount of cowl.
- Re-draw the CF line as a straight line.
- Optional: Cut and open up the new drape feature to add extra flare on the right side of the bodice only.

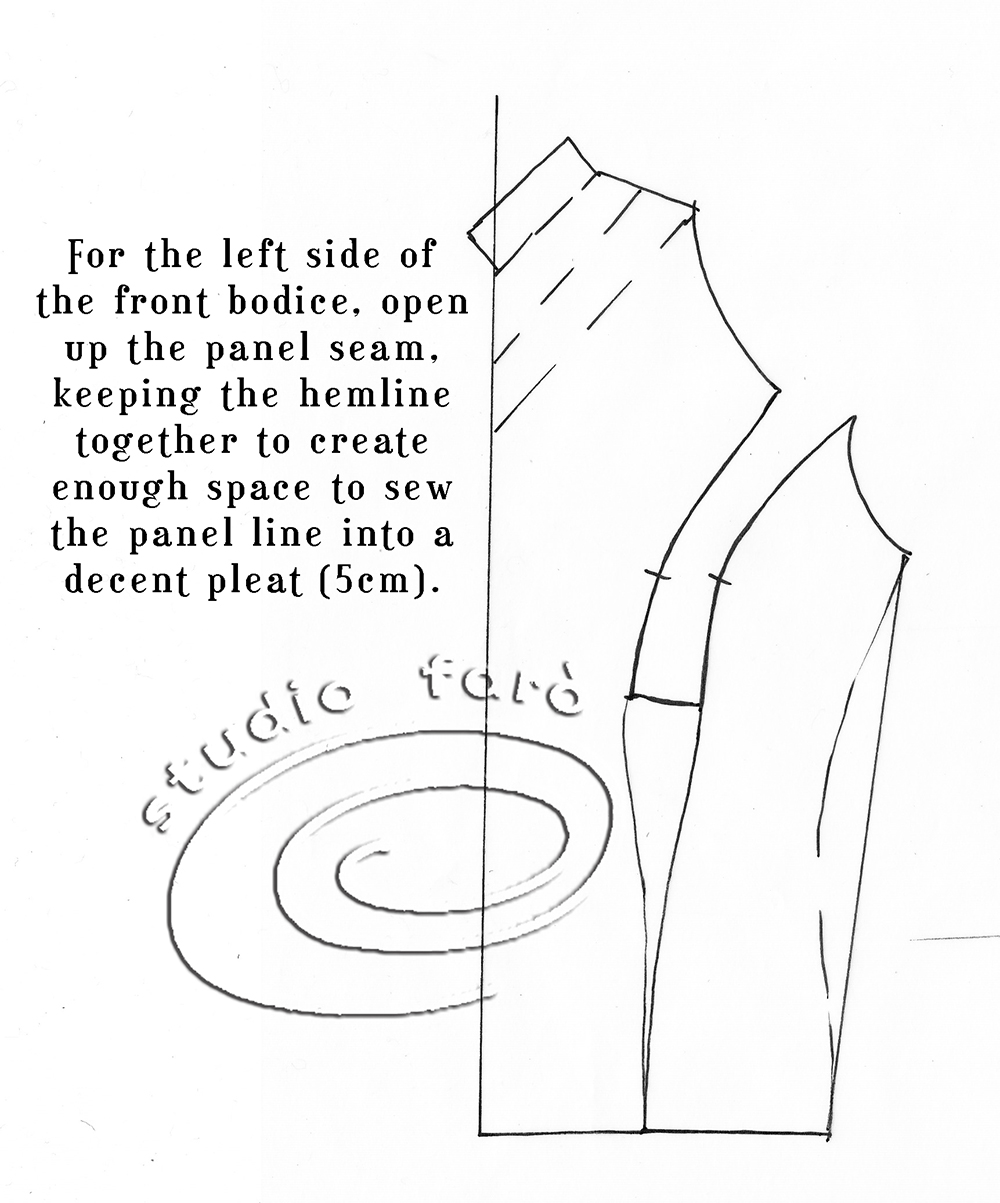
For the left side of the front bodice:
- Open up the panel seam, keeping the hemline together, to create enough space to sew the panel line into a decent pleat (5cm).
- Open up the built up neckline as for front right above.
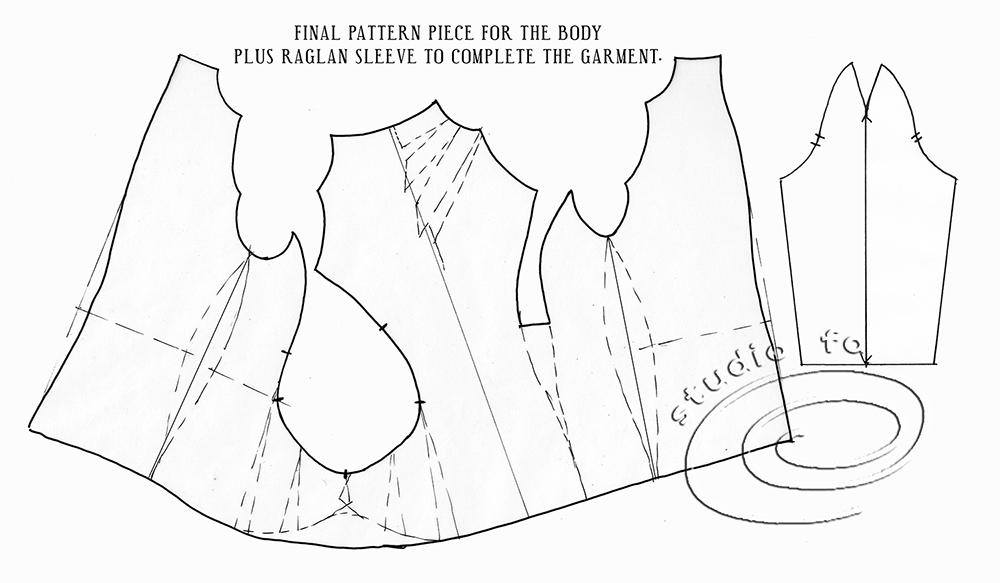
Trace fronts and backs together leaving a CB seam. Below I have sketched in the pattern bones onto the pattern shape to give you an idea of where the extra fabric is included and which parts of the pattern are the original knit block. In the end, this is a design concept that has been developed into the first technical prototype. Cutting and sewing is the ultimate test, so the first toile will reveal all.
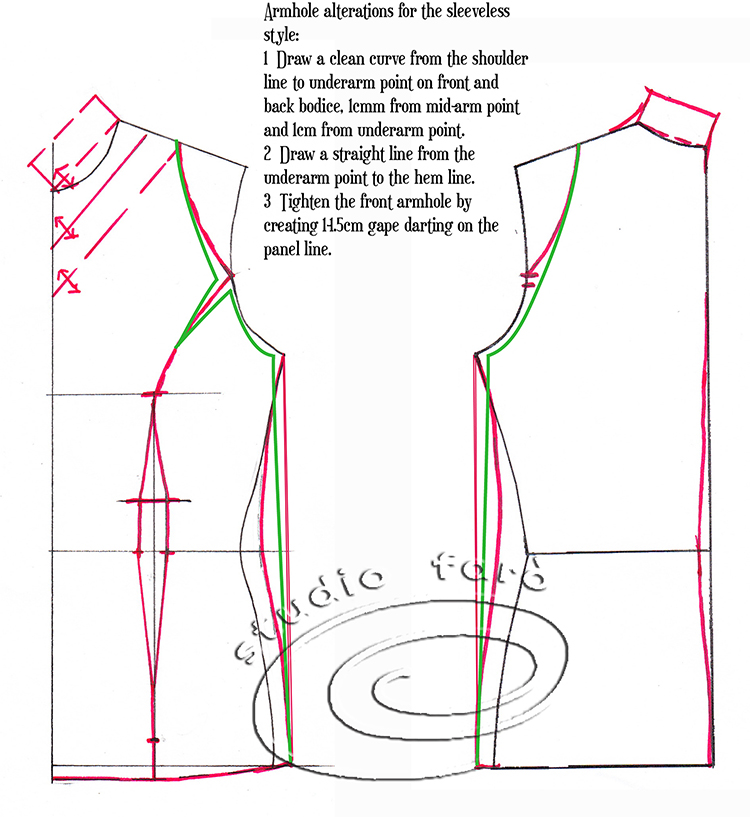
If you are thinking of trying the sleeveless style, the green line alteration in the sketch below will clean up the armhole and remove that unnecessary peak.
- Draw a clean curve from the shoulder line to the underarm point on front and back bodice, 1 cm from mid-arm point and 1cm from underarm point.
- Draw a line straight from the underarm point to the hemline.
- Tighten the front armhole by creating 1-1.5cm gape darting on the princess panel line.
In many ways, this is quite a complicated pattern development that has many features. Not all features need to be included in your version of the style. If you have any questions do not hesitate to email because I love to hear from you.
If you have your own challenging style that could be a Studio Faro #PatternPuzzle we would love to include your idea in our weekly challenge.
Enjoy!
No Comments