20 Jan Cross Drape Tee
Posted at 14:39h
in Pattern Making Instructions, Pattern Puzzles, Stretch Patterns, Womens Knit Block
2 Comments
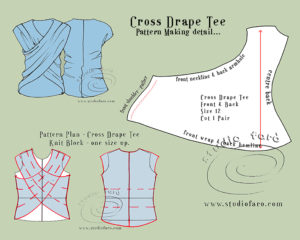
Some very quick and clever answers on Saturday had our #PatternPuzzle solved in one hour! Thanks to Evelyn, Mioara, Cyndi and Delwyn for such great ideas. And thanks to all our fans for making our Saturday morning so much fun. The pattern shape below is for the entire top, when cut as 1 pair.
You’ll find a video of the pattern making instructions on my Youtube channel.
Delwyn made the most interesting observation – that if we cut two pair of the shape, treating the CB as both CF & CB and allowing the drape extension as side panels, it would be a very interesting tunic with long draped side seams. So many great ideas, and so little time to get them done!
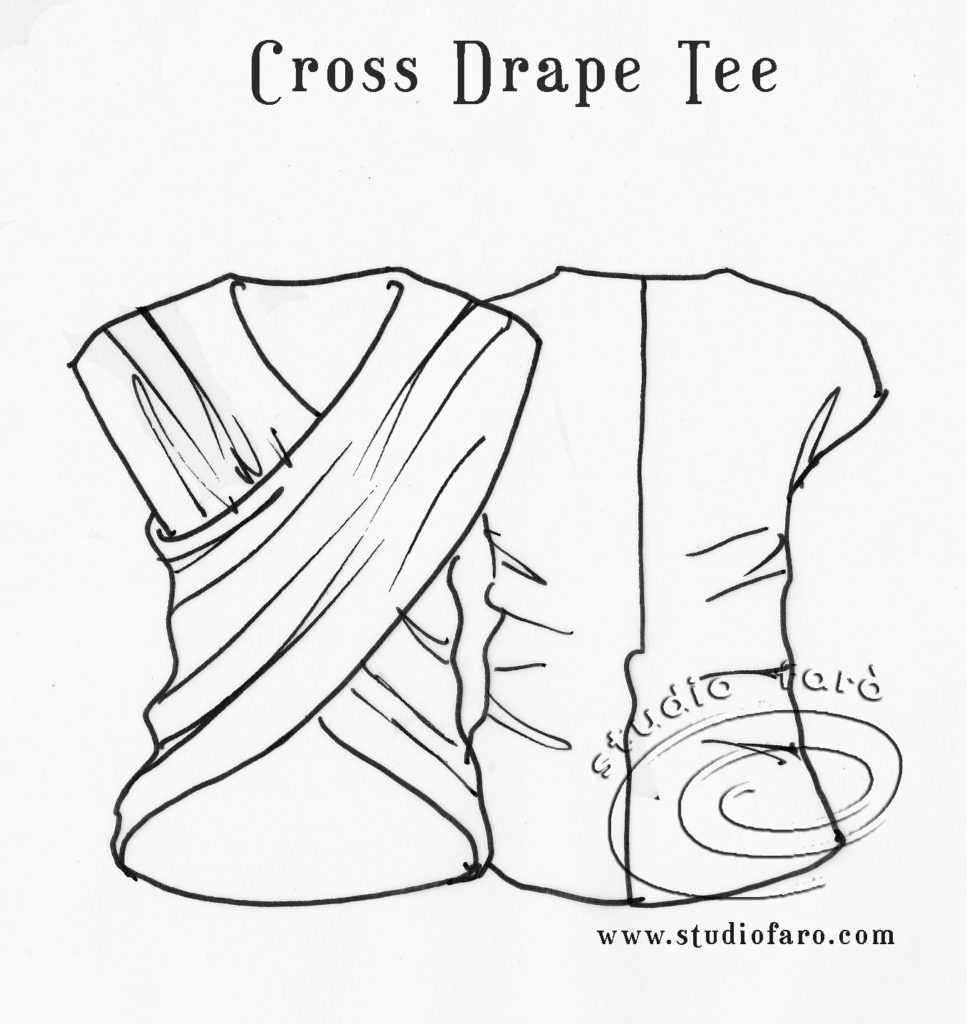
Below is the sketch of the style.
Please note that I have added the gathered drape into the front shoulder – it was missing in Saturdays sketch but is most definitely in the pattern. It is a cross-over jersey top with one centre back seam and two shoulder seams. The outside edges of the top could be overlocked, turned 1cm and stitched or you could bind all edges. Depending on how long you make this top, you may expose a small amount of midriff.
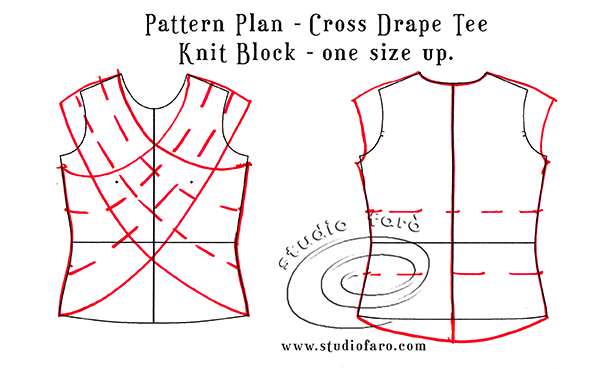
The Pattern Plan below is based on my knit block and I decided to use a larger size to get a more generous fit in this particular style. The drape lines (dashed) in the front and back pattern will be opened up to introduce extra fabric for the drape and gather. The shoulder line has been extended into a cap sleeve of about 8cm.
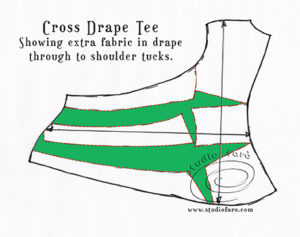
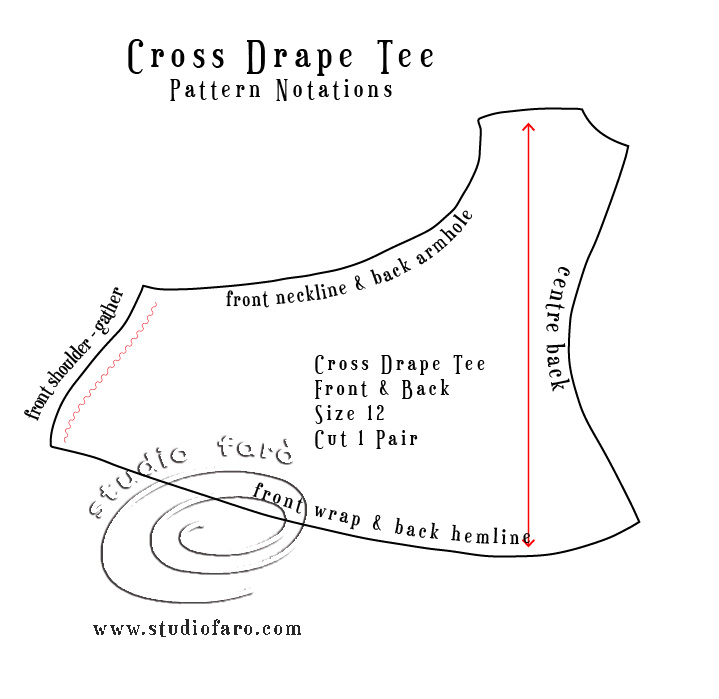
The final pattern shape below shows exactly where the extra fabric is introduced into the top. It is the flexibility of the jersey that allows us to shape the front shoulder seam, then gather it to meet the back shoulder measurement. Placing the grain on the pattern through the front drape will give us the greatest amount of stretch where needed.
The final pattern piece below has the notations for making and important parts of the pattern are labeled. Anyone fancy having a go at this style? Happy to reply to comments and answer all your questions.
If you’d like to buy a copy of these pattern making notes for your own personal use at home you’ll find them here: Cross Drape Tee – Pattern Making Instructions. Enjoy!
Anne De Smet
Posted at 03:55h, 19 FebruaryHi Anita, I managed to produce a sewing pattern based on your pattern outline. However, I don’t understand very well the green zones/lines in the drawing. You are speaking about introducing extra fabric into the top. I don’t get this. Do you actually mean that the dashed lines/colored zones need to be folded in so as to create the draping effect? I can see that for the sholders but not so well in the back. Could you enligthen me? I’m a beginner.
Thanks,
Anne
Studio Faro
Posted at 15:16h, 19 FebruaryHi Ann
Thanks for dropping by with your question. The green areas show how much extra fabric is added compared to the original knit block. When you place the garment on the body the drape will fall into place. It is not folded or pressed or sewn down. It is free form and only becomes evident in wearing. I hope my explanation helps. If it’s still not clear please don’t hesitate to come back with any questions you may have.