09 Mar Double Drape Maxi
Posted at 15:16h
in Pattern Making Instructions, Pattern Puzzles, Stretch Patterns, Womens Knit Block
0 Comments
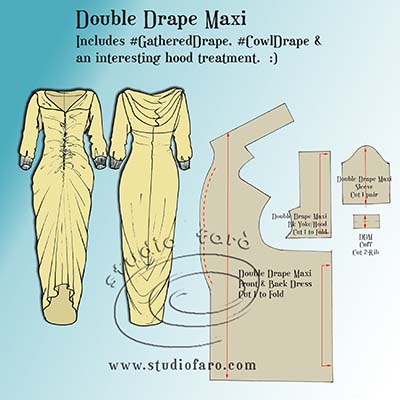
You may be forgiven for thinking that we often torture the stuffing out of our fabulous #PatternPuzzle fans. Well, last Saturday was no exception. I did a slightly tricky thing with a ‘grown-on hood’ and it was enough to make the pattern shapes very hard to read. I have seen similar styles in both historic and current fashion and have waited some time to try this out on the blog. The idea I have is to cut this dress from my knit block using a merino jersey. That could be either a one-way or two-way stretch knit. The Double Drape in this Maxi refers to the #CowlDrape on the back of this dress and the #GatheredDrape on the centre front (CF) seam. The hood styling may also be considered a #CowlDrape with the large tuck and the centre back (CB) line on the fold.
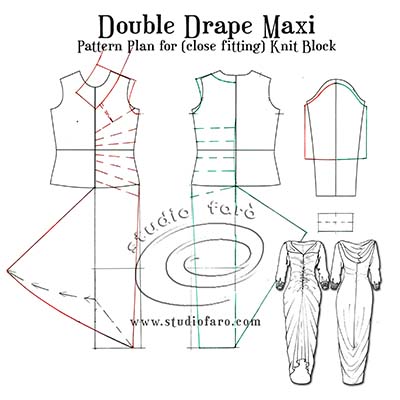
Here in the Pattern Plan, I’m using my close-fitting Knit Block, extended to ankle length for our maxi.
- Mark in your hem length, around the ankle area, according to personal preference for the front and back block.
- Extend shoulder line and drop the underarm to achieve a relaxed fit in the armhole.
- Make corresponding changes to the sleeve head.
- Widen the sleeve at the three-quarter length. This will be eased/gathered into a rib cuff. The size of this cuff will depend on your rib fabric – often cut 2-4 cm smaller than finished measurement (forearm).
- Mark in the wide necklines, front and back, with a shallow ‘V’ in the front.
- Construct a grown-on band on the front neckline. This will extend as part of the hood pattern.
- Lift the CF line to create the waterfall drape in the front seam.
- Lift the CB line to create the cowl drape in the lower back dress.
- Mark in the cut lines on the front and back bodice that will used to include extra fabric for the drape.
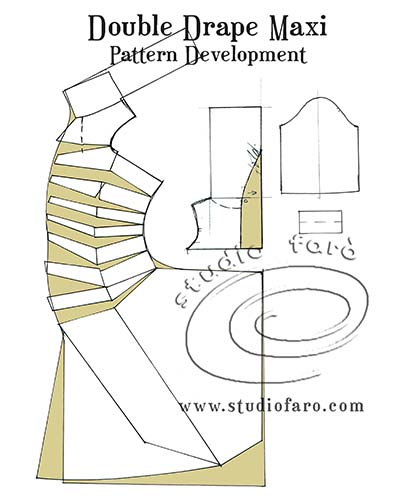
In the first pattern development:
- Cut through the dashed lines, joining the matching pieces from front and back bodice.
- Open them up through the centre front, keeping the centre back line together.
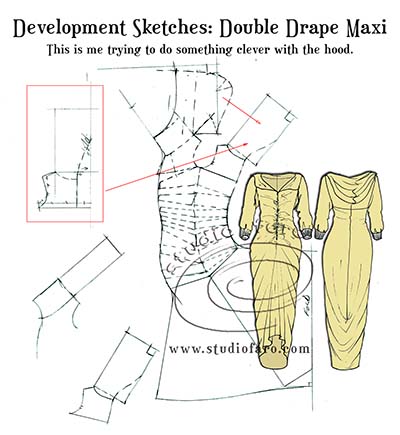
- Note I have drafted a hood ‘grown-on’ to the front neck as one piece. Then decided to split the hood between the front and back bodices.
The diagram below shows the distribution of the gathered drape in the centre front seam.
- It also shows the squaring up of the hemlines, placing the centre back line on the fold for the back cowl drape.
- Once the back yoke has been separated from the main body of the dress, the back section of the hood is added.
- Squaring up the back edge of the hood allows you to place it on the fold with a generous tuck to shape into the back of the head.
The grain lines and cutting instructions are on the pattern pieces below. Add the seam allowances that suit your own machinery and sewing style. These pattern making instructions have been developed with knit fabric in mind. If you are thinking of trying it for woven fabric you will need a fitted dress block and a different set of instructions.
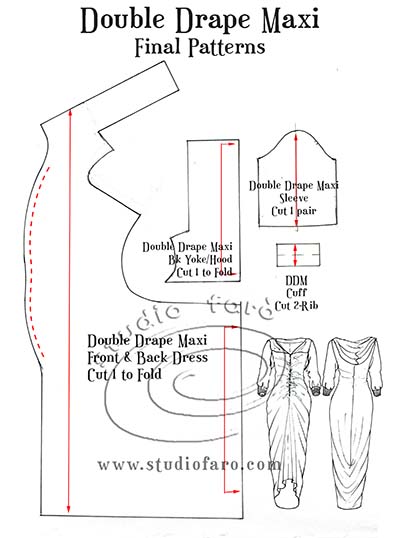
Let me know if you have any questions in the comments section below. Always happy to help. If you’d like to buy a copy of these pattern making notes for your own personal use at home you’ll find them here: Double Drape Maxi – Pattern Making Instructions. 🙂
Take this moment to sign up for my fabulous newsletter! Every month or so I send an email newsletter with new website content and always, always an enormous discount code for all my sewing patterns, garment blocks and pattern making instructions.
This discount code is for subscribers only. Don't miss out!


No Comments