30 Sep Follow-up to CarmencitaB Pattern
So it looks like the school holidays, here in Australia, have distracted my #PatternPuzzlers with other duties. So we will be leaving last Saturdays puzzle up for a while to see if it gets any bites. In the meantime this weeks post will be the follow-up to the CarmencitaB Dress.
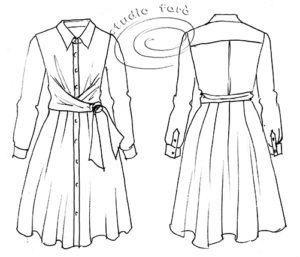
The original idea from CarmencitaB was to work out how to cut the pattern for the shirt dress sketched below, as an homage to an original design from Valentino.
This wrapped shirt-dress features:
- A two-piece shirt collar.
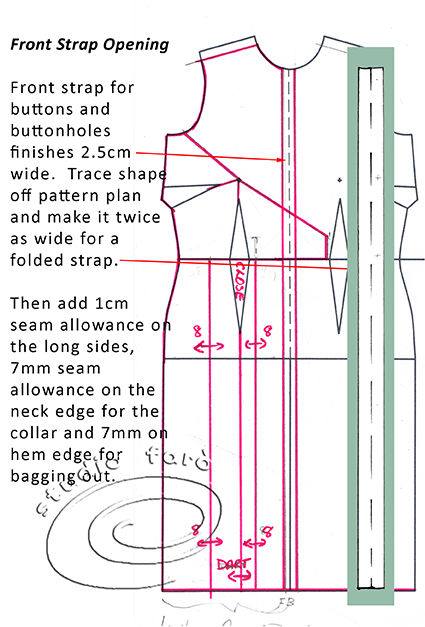
- A separate front strap for buttoning.
- Wrap drape at CF waist with sash ties.
- Soft pleats around waistline of full skirt.
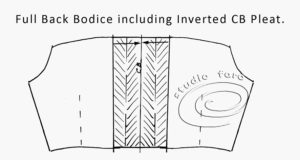
- Double Back yoke and CB action pleat.
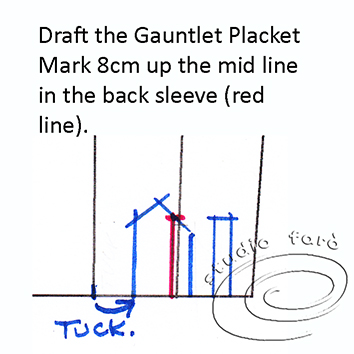
- Shirt sleeve with button cuff and gauntlet placket.
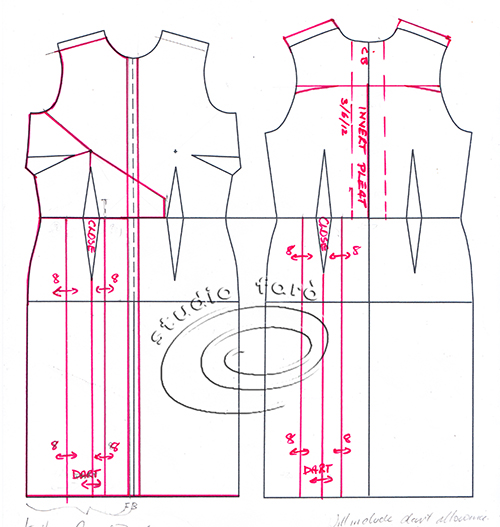
The pattern plan set out below is based on the fitted block and all pattern adaptations are featured in red. So I will list the changes:
- Mark a front button strap 2.5cm wide, sitting equally either side of the CF line.
- Move the shoulder line forward by 1cm. This means adding 1cm to the back shoulder and removing 1cm from the front shoulder.
- Draw in the front wrap style lines making sure they intersect with the bust point.
- Mark in the position of the soft pleats equally along the waistline. Also, extend a line from the end of the front waist dart to the hemline to add the flare.
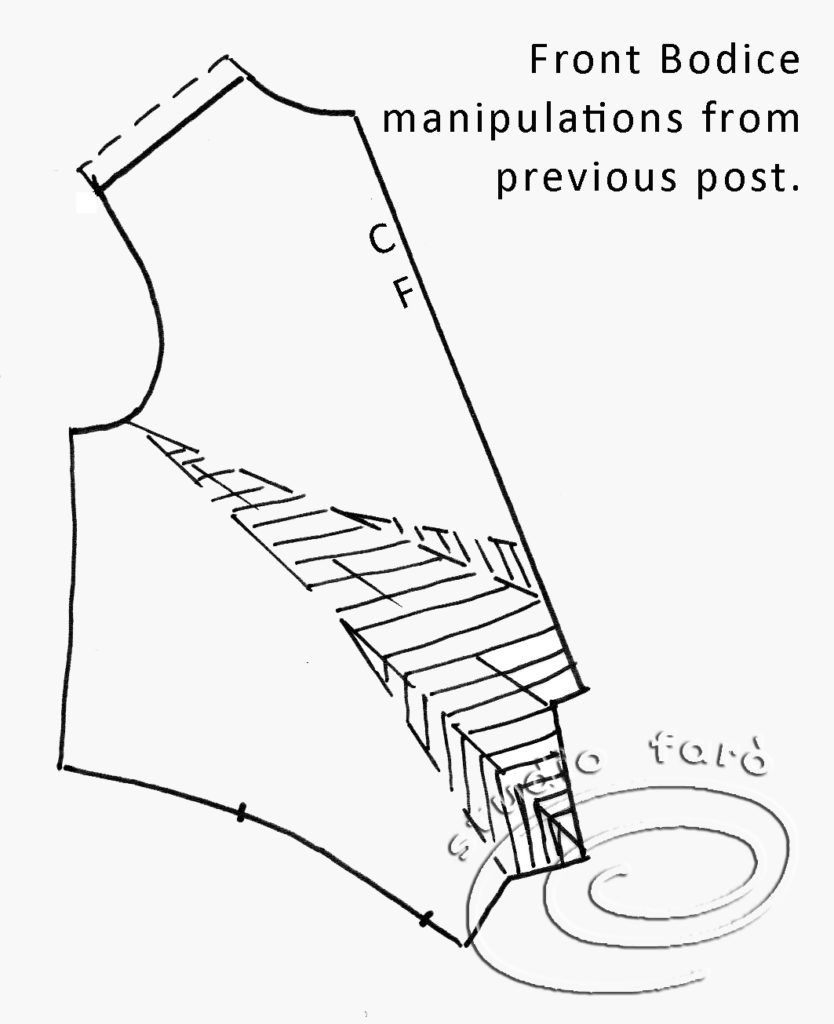
The pattern piece below is the front of the dress with the drape feature. The front bust and waist dart have been transferred into the drape (smaller shaded area). And the pattern has been slashed open down the middle of the dart allowance all the way to the armhole. This extra fabric will give the drape feature a more dramatic effect, making a bigger statement. Full details in the first post.
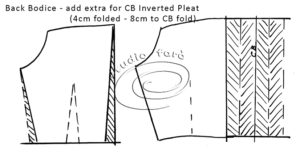
The first stage of pattern adaptation for the back bodice is set out below. I have moved the shoulder seam forward by 1cm and separated the back yoke. For the rest of the back bodice, I would like to get rid of the waist dart. I have taken half of the dart allowance from the side seam and the other half from the CB line.

The second stage of pattern adaptation for the back bodice is to add the inverted pleat. I would make the pleat generous rather than tiny. Most likely 3cm folded, that is a total of 12 cm. A lot will depend on the weight of your fabric.
The waist sash that ties the drape feature into place at the front waist is 5cm wide to match the connecting seam on the front bodice. The waist sash is shorter on the right side of the wrap and leftside is longer.

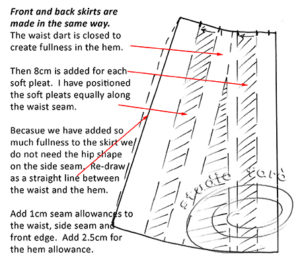
To make the skirt pattern I decided to fold the waist dart out to create fullness in the hem. Then added two large tucks equally from waist to hem. These will be soft tucks, not pressed pleats. Apply the same instructions for the front and back skirt.
To lift the front placket pattern piece, trace the 2.5cm strap from top to bottom on the pattern plan. Double the width of the strap to make a folded pattern piece, then add seam allowances.
The pattern plan below is for the sleeve, the placket and the cuff. The cuff is a folded pattern piece, twice the finished width of the cuff with an additional 1 cm each end of the cuff for buttons and buttonholes. For a size 10, I would make this pattern piece maximum 24 cm long, making it 22cm when closed.
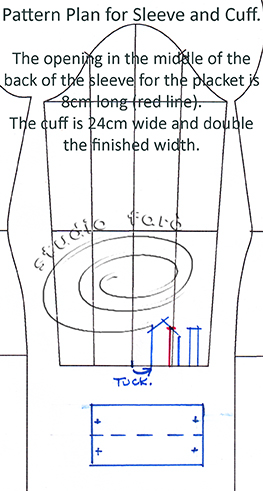
The cut into the sleeve for the placket is 8cm. This matches the height of the placket and the bind that finishes the placket edges. If you are not familiar with the gauntlet placket, a continuous placket is very acceptable on this shirt sleeve.
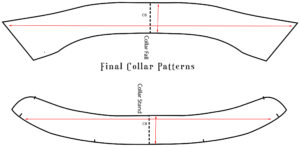
And finally, the two-piece collar finishes this beautifully styled dress. This is what your final collar pattern should look like. The cutting instructions are:
Cut 1 Pair Self
+ Cut 1 Pair Fusible Interlining
There is a lot of work in this beautiful dress but well worth the trouble for the outcome. The wrap detail at the CF is a little tricky. I have worked on the solution and cut a calico of this feature and will post the results with photographs later in the week.
Use the comments section below if you have any questions and I’m happy to fill in the gaps.
Enjoy! 🙂
No Comments