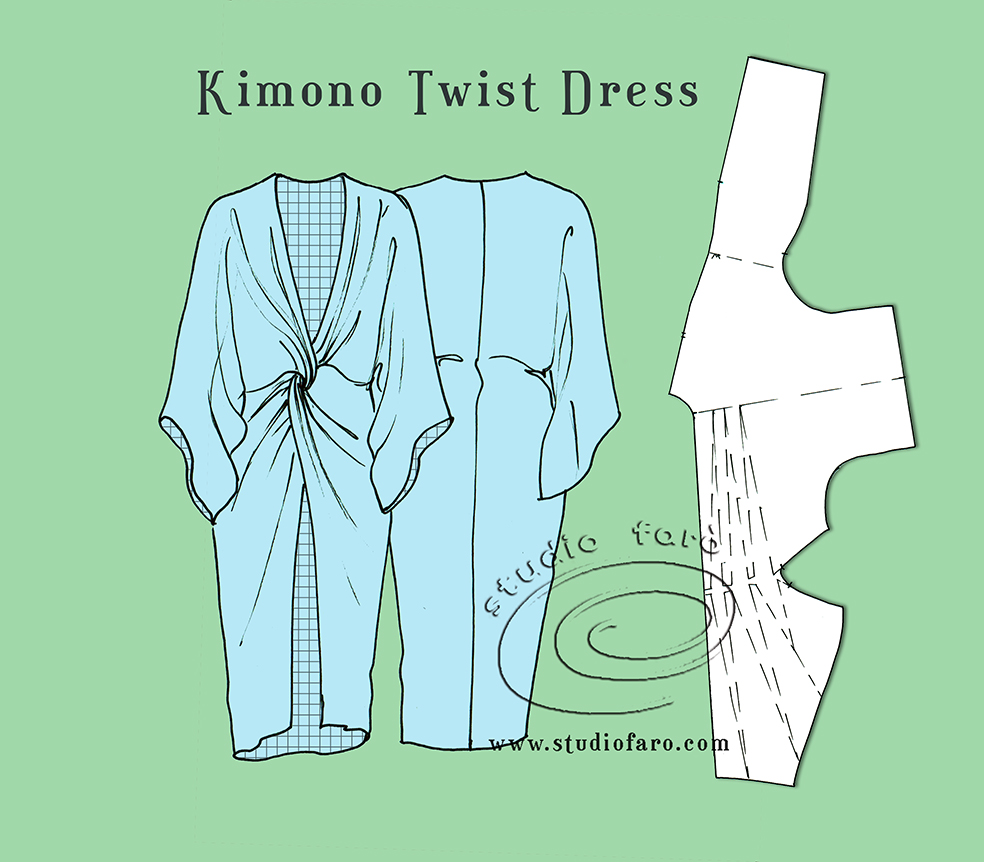
28 Apr Kimono Twist Dress
Every week new fans turn up to comment and solve my #PatternPuzzle and this week was no exception. Steph Go was in early with a comprehensive answer revealing the main parts of the pattern piece. Then Julie and Lynn turned up a little later to finish off the puzzle. This elegant evening dress is a little daring, showing lots of leg and decolletage. It will always look good in soft drapey fabrics such as silk crepe, lightweight stable knits, silk, and polyester chiffon. With a little experimentation, I think it could be cut in either knit or woven fabrics. The style relies very heavily on the fit on the high hip where the twist is formed. This feature holds the entire dress in place. If you’d like to learn my method for creating Twist Drape Patterns I have a detailed worksheet for making Jersey Twist Patterns. For just a few dollars you’ll get the same training you’d get if you came to the workshop in my studio.
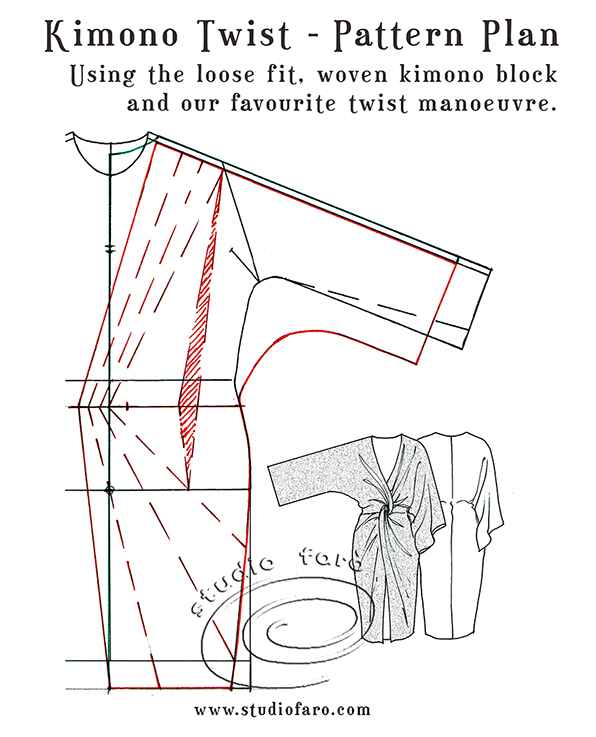
Starting with a woven kimono block that has a minimum of 4cm garment ease on the hip and 6cm garment ease on the bust.
- Move your NP 1.5cm to open neckline.
- Lengthen the block below the knee adding 6cm. Taper the side seams by 3cm at the hem.
- Decide the position of the twist. I have placed it 6cm below the natural waist.
- Mark a line, at this point, at right angles to the CF line, extending 7cm into the right side of the front block.
- Continue line back towards the left side seam, marking the seam line for the twist.
- Connect the far left point to the new neckline position (1.5cm from the NP (neck point).
- Connect the same point to the CF hemline.
- Mark in the balance of dashed lines for adding drape, from twist to shoulder and twist to skirt.
- Create a firm fit at the high hip position by removing garment ease. To do this you will need to measure yourself at this high hip position and remove the difference.
- Rather than re-shaping the side seam I have decided to remove the extra from waist to shoulder point and waist to hip point (red shaded area). This will produce the same effect without over-working the side seam shaping.
- Decide the length of your sleeve (bracelet length here), keeping in mind the width of your fabric.
- Decide your sleeve opening using a tape measure around the correct position on the arm (using 50 cm here).
- Connect the sleeve opening back to the high hip with a decent curve.
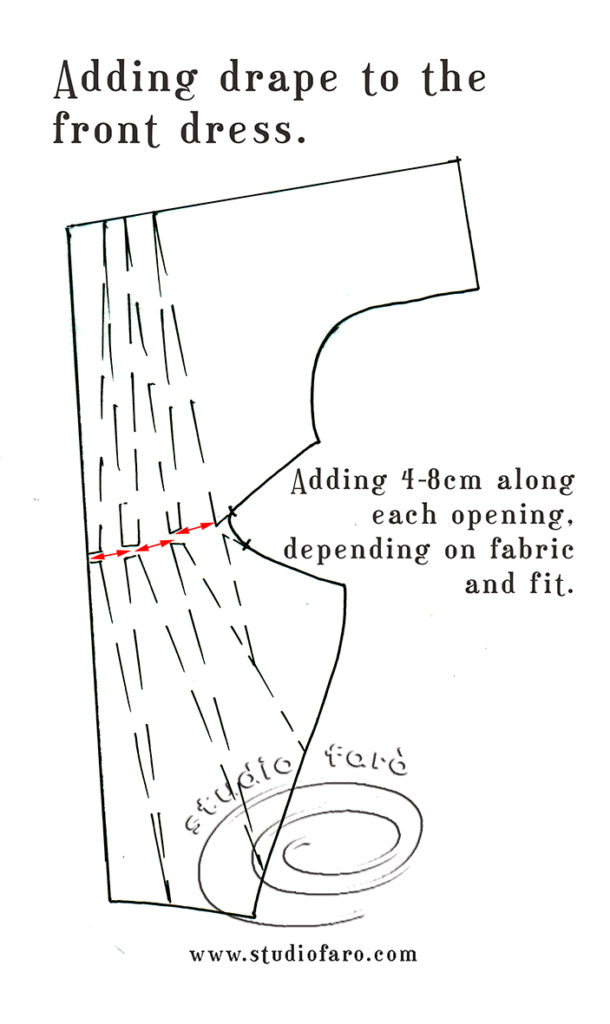
Open the bodice and skirt patterns along the dashed red lines to include extra fabric for the twist and drape. I suggest a range of 4-8cm for each opening depending on fabric, and fit. The high hip seam is opened up toward the side seam. This will allow you to twist the two fronts together before sewing to secure the twist.
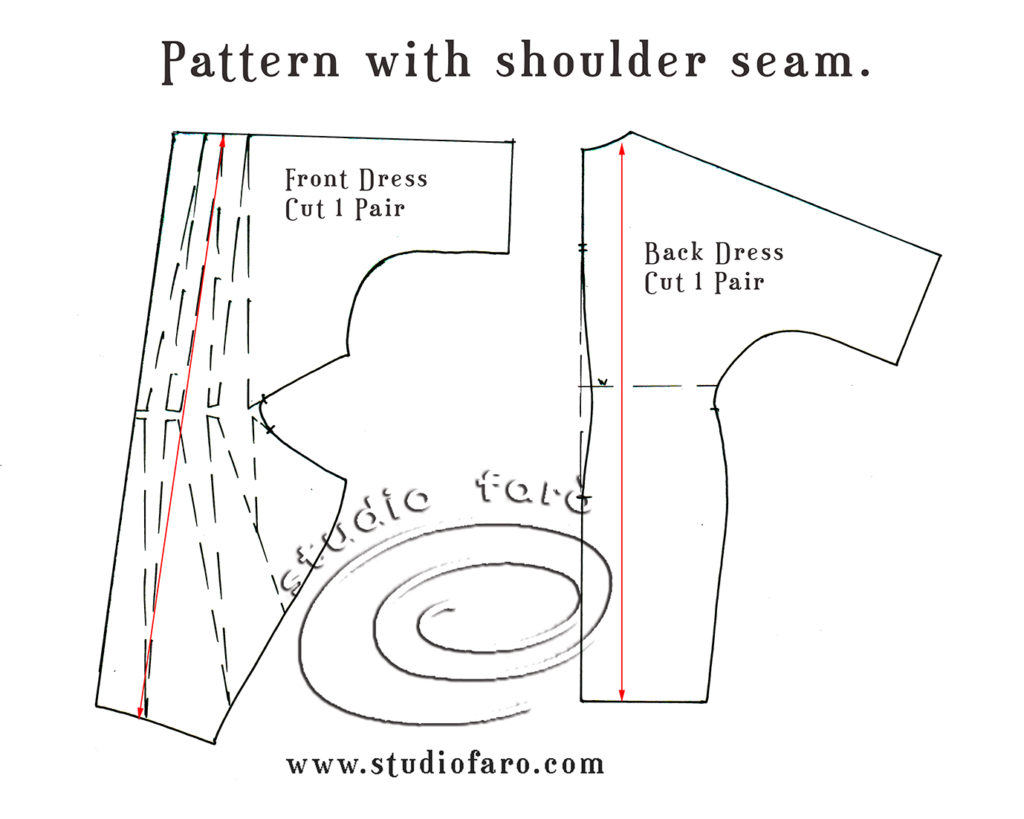
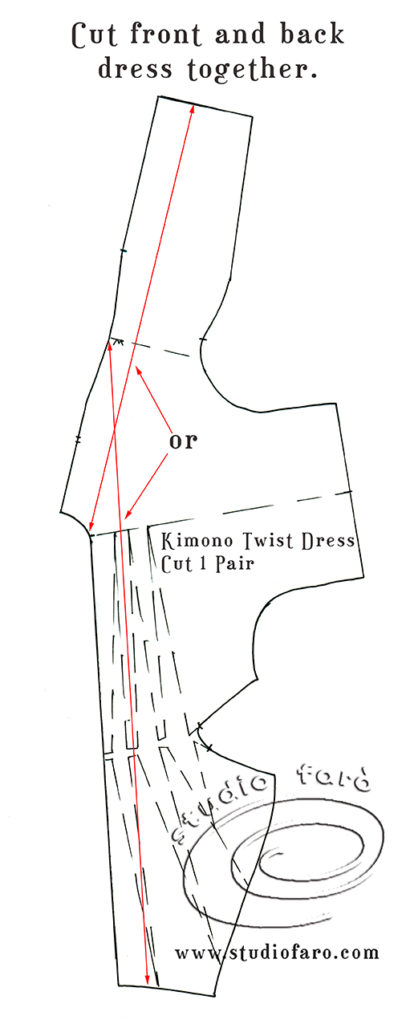
The back dress has 1.5cm waist shaping of the CB seam. This design is probably best cut with separate front and back patterns to reduce the fabric wastage for this style. Cutting them together does make for an interesting #PatternPuzzle but not necessarily an economical or practical pattern for manufacture.
Below the pattern that combines the front and back has a number of grain line possibilities depending on the fabric you use. If you keep the CF on the straight grain you will have the opportunity of chevron stripes on the CB seam. Alternatively, the grainline could run with the CB seam, placing much of the front drape near the bias grain. This is a very flexible design and the outcome will largely depend on the fabric you choose and how you best use that fabric. There are so many possibilities!
Feel free to leave your comments below and ask me any questions. I love to hear from our fans. If you’d like to buy a copy of these pattern making notes for your own personal use at home you’ll find them here: Kimono Twist Dress – Pattern Making Instructions. Enjoy 🙂
You’ll find the first sample post here: Kimono Twist – First Sample
No Comments