14 May One Hour Dress from Festive Attyre
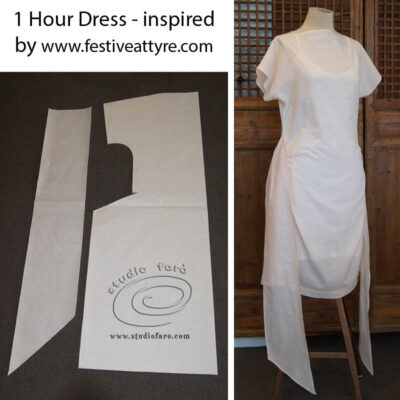
I’ve seen this fabulous dress idea on Pinterest for so long now, I finally had to try it out. I’m not entirely sure that I’d get it made in one hour, particularly if you include making the pattern. I tracked the inspiration down to a fabulous blog called Festive Attyre. You should pop over to their website and checkout all the great ideas. There are two slightly different versions of this dress on the blog. In this case, I’ve tried only one of them and I’m seriously impressed. In this sample I’ve used a cotton voile, that would need a petticoat underneath if I planned on wearing it. I think it would make the best high summer frock ever. Loose and cool, all at the same time.

The diagram below is from the Festive Attyre blog, along with loads of great information about this beautiful dress. I followed the sizing instructions exactly as they are below. The sizing is equivalent to an Australian size 10 including a reasonable amount of garment ease to suit this design. And the 1″ grid is easy to follow. If you have to change the sizing at all, remember that as a general rule we use a 2″ grade between sizes (full circumference) for the important horizontal measurements. By that I mean you would have to increase (decrease) the bust and hem measurements for this half pattern by 1″ for each size.
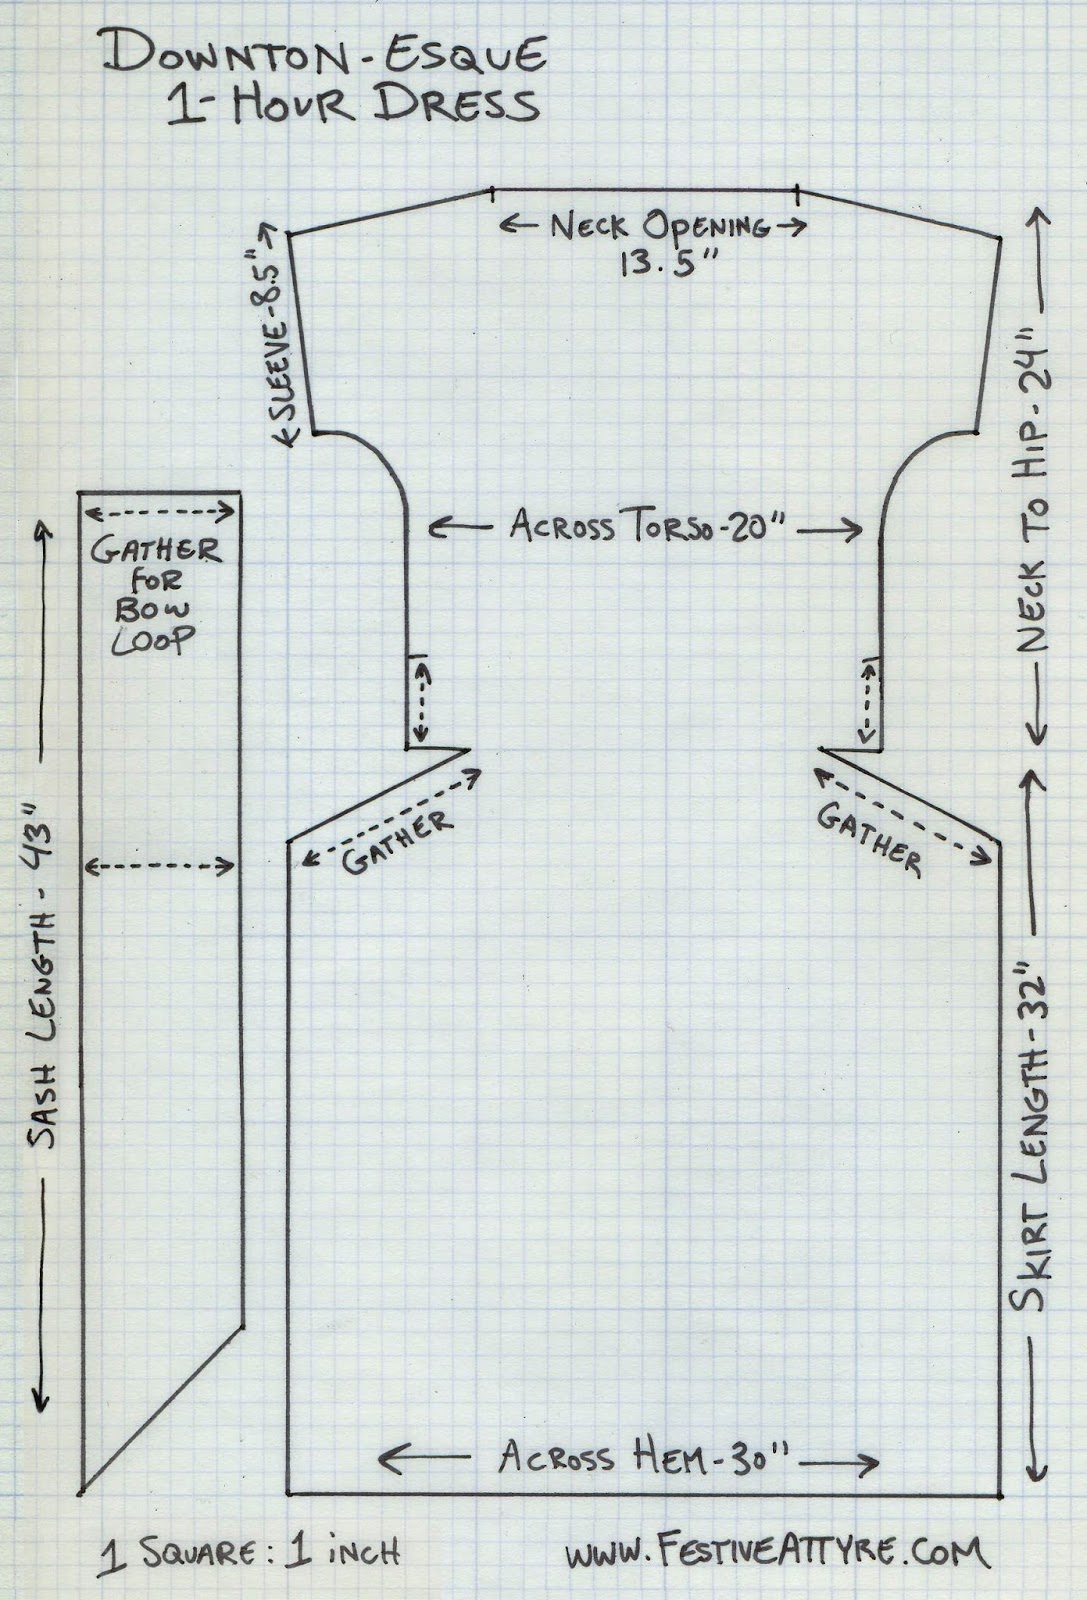

Before I cut this dress, I did have to decide whether the seam allowances were included in pattern above. To be sure that the pattern you are using will actually fit, I suggest you check that the bust measurement on the pattern has a generous amount of ease (8-10cm or 3-4″) plus a seam allowance. Because my first sample is in a cotton voile (semi-transparent), I allowed a seam allowance of 1.25cm (1/2″) for french seams. I also checked the final length of the dress and made sure I had enough length to turn a decent size hem of 5cm (2″) to give weight to the hemline.
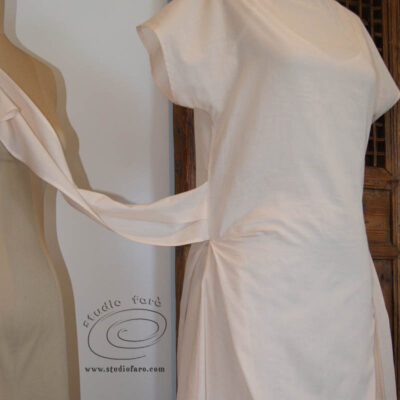

So now is the moment I confess that I didn’t exactly follow the sewing instructions for the side seam detail, that are clearly marked on the pattern. I turned the horizontal gathers into a large inverted pleat to reduce bulk on the hip line. I can’t really say whether my choice is in any way better than gathers at the hip. It’s certainly a matter of personal preference, as neither option changes the fit or behaviour of the dress.
I also omitted the vertical gathers on the side seam, where the tie attaches to the dress. My idea was to leave length in the side seam so I could wear the dress either tied at the waist or tied at the high hip level.
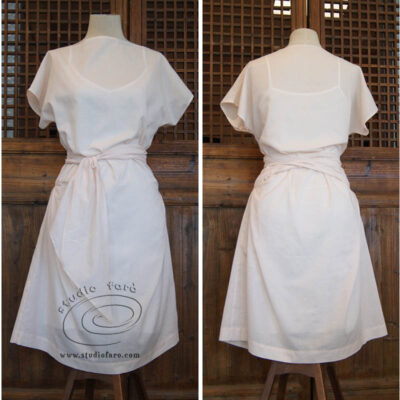
There are a few different ways to wear this dress, depending on whether you prefer a waist or hip emphasis. The image below shows the sashes tied at the back for an overall softer line in the dress.

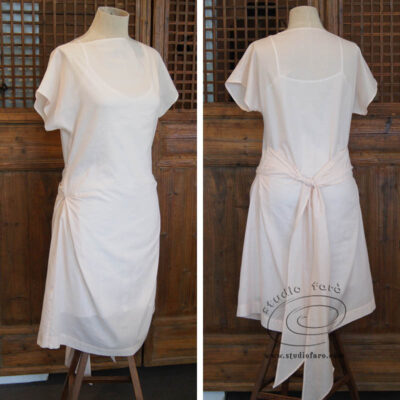
If you use the side seam ties to create waist emphasis, it will lift the dress and allow you to blouse fabric over the waist tie. The overall shape of the dress, with a waist tie, is consistent with current dress design trends. It draws attention to the waistline and creates a flattering shape.

What’s next?
What I’ve found is that there are many versions of this dress out there on the internet. So have a good dig around before deciding which version to make. And although I have messed with the construction of this garment, they all look like they would work for most figure types. I’m now imagining this dress in a large scale border print that I have, on a cotton voile. And of course I’ll have to make myself a slip style, petticoat pattern to complete the outfit. 😉
No Comments