26 Jun Pattern Plan for the High Neck Fleece Jacket
The last Pattern Puzzle generated some curiosity so I have decided to take it from the “what a great idea” stage to reality. This will reveal all potential issues as we work our way through all stages of prototyping to the final sample.
To begin I have a Production sketch with clear front and back views. For this pattern I am using my undarted kimono block to begin my pattern plan. When working with this block I tend to work the back and front on top of each other. The reason is that so much of this block is the same front to back with the exception of the necklines and the shoulder/overarm line. (If this is not clear please comment and ask – always, always happy to respond). Pic below is the entire pattern plan, with more detail in the following images.
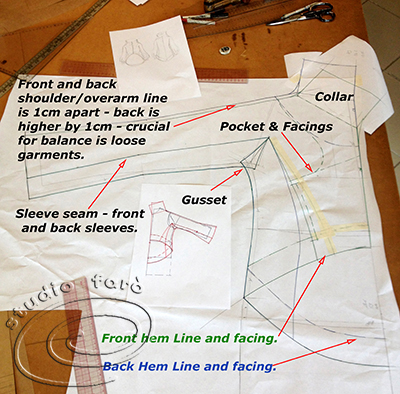
Set out below are some photos with comments and notes. Here’s hoping resolution and grammar are my friends today – again let me know if any part of the process is not clear. I will include here in the post the text I have placed on the images.
Collar first – the method I have used for the Funnel Neck Collar is the placement of a rectangle that represents the height and width of collar, on the shoulder line and CF/C B lines.
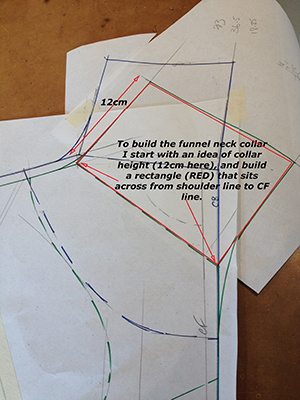
FRONT COLLAR DETAIL
‘To build the funnel neck collar I start with an idea of the collar height (12cm), and build a rectangle (RED) that sits across from the shoulder line to the CF (centre front) line.’
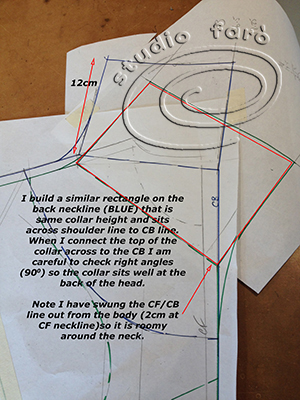
BACK COLLAR DETAIL
‘I build a similar rectangle on the back neckline (BLUE) that is the same collar height as the front and sits across the shoulder line to the CB line. When I connect the top of the collar across to the CB I am careful to check the right angles (90 degrees) so the collar sits well at the back of the head.
Note I have swung the CF/CB line out from the body (2cm at CF neckline – 0cm at the front jacket hem.) so it is roomy around the base of the neck.’
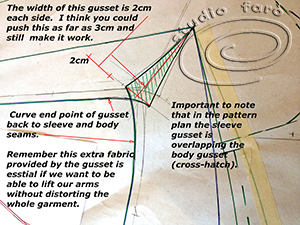
GUSSET DETAIL
‘The width of this gusset is 2cm each side. I think you could push this as far as 3cm and still make it work. Then curve the end points of the gusset back to the sleeve and body seams, and back to the top point of the gusset. Remember the extra fabric provided by the gusset is essential if you want to be able to lift our arms without distorting the whole garment. It’s important to note that in the pattern plan the sleeve gusset is overlapping the body gusset (cross-hatched area).’
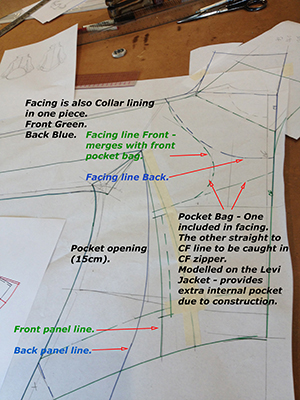
POCKETS AND FACING DETAIL
‘In this style the facings are also the collar lining cut in one piece. Front Green – Back Blue in this image. The front facing line merges with the front pocket bag. The back facing line is deep to provide contrast in the back neck for good point of sale appearance. The pocket opening is 15cm. Pocket Bag – One is included in the facing. The other goes straight to the CF line to be caught in the CF zipper. (Modelled on the Levi Jacket – provides extra internal pocket due to construction).’
Phew, now I am off to lift the different pattern pieces and I will report asap on results.
Enjoy 🙂
Take this moment to sign up for my fabulous newsletter! Every month or so I send an email newsletter with new website content and always, always an enormous discount code for all my sewing patterns, garment blocks and pattern making instructions.
This discount code is for subscribers only. Don't miss out!


No Comments