22 Jul Pattern Puzzle from CarmencitaB
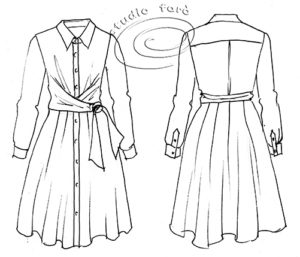
Last week I received an email from CarmencitaB regarding a slightly tricky pattern she has been puzzling with for a little while. And you all know I love a challenge and the results are in this post. Firstly some picture references (from CarmencitaB) for the direction we are going in:

The style is a waisted shirt-dress with an interesting wrap detail at the waistline. It is the wrap detail that requires our time and attention.
After reading Carmencita’s post the first thing I noticed was that the pattern had no bust darts. A quick production sketch often helps me work my way through the detail of the design.
So I decided to start with my fitted dress block and see how much wrap I could get out of the darts. By that, I mean closing the bust and waist dart into the front style/fold line on the pattern.
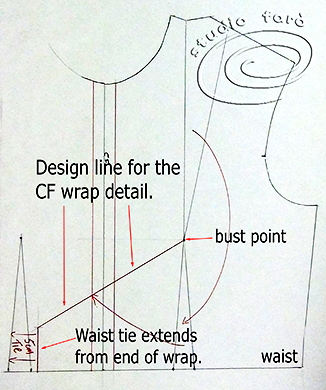
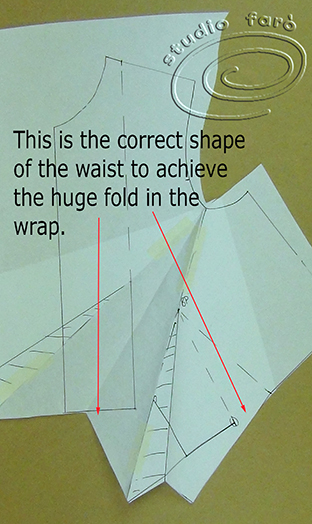
For the waist drape to fold and tie, while still being able to button through as you would expect on a shirt dress, the fold has to be much deeper than the amount supplied by the two darts.
A few rough calculations and a guess or two later and I think I need at least 22cm in width of waist wrap to make this style work. So I slashed the bodice along the middle of the dart straight through to the armhole to gain this extra fabric.
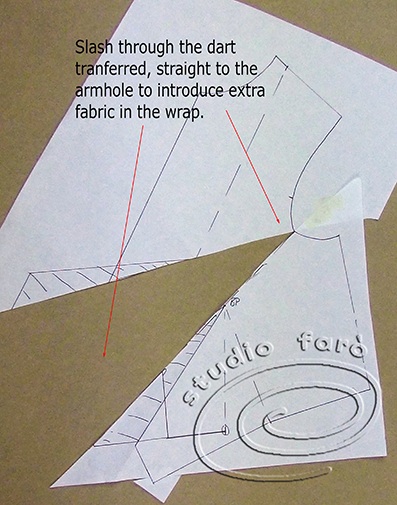
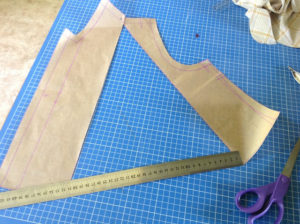
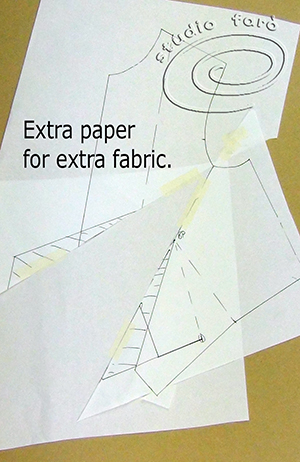
Glue some pattern making paper behind the bodice pattern to fill in the new shape of the pattern and the extra drape fabric.
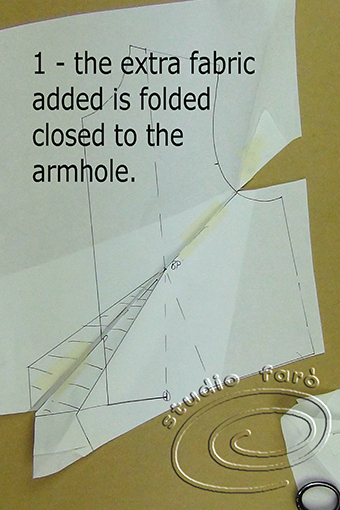
To get the correct shape on the outside edge of this particular pattern piece It has to be folded in two stages. First, fold the extra fold/fabric closed to the armhole.
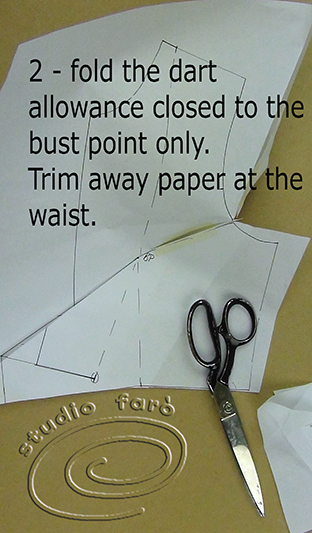
Then secondly, fold the dart allowance closed to the bust point only. Trim away the excess paper on the waistline while all the dart and extra fabric area is closed. This will give you the correct shape on the outside edge of the pattern.
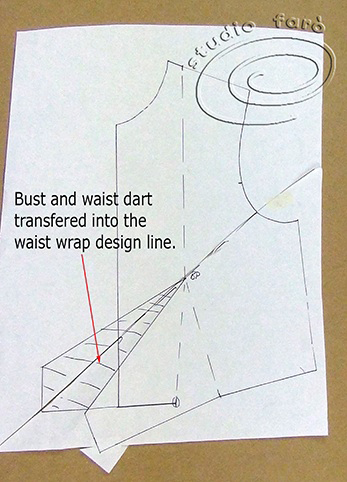
Now you can see the unusual shape created by this fold on the outside edge of the pattern at the waist.
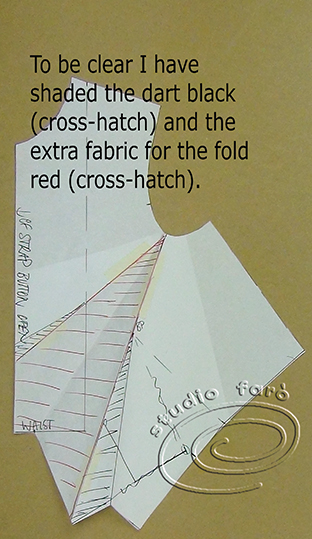
In the picture below I have shaded the wrap fold areas to distinguish the dart allowance from the extra fabric added. We will need this information when we finalise the pattern and have to achieve the correct wrap matching the folds and the outside edge of the pattern.
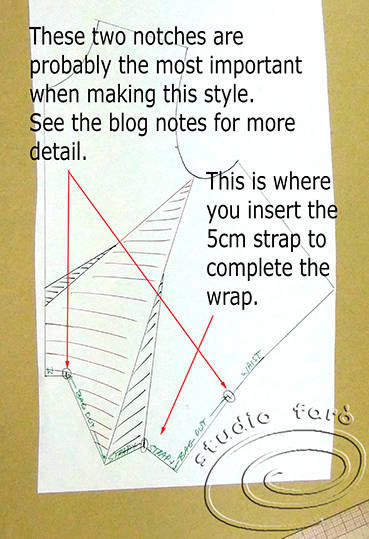
In the image below I’ve made a clean copy of the pattern, including the shading and labeled that unusual shape at the waist to make it a little clearer. Now you can see the stitching line (outside edge) of the pattern (no seam allowances have been added at this stage). Please note the two most important notches where the wrap comes out of the waist and crosses over the front strap buttoned opening. The lower edge of the wrap is bagged out when you insert the 5cm strap.
Of course, this photo tutorial only deals with the front bodice pattern and not the rest of the shirt dress pattern. However, if there is enough interest (comments, shares, etc) I am happy to attempt to demonstrate the rest of the drafting required to finish this pattern. Just let me know. :))
Please ask questions, I’m sure I haven’t got all the detail right yet! So Carmencita, I hope this post is useful, let me know if you have any questions, and we’re looking forward to seeing the results!
Nicoline karssen
Posted at 17:01h, 14 DecemberI would like to see the whole pattern 😊
Nicoline Karssen
Nicolinek@kpnmail.nl
Studio Faro
Posted at 16:26h, 15 DecemberHi Nicoline, thanks for dropping by. I always work out the challenging parts of the puzzle but don’t necessarily complete the more straight forward sections. Maybe one day I’ll get around to completing. 😊