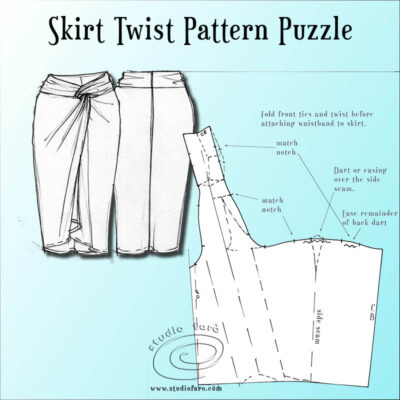
04 Nov Skirt Twist
Posted at 11:08h
in Pattern Making Instructions, Pattern Puzzles, Stretch Patterns, Womens Skirt Block
2 Comments
With this weeks post of the pattern solution and detail, I must apologise for the delay in posting. It turns out my original pattern shape was not entirely accurate. As I prepared this post I realised that the pattern shape would not necessarily achieve the fit I had sketched in the design drawing. This is not an uncommon problem when translating design drawings to actual patterns, which is why we often have to sample a couple of times to perfect the fit.
If you’d like to learn my method for creating Twist Drape Patterns I have a detailed worksheet for making Jersey Twist Patterns. For just a few dollars you’ll get the same training you’d get if you came to the workshop in my studio.
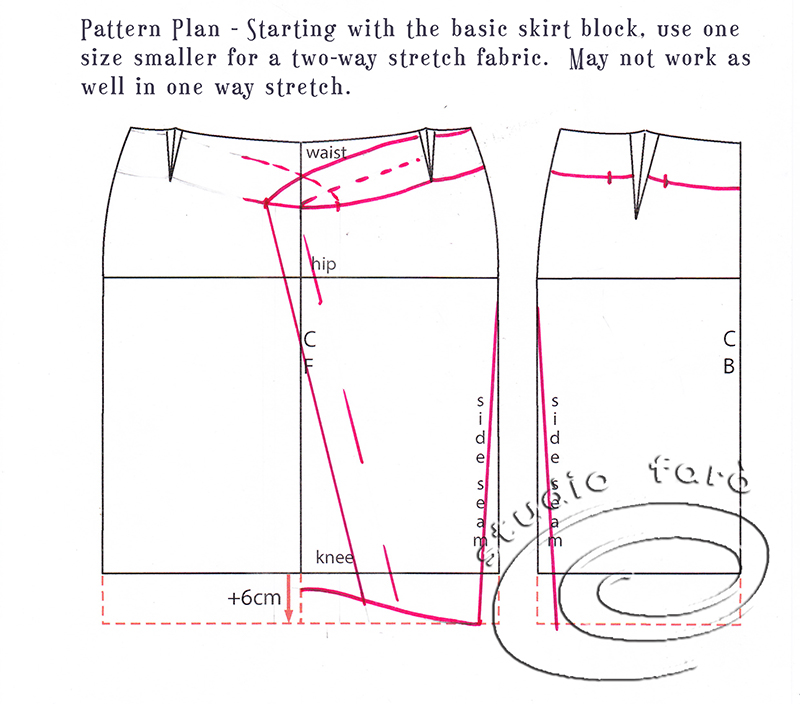
So back to the pattern table to finesse the shape of the pattern. I reworked the pattern plan with the following changes – a greater angle on the front wrap, a lift in the CF skirt length and more tapering on the side seams towards the hem.
The pattern plan below shows the re-worked style lines to begin this pattern. I’m using my basic skirt block, a size smaller, so I have no garment ease and can use two-way stretch jersey. If you don’t already have your own skirt block you’ll my my Skirt Block here, in Sizes 6-22.
There is a worksheet on the website (not too many dollars) with full instructions to draft your own Skirt Block.
Begin by tracing your skirt block onto pattern paper, as a full front skirt block for the asymmetric design, and a half back skirt block:
- The side seams have been tapered to hug closer to the body.
- The front hemline has been lifted on the CF to achieve the lift you see in the front of the design sketch.
- The wrap/twist feature in the front is located 4-5cm past the CF line and connected back to the lowered waistline.
- Mark the front edge of the wrap feature angled back towards the middle of the left side skirt.
- I have marked the waistband at approx. 7cm wide at the side seams and through to the CB.
- The intention is to open up the front edge if that wrap to include extra fabric for the twist and drape.
- Then to add the front and back waistbands to the top of this wrap line.
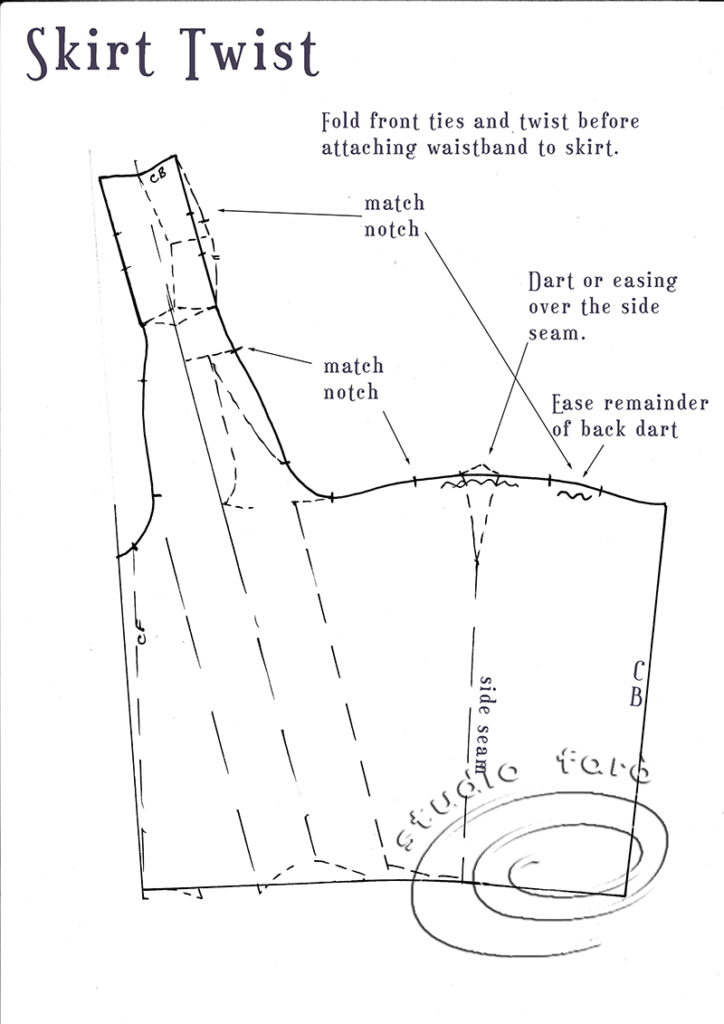
The pattern shape below is the final version of the pattern piece with the original skirt block marked with a dashed line. The back dart allowance is eased into the folded waistband. The side seam shaping can either be turned into a dart or eased into the waistband. That will all depend on the fabric and the skill of the machinist with darts.
The front and back waistband have been laid along the fold line coming out of the front wrap feature. No extra fabric has been added to the back waistband but the front waistband has been opened up to match through to the extra fabric in the twist feature in the front of the skirt.
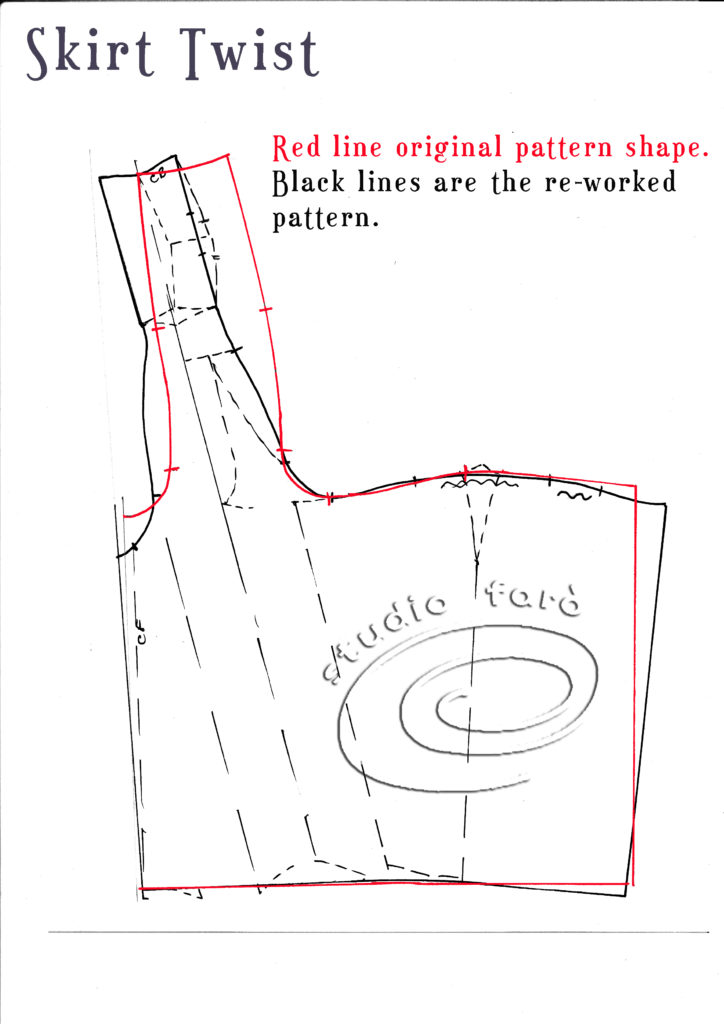
The image below is the comparison of both pattern shapes to demonstrate the subtle difference. The red lines are the first pattern shape from the Saturday morning puzzle and the black lines are the final pattern shape. The most noticeable differences are the increased angle on the front fold line into the drape, an increase in the amount of fabric and shaping over the back seat area of the skirt and a shorted CF length.
Even at this stage there is more testing and proving to be done before this design is fully realised. Let us know if you have any questions about this #PatternPuzzle or any of the others featured on this blog. If you’d like to buy a copy of these pattern making notes for your own personal use at home you’ll find them here: Skirt Twist – Pattern Making Instructions.
We would love to hear from anyone who has a #PatternPuzzle they would like featured by Studio Faro.
When you share this post, leave a comment or let us know so we can drop by and say hello. 🙂
Isabel perez
Posted at 02:50h, 26 AugustGood morning
How can k buy the pattern of this skirt twist with all the details to cut and saw it
Studio Faro
Posted at 07:32h, 26 AugustHi Isabel,
Thanks for dropping by. This skirt twist is only available as pattern making instructions at the moment. Hopefully some time soon I’ll have the pattern made for sale.
If you are a subscriber to my newsletter you’ll be the first to hear when it’s released. 🙏💕
Anita