08 Dec Something for Christmas
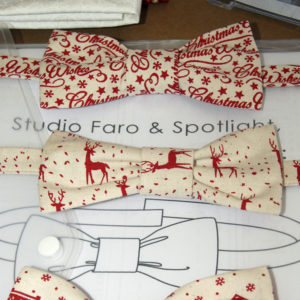
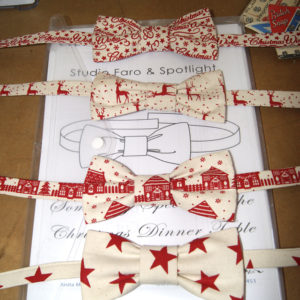
I recently had to come up with a crafty Christmas idea that I could demonstrate at the Wagga Wagga Spotlight store. Once a year they have local makers demonstrate in the fabric department, and this year it was my chance. So in a moment of inspiration, I came up with the Christmas Bow Tie as an alternative to the usual party hats. I had the choice of all their Christmas prints and I selected four different prints in a red and white theme.
List of fabric and trims:
- .25m of fabric will make 4 bow ties.
- thread to match.
- 2 x press studs for the tie ends.
- needle for stitching on the press studs.
- If your fabric is light you may want to use fusible interlining to make it heavier.
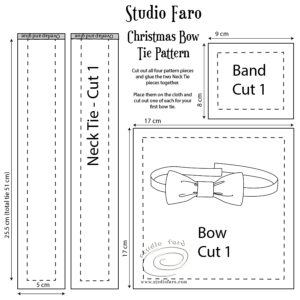
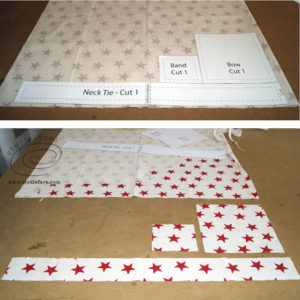
Copy the measurements from the above image and draw up your pattern pieces for the bow tie pattern. I’ve included small seam allowances of 7-10mm (¼-⅜”) on all pattern pieces. When you lay them on the cloth you’ll see that you can easily duplicate the cut for a second bow tie without wasting too much fabric.
This bow tie has three separate pieces – the bow, the band, and the tie. They are all sewn up separately then assembled to make the complete bow tie.
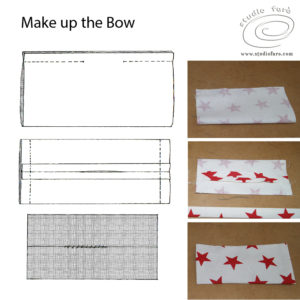
To make up the Bow;
- Fold the bow piece in half, with right sides together, and stitch along the long edge, leaving a 5cm (2″) gap in the centre of the seam.
- Press this seam open and make sure it’s in the middle of the bow.
- Stitch the open ends of the bow closed at 1cm (⅜“).
- Turn the bow through to the right side and hand stitch the opening together to finish.
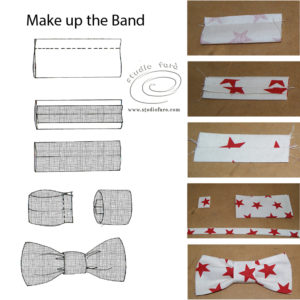
Sewing up the band for your bow tie.
To make up the Band:
- Fold the band piece in half, along the longer edge, and stitch 1cm (⅜“).
- Press the seam open, then turn the band through so the right side of the fabric is on the outside.
- Stitch the open ends together with a 1cm (⅜”) seam allowance.
- Turn through so the seam is on the inside.
- Push the bow piece through the band piece until it is exactly in the centre.
- You can tack these two pieces together at the back to prevent them shifting.
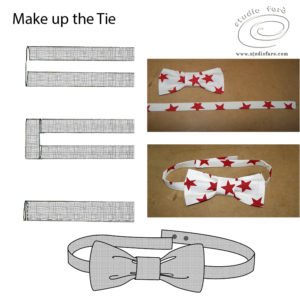
To make up the Tie:
- Press the long edges of the tie toward the centre by 1cm (⅜”) on both long sides.
- Turn the short ends in by 1cm (⅜”) and press.
- Edge stitch along the ends and length of the tie.
- Slip the tie through the back of the band and secure with a back tack.
- Add 2-3 press studs to the ends of the tie for adjustable fittings.
If not everyone around your Christmas table is happy to wear a bow tie, it would be very easy to slip the bow onto a hairband and treat as a hair decoration. Let me know if you have any questions about this crafty Christmas idea.
I’d like to wish all my fabulous blog followers a wonderful festive break and I look forward to catching up with you all in the new year. 🙂
No Comments