21 Jul The Apron Dress
The going was tough early Saturday morning with very few attempts at guessing the detail in the #PatternPuzzle. Julie Eilber came the closest when she suggested it may be pregnant manatee. Later in the day Em Pea Horgosi came to the rescue and provided all the answers.
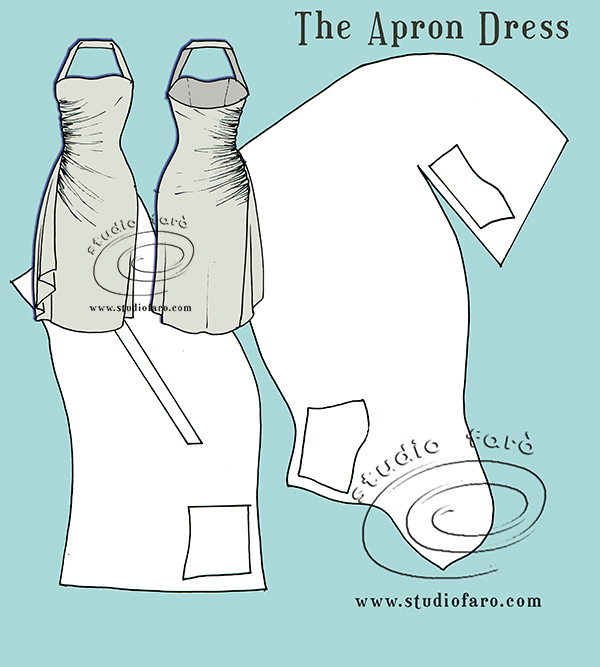
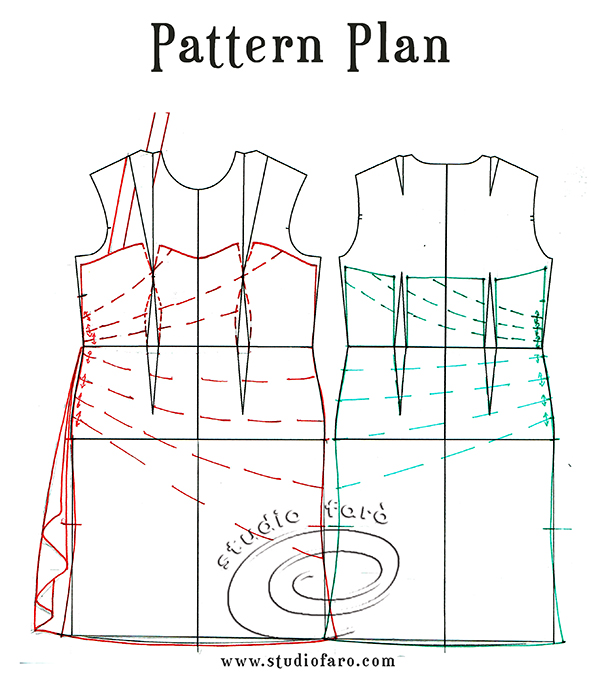
This design best suits a stable woven fabric that cuts and drapes well on the bias. Below I have used my fitted dress block to build the Pattern Plan.
The first thing to focus on in this style is the fit of the bodice along the top edge of the dress and the corset that supports it.
The first thing is to reduce the outside (top) edge of the dress so it fits close to the body. By this I mean to:
- increase the bust dart as you so for gape darting.
- then reduce side seam by 1cm (3/8) at underarm to zero at the waist for sleeveless styles.
- take 2cm (3/4) out of the back bodice at the top of the waist dart.
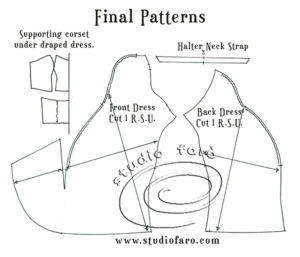
- mark in the position of the halter strap.
For the ruched drape in the right side seams, mark dashed lines across the front and back block (as diagram below) to indicate the direction of the drape and where you will open the pattern to introduce extra fabric. Also, mark the length of the waterfall drape on the front right side seam to help make this pattern piece. Please note that I have also shaped the skirt side seam – slightly tighter around the thigh with a little flare at the hem.
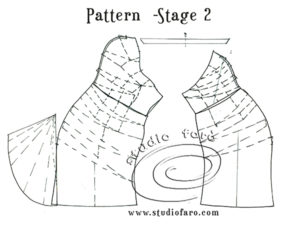
When I first started to adapt this pattern I had included waist seams in the original design. However, part-way through the process I realised that the bodice and skirt patterns could be easily joined as one pattern, even if it does make a slightly weird, fabric-hungry shape. There is an advantage of working through the pattern in sections as it helps with a gradual understanding of how the pattern is built.
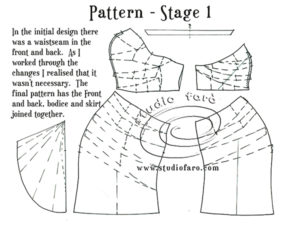
Either version of this pattern (waistline or not) would work well as long as you consider where you can place the grain to maximise the benefit of bias drape in this style. Please note that the waterfall drape in the side seam stands away from the main garment to allow you to include the gather and drape together in the right side seam.
It’s also at this stage that I realised I have built a difficult seam into this pattern. The joining of the waterfall drape to the front dress will make the seaming difficult but not impossible. If I get an opportunity to make this one I’ll let you know how well it sews together. If you plan on making this now I suggest the waterfall drape could be cut separately.
Trace the corset pattern pieces, from the Pattern Plan, to make the internal support for this dress. These corset pattern pieces are cut on the straight grain. The grain on the main dress patterns has been placed to maximise the bias through the ruched area.
Hoping you all enjoy the post and follow my blog to get this great information direct to your inbox. Any questions can be left in the comments section below or email me direct. If you’d like to buy a copy of these pattern making notes for your own personal use at home you’ll find them here: The Apron Dress – Pattern Making Instructions.
Enjoy 🙂
No Comments