11 Nov Twist and Turnback Top
Posted at 10:28h
in Pattern Making Instructions, Pattern Puzzles, Stretch Patterns, Womens Knit Block
0 Comments
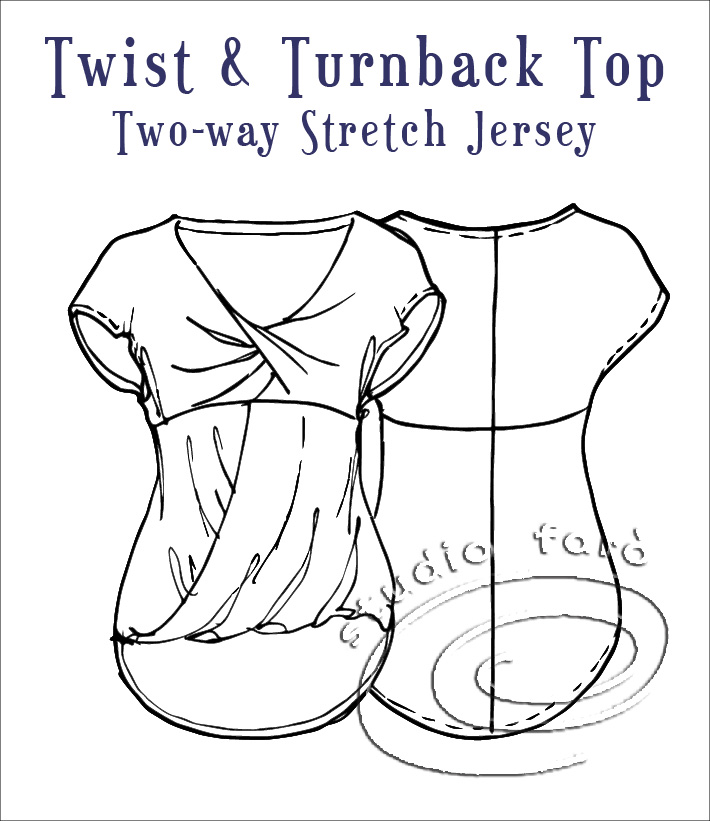
My design this week featured below has a single twist in the front bodice, a turn-back drape on the front hem and a two piece back to maintain the empire fit that holds the bust twist in place.
If you’d like to learn my method for creating Twist Drape Patterns I have a detailed worksheet for making Jersey Twist Patterns. For just a few dollars you’ll get the same training you’d get if you came to the workshop in my studio.
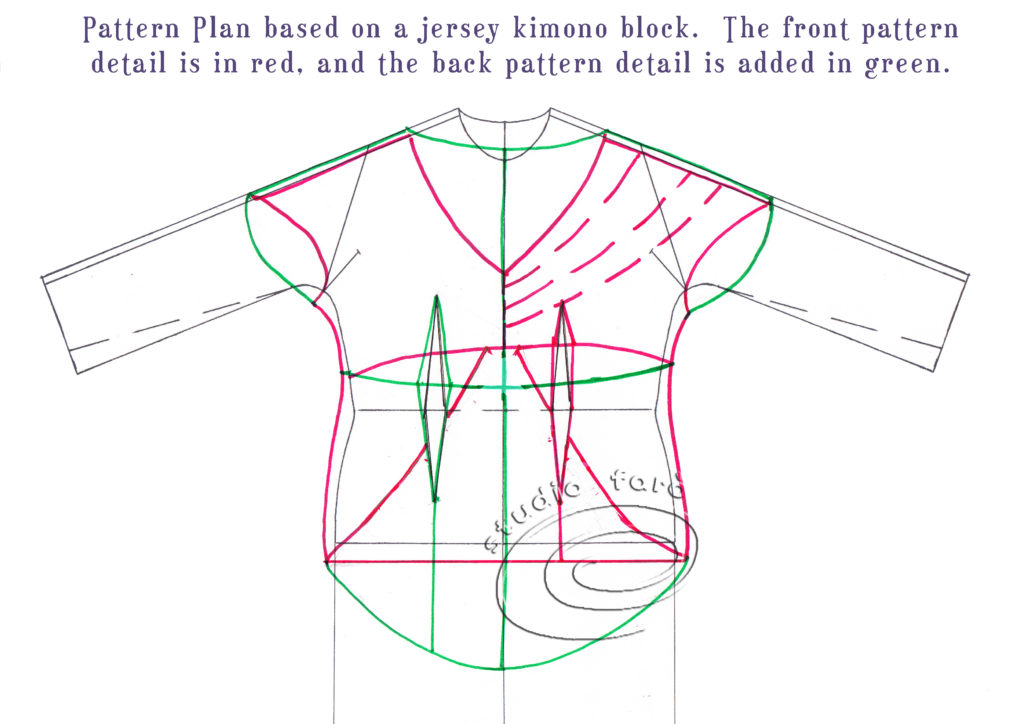
Please note that the back patterns are a slight deviation from Saturdays pattern shapes. When putting this blog together I realised the need for a tighter fit in the back. The only way to achieve this is to continue the empire seam through to the back.
The pattern plan below sets out the shape of the new design patterns with dashed lines where we will add extra fabric for the single twist in the front bodice. Please note the front is outlined in red and the back is outlined in green. I have used our kimono jersey block for two way stretch to make this pattern. NB – Along the empire line I have doubled the amount of darting indicated by the waist dart to make the empire fitting work under the bust.
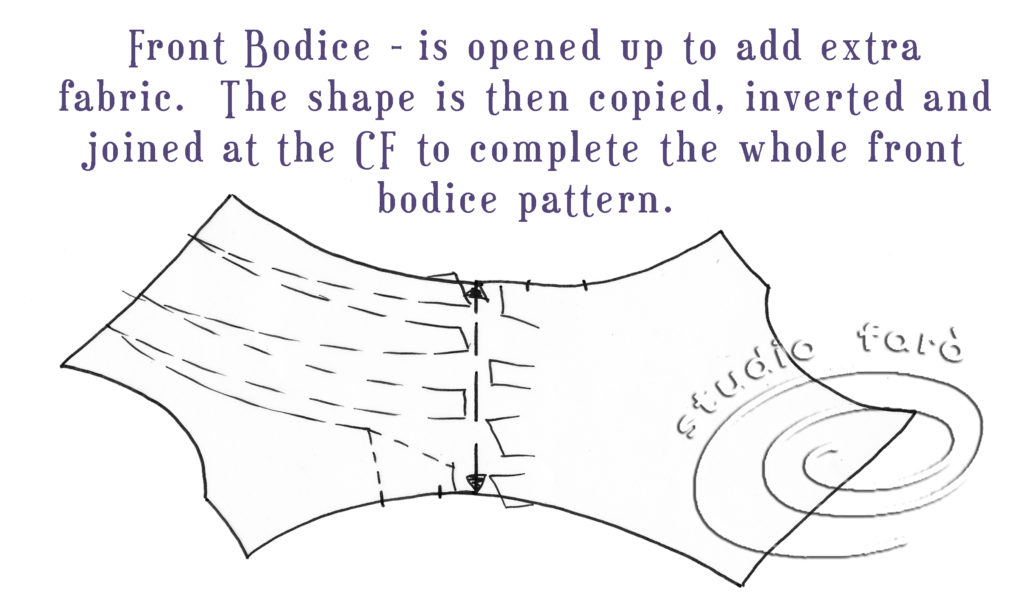
For the front bodice, trace the shape of the right side including the dashed lines. Cut this shape out and also cut along the dashed lines so you can open up the bodice to add extra fabric (approx. 2-3 cm between each piece) for the single twist around the bust.
Now make a second copy of the opened up bodice, flip it horizontally and bring the two centre fronts back together. In the diagram, you will see that I have left some extra fabric/space between the centre fronts for the take up of fabric that will be caused by the single twist in sewing.
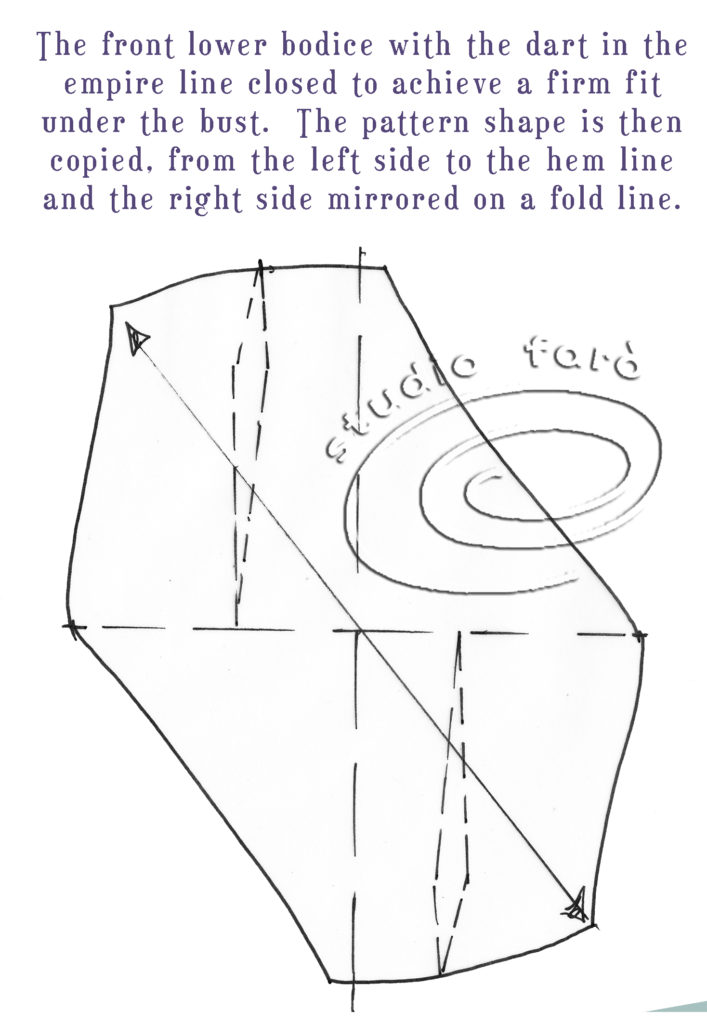
For the lower front bodice, trace from the centre front to the waist dart and close the dart as much as you can for a firm fit under the bust. Trace the rest of the pattern to the side seam and include the extra in the diagonal wrap line. Make an exact copy of this pattern piece, cut it out and flip it over to join at the hemline and complete the turn-back pattern piece. To encourage the ‘roping’ in the front hemline draw the grain line from side seam to side seam as the diagram.
Below I have used a slightly transparent graphic to show how the piece will turn up to the empire line to complete the lower front bodice.
For the back upper bodice, trace the whole pattern shape then adjust the side seam and CB fit to account for the dart allowance. Usually you can take half of the allowance off each side along the empire line. Again we need a firm fit in the back empire line to hold the front twist in shape. For these jersey styles it is better for the fit to be achieved on the seams and not with darts.
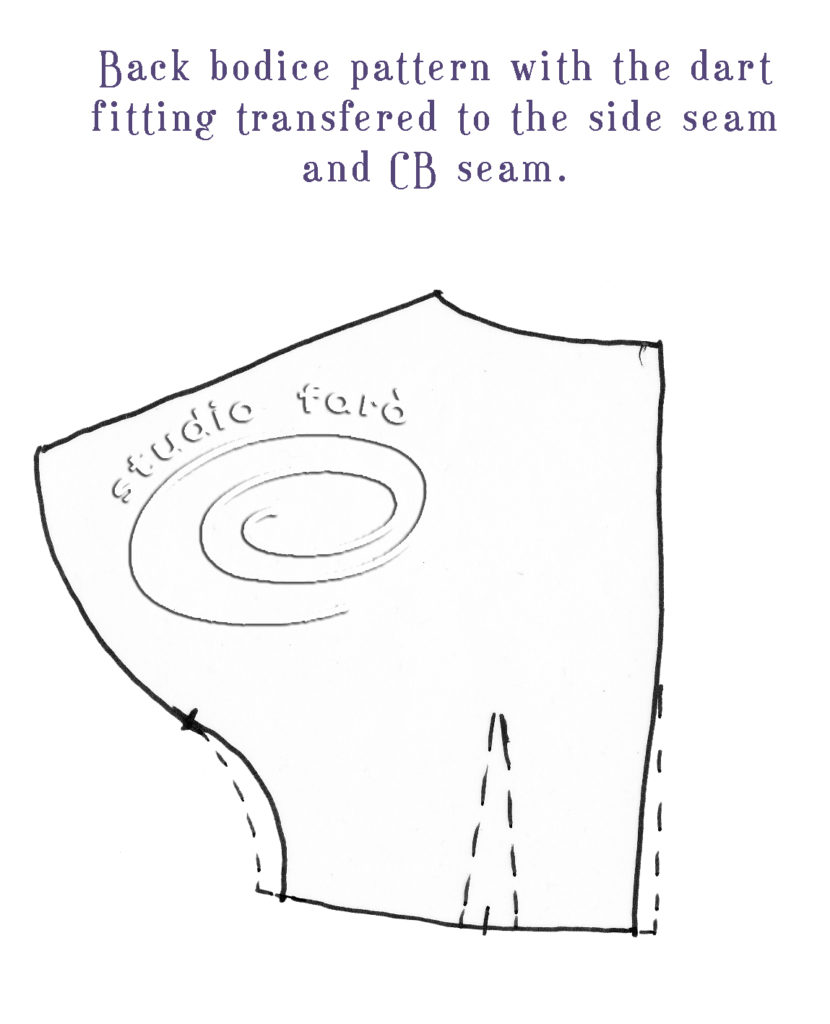
Trace off the lower back bodice starting at the centre back and tracing to the first side of the waist dart only. Close the waist dart, pivoting on the end of the dart to transfer the dart into the hem. Now the top empire seam will match with the upper bodice and be firm enough to hold the front bodice in place.
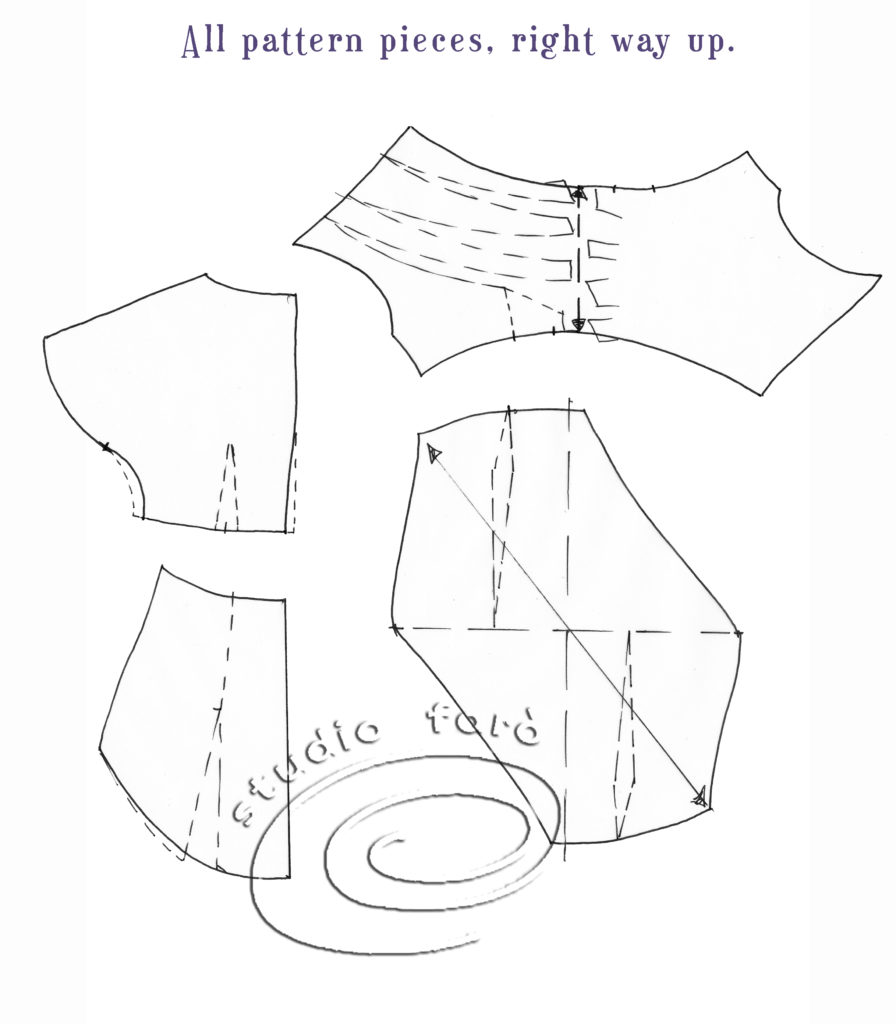
The diagram below has all the pattern pieces set out in a more logical order for your better understanding. Please let me know if you have any questions, I am very happy to answer your comments and emails.
If you have any questions about this project please use the comments section below. We love to hear from you! 🙂
No Comments