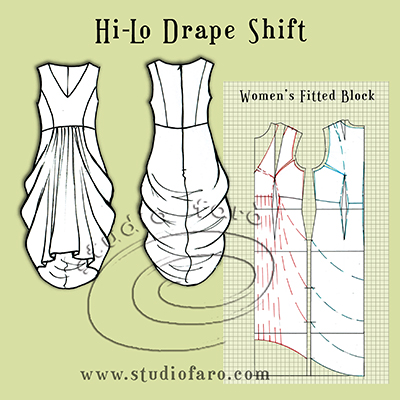
12 May Hi-Lo Drape Shift
The post is a little late this week as I am totally distracted by work that is going on in the backend of the website, setting up a members area. We have been working out the best content to make it both attractive and useful to fans and hope to open that members area very soon. Now back to the #PatternPuzzle that was such fun on Saturday with fans working getting to the answers super-fast. Then overnight, while I was asleep so many added sketches and photos and in one case an amazing mini-toile.
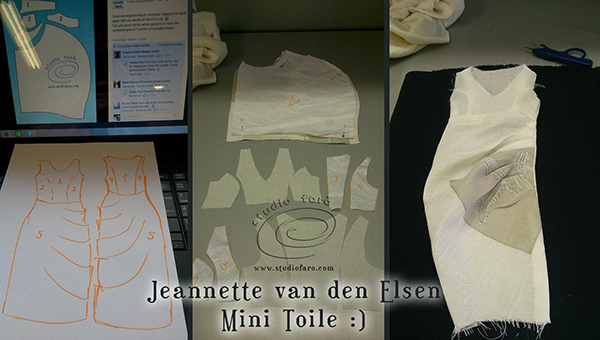
I will get to the pattern making instructions in a moment… But firstly, there is a much more important story to tell… About possibilities, imagination and flexibility in pattern making. It was Jeannette’s mini toile that sparked this idea with her imaginative use of the pattern pieces. And although her solution was not the same as the #PatternPuzzle, it was both interesting and possible. Here Jeannette has used the pattern as a single piece and placed the drape on the front side seam only. It is remarkably similar to the Jersey Ruche Skirt in that all the darting is sent to one side seam, producing a large amount of drape. And similar to The Apron Dress where all the darting is sent to the side seam for the front and back patterns. However Jeannette’s Dress is far more demanding but nonetheless possible. Don’t be surprised if you see something similar turn up in a future pattern puzzle. 😉
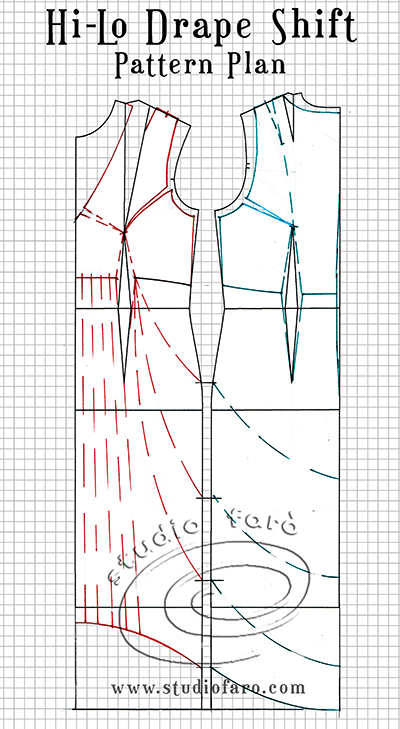
Starting with my fitted dress block. trace out half front and back with the side seams together:
- Mark in your neckline and sleeveless armhole with the usual gape darts.
- Mark in the slightly shaped low empire seam, from the front through to the back.
- Double the darts on the empire line to make sure the garment profile is sharp.
- Mark in the princess panel lines on the front and back bodices.
- This dress has Hi-Lo hemline. Using your tape measure, stand in front of the mirror and decide your best lengths for you for the front and back hemline. I approximate the hems in this pattern plan are most likely front 107cm (from HNP) and back 120cm (from nape).
- Mark in the curved Hi-Lo hemline, making sure the line starts with a right angle on the CF and ends in a right angle on the CB.
- In the area under the empire line, between CF and the waist dart, mark in a number of vertical lines. These will be used to introduce Gathered Drape to the front skirt.
- From the empire line, at the front dart position, mark in the curved lines that will introduce Cowl Drape in the back skirt.
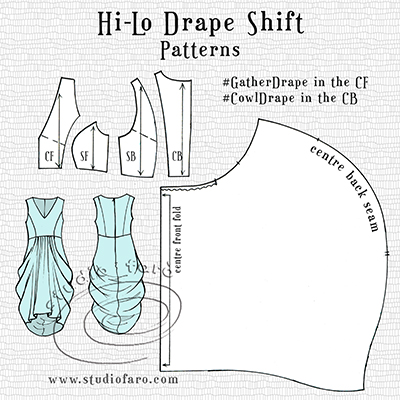
The major pattern development in this puzzle is adding the extra fabric to the skirt to achieve both Gathered and Cowl Drape in this design.
Starting with a good straight line for the CF mark in each section of the front pattern, adding extra fabric between each section for the Gathered Drape. When you get to the Cowl Drape through the back skirt, close all the darts, join the side seams together and open up to add the extra fabric. There are no rules as to how much you add. It will depend a lot on the fabric you are using for this design.

The final pattern pieces below are the four bodice patterns and the one large (front & Back) skirt pattern. I fancy the bodice would benefit from a full lining as long as you stabilise the neckline and armholes. As for the skirt area, lining is possible but please remember that you will see the back lining because of the Hi-Lo hemline. That means the colour match of fabric to lining needs to be good and not too distracting.
Let me know if you have any questions about this design and these pattern making instructions. Always happy to help. 🙂
No Comments