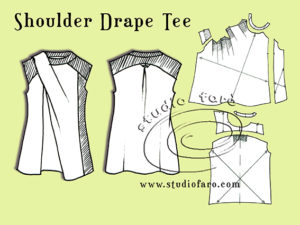
07 Jul Shoulder Drape Tee
The Saturday #PatternPuzzles have featured many ‘on-trend’ fashion styles and this week is no exception. The shoulder drape featured is currently popular and turns up in many fashion collections. Our fans were excellent at spotting all the design detail and solving the puzzle.
When confronted with such complex patterns, my approach as a pattern maker is to divide the pattern making into several stages to some order to the job.
In this case, the neckline, yoke and side panel are straight forward detail in pattern making. However, the shoulder drape, with the pleat coming out from under, has the potential to be confusing. In the following demonstration, each complex feature is dealt with separately in the notes.
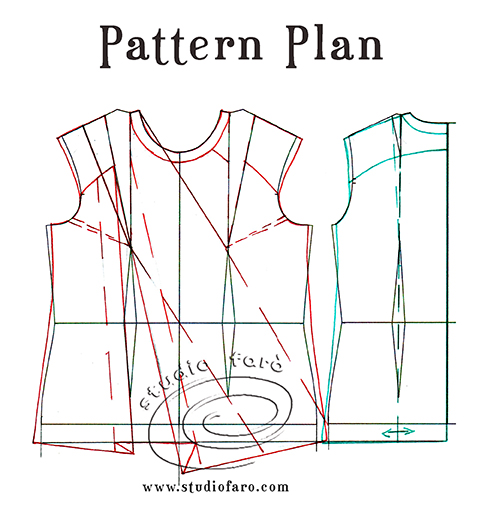
Using a fitted dress block mark in the following:
- The neckband (2-2.5cm wide) at the base of the neck, front and back.
- Extend the shoulder line – 1cm.
- Reduce side seam at underarm point for this sleeveless style.
- Draw in 1cm gape dart in the front armhole, connecting to bust point.
- Mark in the front and back yoke lines.
- Draw in the location of the main shoulder drape, connecting with both bust points, through to the hemline. This indicates the direction of the drape.
- The inverted pleat that comes out from under the main shoulder drape will be dealt with separately after the main drape is completed.
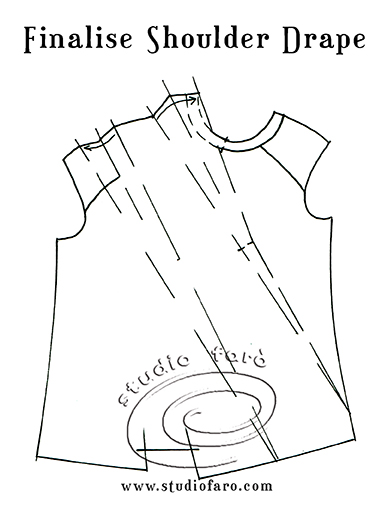
Use the shoulder darts and gape darts (in the armhole) to add some flare to the hemline with the balance going to the main shoulder drape.

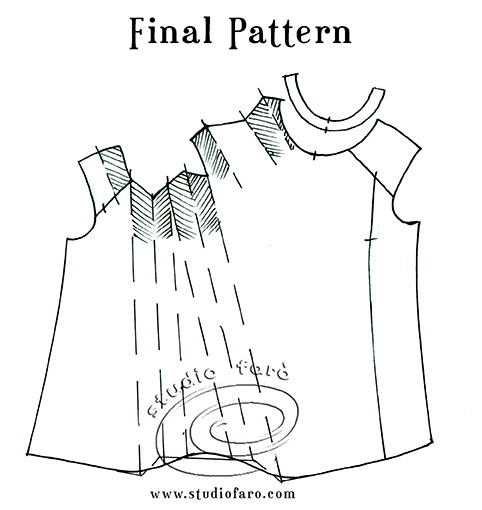
Slash open the pattern to include extra drape. Equalise the main shoulder drape, by folding out both sides of the drape, to get the correct shape on the outside edge of the pattern.
Mark in the inverted pleat, coming out from under the main shoulder drape, connecting to the hem detail.
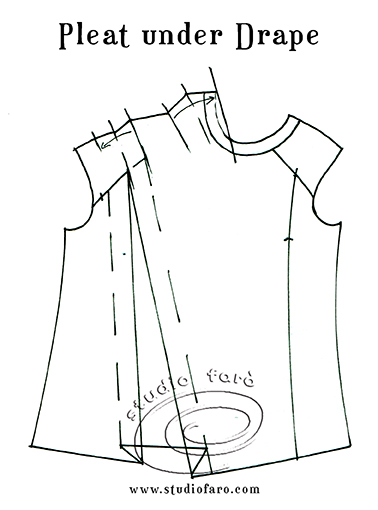
Expand the pleat area to achieve the final pattern piece. Many style variations can be extracted from this one main pattern.
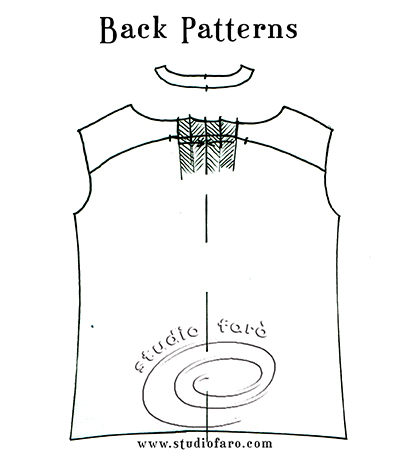
The back pattern changes are less complex:
- Close-out the shoulder dart and send flare through to the hemline.
- Extend the CB line, at the yoke seam, to add extra fabric for the inverted pleat.
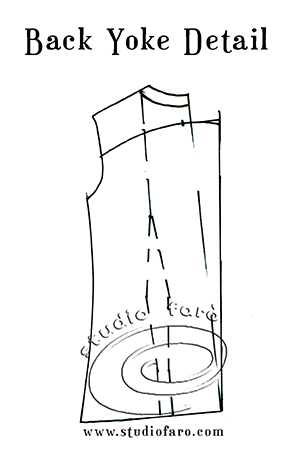
You now have full back patterns and can decide if you keep the yoke detail or prefer a plain back view.
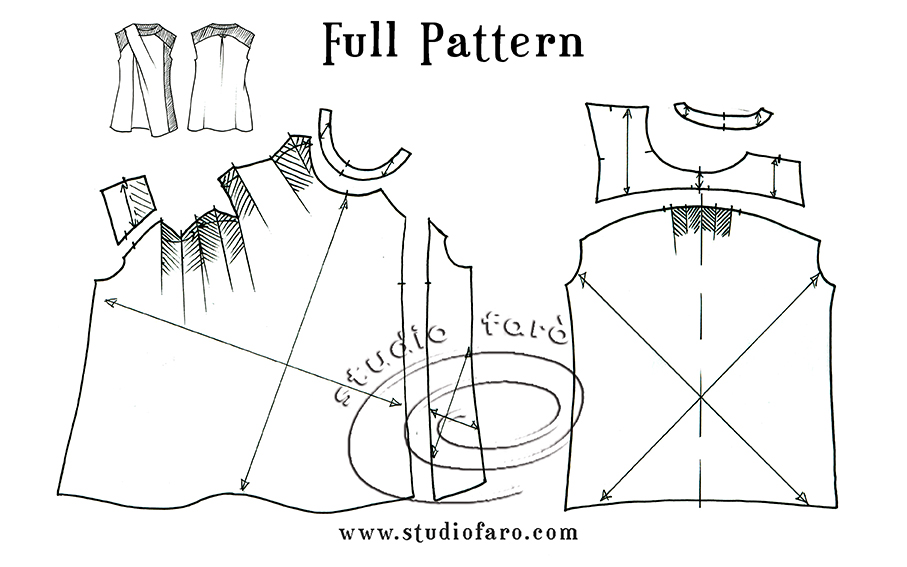
The full set of pattern pieces is set out below for the #PatternPuzzle style. There are several designs that can be lifted from this pattern, with or without yokes, etc.
Let us know if you have enjoyed our post and if you have any questions, we love to hear from you. If you’d like to buy a copy of these pattern making notes for your own personal use at home you’ll find them here: Shoulder Drape Tee – Pattern Making Instructions.
Enjoy 🙂
Monica Romano
Posted at 06:41h, 21 MaySiete bravissimi e creativissimi…sto provando a seguire i vostri pattern spiegati molto bene !
Studio Faro
Posted at 09:37h, 21 MayThank you Monica! Have you made any of the patterns? I would love to see your garments.