24 Feb Sporty Glamour
Posted at 17:33h
in Pattern Making Instructions, Pattern Puzzles, Stretch Patterns, Womens Knit Block
0 Comments
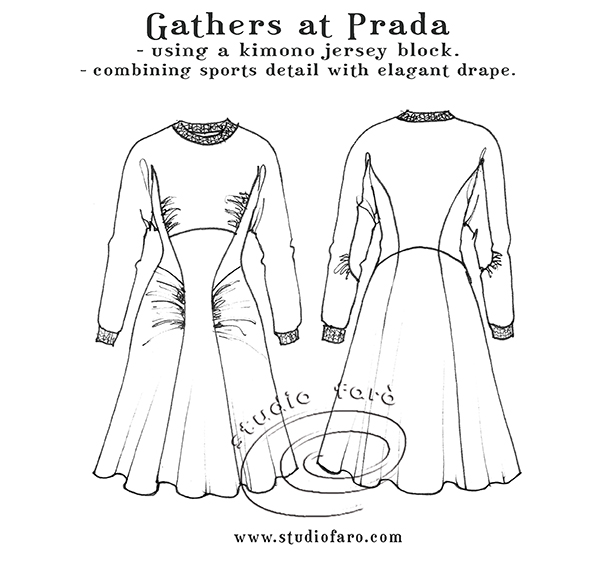
Inspired by The Cutting Class post, Tucks and Gathers at Prada, and Prada’s divine combination of feminine styling with casual, sports trim, I could not resist this challenge. The style that caught my eye is this sporty frock (below) with crew neckline and bead and sequin embellishment. A wicked combination. 🙂

So some of the detail has been identified by The Cutting Class but I have nothing for the back view. Even the video was of little help in revealing the back of this dress. My sketch below is simply my interpretation on what may be happening on the front and back of this frock. This sketch is not a slavish copy of the original and has some uniques style features included in the design. I have kept the empire-like seam but not included the shaped waistband. I’m not even sure if that is a set-in sleeve or kimono style with gusset? I vote kimono…
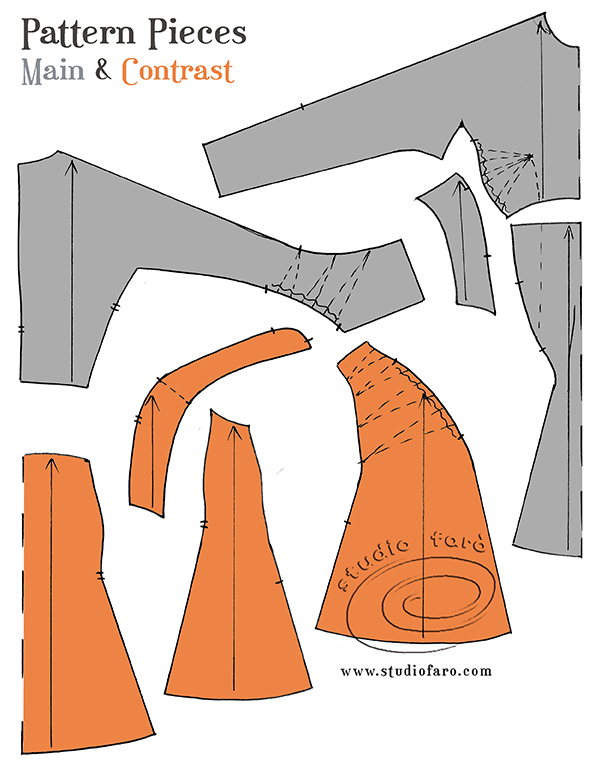
The jumble of pattern pieces below was presented to our FB fans on Saturday morning. The solution was provided by Renee Bock in one very concise and detailed answer.

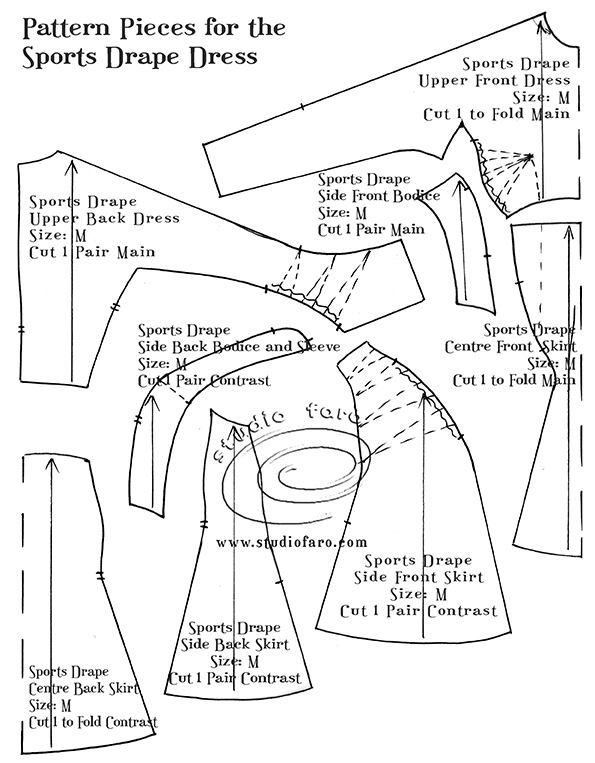
As much as I can glean the fabric is most likely jersey of a decent weight (220-280 gsm) as revealed in the movement of the dress on the catwalk. Below I have used my kimono jersey block to begin the development of the pattern. You’ll find a detailed set of instructions as a PDF worksheet for the kimono block.
Working through the Pattern Plan I have made the following changes:
- Select the length of your dress – here I am working with a knee-length measurement.
- Work the princess line in the front bodice from the gusset line in this kimono block though to the front waist.
- Mark the empire seam in the centre front panel only.
- The princess panel continues past the waist, around the belly, then onto the hem line.
- Mark in the panel seam for the back of the dress, starting at the gusset (as front).
- Still working on the back mark in a sleeve panel line from the gusset down to the elbow-length, then rounded. Mark in drape lines for adding gather to this articulated sleeve.
- Add extra flare for the full hemline on the new panel seams and the side seams (equal amounts).
- Mark in the position of all gathers coming from the darts including added drape lines.
- Calculate the rib measurement for the neckline and cuff.

Rib Patterns for Sports and Casual styles is often recorded as a measurement on the spec. Most ribs are knitted to order for sports product and will come in the width ordered. For example, the cuff rib may be knitted 6cm wide ready to stitch to the end of the sleeve. The finished length may be specified as 20cm. You would cut a 22cm piece (1cm seam allowance), twice to add to your cut bundle. For the neck rib, we would order it knitted to 2.5cm wide so the final rib width is 1.8cm wide (7mm seam allowance). The cut length for the neck rib will be the circumference of the neckline (minus 2-2.5cm to stretch on as you are sewing), plus seam allowance.
The pattern pieces below have all the pattern notations for identification, cutting and sizing. This multi-piece pattern truly lends itself to colour-blocking as you find in the sports sector. It also allows use of a variety of prints and texture that you might find in knit fabric.
Please note the subtle difference in effect with a slight variation in colour blocking (side front bodice panel).
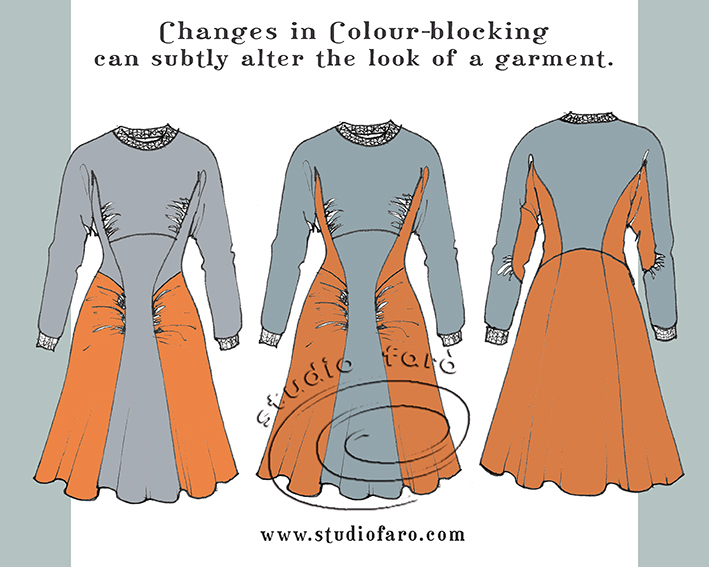
I adore the orange/grey colour combination of the original style because it clearly references a sports colour palette. However, there are many options that would develop a different look. If you’d like to buy a copy of these pattern making notes for your own personal use at home you’ll find them here: Sporty Glamour – Pattern Making Instructions.
Enjoy! :o)
No Comments