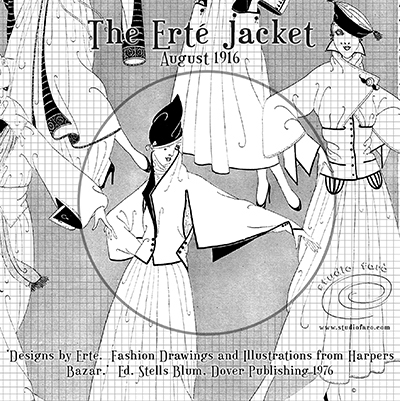
06 Oct The Erté Jacket
My first introduction to Erté was the year after leaving fashion college when my Dad gave me a copy of this book for Christmas. Such a pattern making novice at the time, I had no idea how I would ever achieve such challenging designs.
Irresistible and confounding. These elegant illustrations are so tempting on the one hand then so misleading in the way they represent the behaviour of the garment. The illusion created by the pen is not always matched by the reality of engineering fabric.
Rediscovering this book recently, I was able to look at these great designs with a more experienced eye. I can see where my early exposure to Erté has influenced my design work. And I must say at the outset, that although these designs fascinate me endlessly as a pattern maker, I find them far too theatrical to be applied directly to everyday wear. So I hope to rework these ideas and see if there is anyway this design might fit in a modern fashion wardrobe.
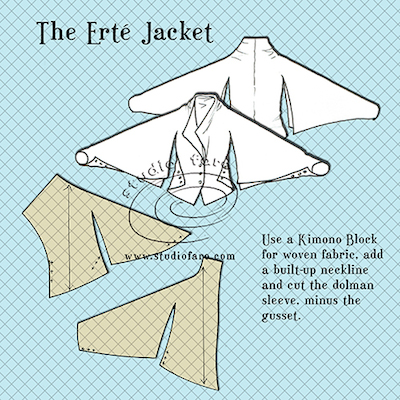
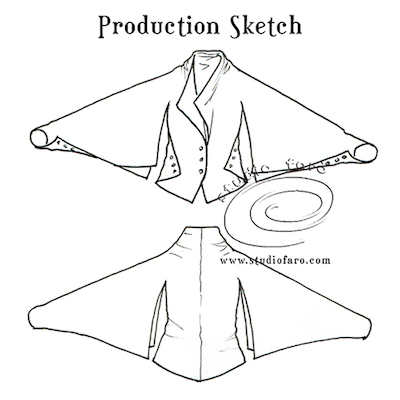
The first order of business is the production sketch. When I look at a new idea for pattern making the first thing I consider is which of my blocks would be most suitable for the job. With the Erté Jacket, we are certainly looking at the kimono block (woven not knit) as a starting point for this design. Then we need to decide how to achieve the built-up collar and shawl like lapel. Erté’s sketch has no indication of seams for the collar or the usual overarm seam from the kimono block. So your guess is as good as mine.
Set out below are a couple of different ways to achieve the pattern for this design. All start with the kimono block and offer variations on collar style and seam placement. The first pattern plan below features the grown-on shawl collar.
The planning for the body of the jacket went like this:
- Add a 2cm button stand to the Centre Front (CF) line.
- Mark in the front length of your jacket and curve the hem line up toward the side seam.
- Extend beyond the side seam for the wrap allowance for the buttoning at the side seam.
- The slit between the body and the sleeve starts in the underarm in the same location as the gusset.
- The sleeve shape follows a similar line to the hem of the jacket, maybe a little shorter as indicated in the sketch.
- The wrap around and buttoning at the wrist is achieved by placing the front and back shoulder line together and drawing a clean line from front to back. The back sleeve will need to be longer to provide the wrap. All of this is slightly informed guesswork with the knowledge that I will get a chance to refine this feature in the first toile.
- The back has very similar styling to the front with the exception of the shaping on the CB seam.
Please note I have adjusted the end of sleeve shape (dashed line) so the cuff buttons up more easily.
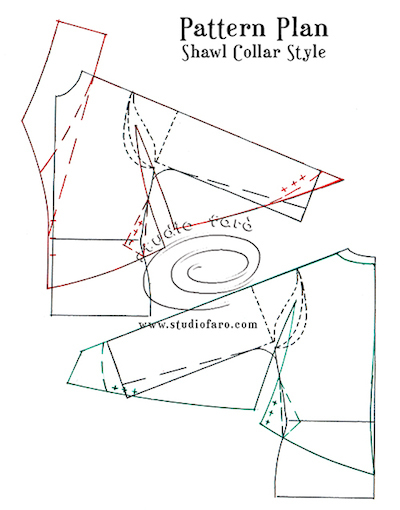
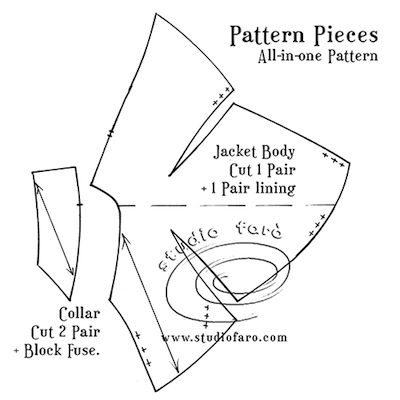
The first set of pattern pieces are those featured in the #PatternPuzzle, where the back and front patterns are joined along the overarm seam. In this version, the shawl collar is separated from the main garment so we can eliminate the overarm seam. Erté’s illustration suggests there is no seam here but only a toile will prove whether that is actually possible. The grain has been left in the conventional place, parallel to the CF. This then places the Centre Back (CB) seam on the bias which may be a bonus if the jacket is cut in stripe or plaid.
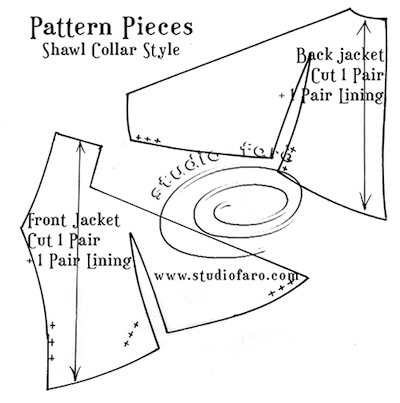
The second version of the shawl collar style has the front and back pattern separate and the shawl collar grown-on to the front. The grain line is also in the conventional place (parallel to CF and CB) for the front and back jacket.
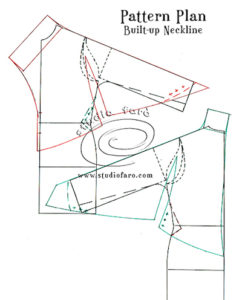
The alternative method for achieving this design is offered in the pattern plan below. In this version, the collar is drafted as a built-up neckline. This is where the front and back collars are grown-on to each pattern as a shaped extension of the neckline and the overarm seam. This particular style of collar is rarely successful from the first draft and often requires a lot of finessing to succeed. Sampling and adjusting the collar is about balancing the shape of the shoulder/collar seam between the front and the back. The body of the garment is the same as above.
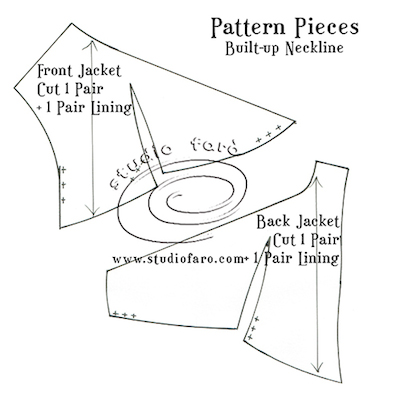
The pattern pieces for the Built-up Neckline are set out below with the grain line conventionally placed. The fit of this garment will depend on the side seam buttoning and the shaped CB seam. You may get more flexibility in fit, if the garment is cut on the bias. In the #PatternPuzzle on Saturday, Mioara Cretu noted that there were no darts featured in the original sketch yet the garment looks very fitted. So our first toile will reveal any additional fitting required to achieve the shaping.
I have had so much fun this week working through an Erté design that I think you may see them come up again in the #PatternPuzzles of the future. Let me know if you have any questions in the comments action below. I am very happy to help you through your pattern making step by step. If you’d like to buy a copy of these pattern making notes for your own personal use at home you’ll find them here: The Erté Jacket – Pattern Making Instructions.
Enjoy 🙂
MAKERS
More in our MAKERS Pinterest Album
No Comments