09 Oct THE PATENT BLOUSE – First Sample!
Posted at 14:53h
in Pattern Puzzles, Self-draft, Sewing Pattern Alterations, Vintage Patterns
0 Comments
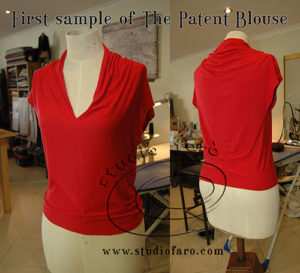
The Patent Blouse has become a favourite top for me after the first set of samples were very wearable. It has become such a favourite that I managed to wear out my first red sample very quickly. Unfortunately rayon is not made to last and very soon the surface of the knit was a little shabby with pilling. I have promised myself that the next red patent blouse will be made in merino. July 2019: This pattern has now been added to the website as a PDF download – The Patent Blouse Sizes XS-XXL
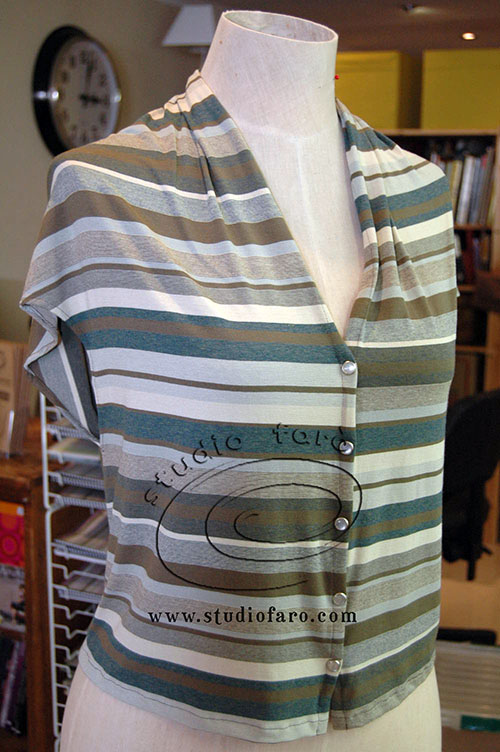
Following the first sample Teresa made this stripe, button through sample, adding a front opening on the CF seam. A great idea that works so well with the stripe. However I think I would need vertical stripes and maybe a little longer for my figure. That’s what happens when the scrap of fabric has an influence on the final sample. It’s a beautiful stripe that I have been saving for just this kind of job.
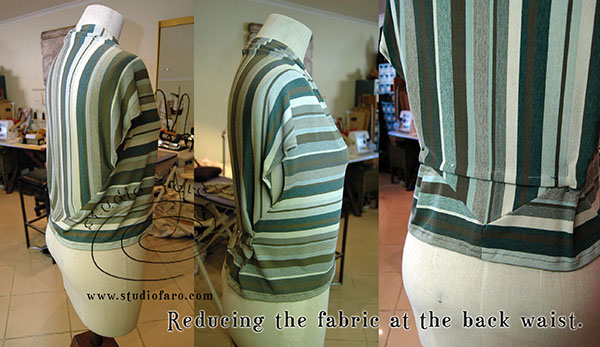
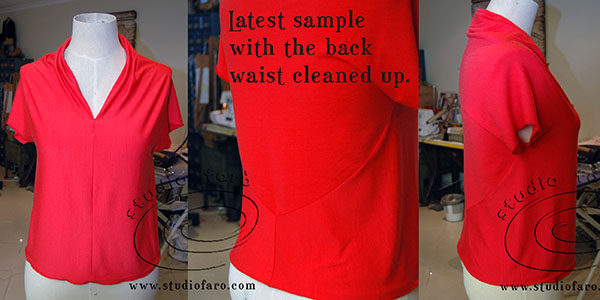
Having worn my first red sample so often, I have decided on some alterations to the pattern to bring it into better shape. The mayor issue for me was the extra fabric that drapes in the lower back of the top. And I think a little waist shaping in the back would also improve the garment.
To remove the extra fabric in the back length pin (3.5cm) horizontally across the back and get a clean line. Then pin in waist darts (3.5cm) across the diagonal seam, both sides, in the back.
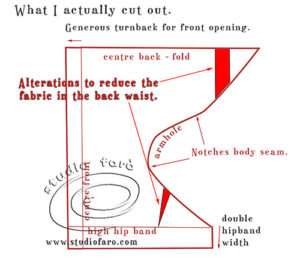
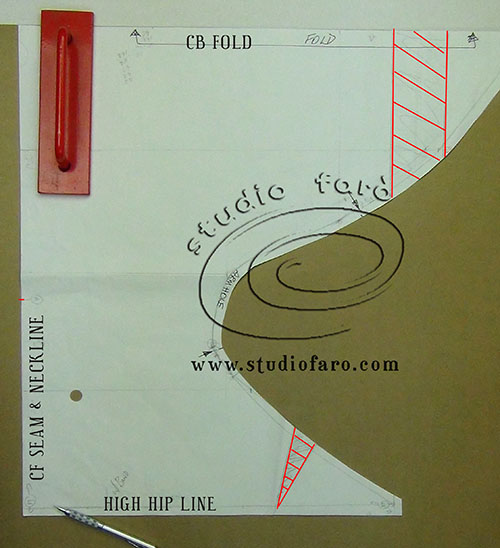
Transferring the alterations to the pattern is set out below. A dart shapes the hipline of the top, reducing the back waist along the diagonal seam. The back length is reduced, along the same seam, by folding the pattern, keeping the CB fold on a straight line. The idea here is to make sure that these alterations have the same effect on the length of the diagonal seam. In this case the seam length was reduced by 3.5cm between the armhole notch and the Centre Back V seam.
Mark the alterations on your pattern and check the the change in the seam length is the same for both parts of the pattern.
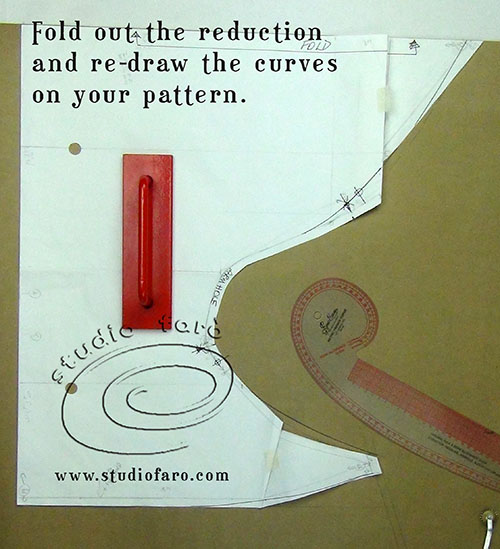
Fold out the reduction and re-draw the curves on your pattern.
I like to extend the top for the hip band allowance rather than have a separate sew-on band. Make a clean copy of your pattern onto pattern card and add the front fold-back seam and the extra length that would have been your hip band. I have added 12cm as I like my tops to be a little longer.

And voila! the promised red merino Patent Blouse with alterations.
For my next sample I would like to extend the length of the top to cover my seat, almost tunic length. This would be great with leggins and boots. I have also wondered how this top might be made into a dress pattern. Does anyone have any design variations on the Patent Blouse that would make a great dress? If so I would love to hear from you. Leave your suggestions and questions in the comments section below.
This pattern is now available on the website: The Patent Blouse Sewing Pattern
If you’d like to share your photos of this blouse you can join my Facebook group, or Instagram. To be sure I see the posts please use my handle @studiofaro or the hashtag #PatentBlouse.
Enjoy 🙂
No Comments