30 Jun Turnback Thinking
The Double Turnback Drape is not especially new. We have featured it twice in our #PatternPuzzles and although it’s not the most challenging pattern to cut, it is so attractive in its simplicity. The Twist and Turnback Top and the Twist Jumper. This particular design detail is featured across many fashion ranges and is relatively easy for the enthusiast sewer to interpret, using patterns they already have in their stash.
However, its success relies heavily on two important features that we will make the highlight of this weeks post.

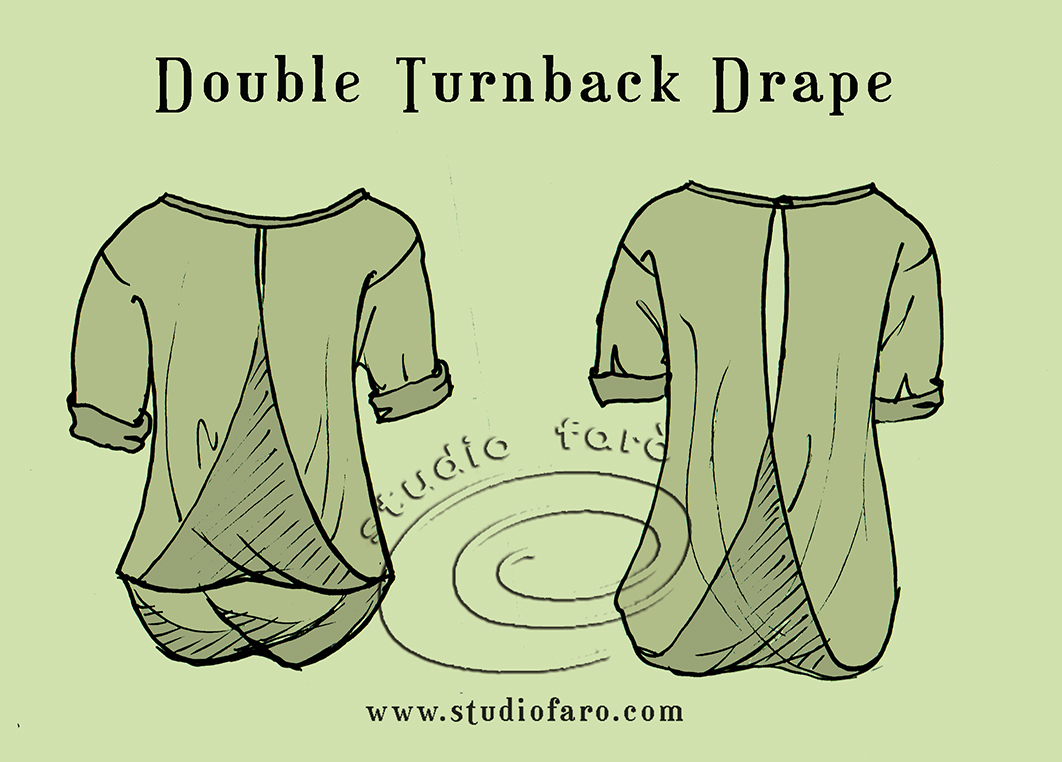
The example we have used this week has a turn back drape in the front and the back and is made of transparent fabric (above). This is a perfect opportunity to see the behaviour of all layers in the Turnback, from front to back.
TURNBACK THINKING
If you look at the example top and see the connection between the CF/CB neck and the bottom of the side seam, then:
- Find yourself a loose fit top or dress that you have made before and know that it fits.
- Trace a copy of the front and back (half bodice) and include a tracing of the sleeve.
In my example, I have used a woven unfitted kimono block. Either block will give you a good pattern.
- Shape the neckline to suit your own style (this will work with ‘V’ necks and rounds).
- Mark in a side seam that ensures a loose fit.
- If using a Kimono block, build in the pattern detail that is your gusset.
- Mark in your sleeve length, and calculate the sleeve opening to suit the style.
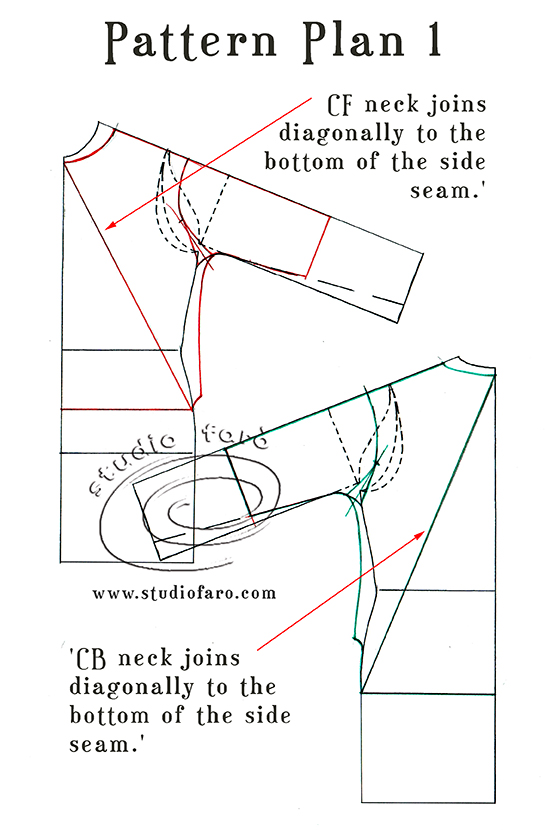
- Draw in your diagonal lines, joining the ‘CF neck to the bottom of the side seam’.
- Then join your ‘CB neck to the bottom of your side seam’.
- Shape the side seam to the diagonal line, clearly defining the end of the side seam for easier sewing.
- Map the shape needed for half front and half back adding the diagonal section to the other side of the CF/CB.
- Copy the front and back sleeve as whole pattern (for the kimono block).
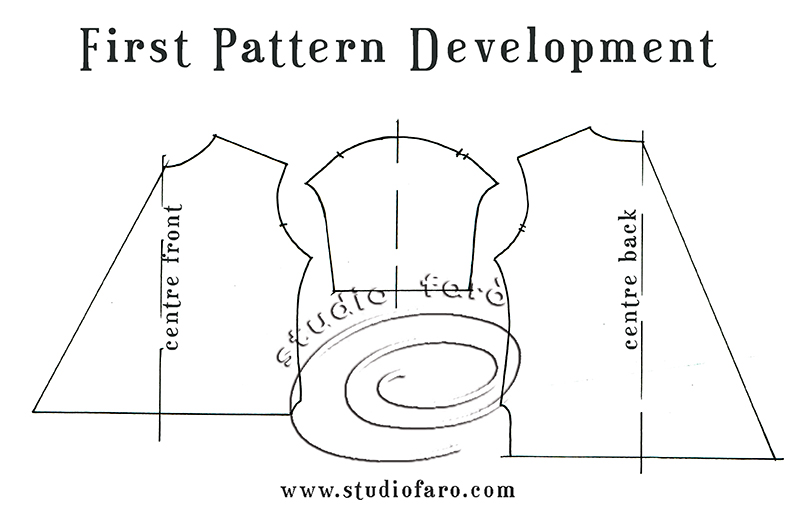
The final phase of this pattern is to use the above shapes to take the front and back patterns:
- Make a second copy of the front and back patterns as above.
- Join them together on the hem fold, making sure they are facing in different directions. (Looks like the king and queen on the playing cards.)
- I have placed the grainline (on the front and back) from mid-shoulder point to mid-shoulder point. This dislocation of the grain is what produces the twist behaviour in the hemline.
- If you require more twist then I suggest you push the grain further off the centre front lines.
- Cut this pattern on a single-lay of your cloth, tracing a pair of the sleeve patterns and one each of the front and back.

In conclusion, the key ideas in this pattern development are:
- That it is the placement of the grain that creates the twist in the hem fold of the garment. The pattern itself is not twisted.
- That the fabric you choose is good on both sides and drapes well. If you are using a light transparent fabric for this style, be sure to have the finest finishes on all seams and hems.
I adore this particular pattern move, ‘The Turnback’. It makes a very elegant top with flattering drape for all figure types. Why not experiment and add a collar and front button to this style for a more tailored look.
We love to hear from you so please let us know if you have any questions. And if you are enjoying these posts why not follow the blog and subscribe to our website to hear about the latest pattern making ideas and resources.
Enjoy 🙂
No Comments