07 Apr The Wrap Drape Dress
Posted at 14:48h
in Pattern Making Instructions, Pattern Puzzles, Stretch Patterns, Womens Knit Block
2 Comments
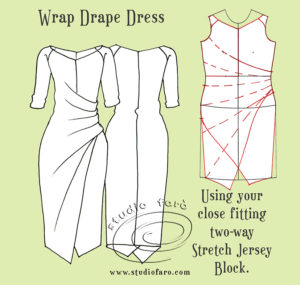
This weeks #PatternPuzzle was a tough one! When you look at the weird pattern shape we posted on Saturday, you are looking at the most complex pattern piece in the style. In this weeks puzzle, in addition to the side seam drape, it’s all about understanding the construction of the front wrap and how that relates to the CF seam. It is a mock wrap in that it is secured at the side seams to create a more reliable shape.
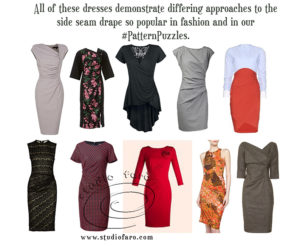
The side seam drape is popular in both knit and woven fabrics. There are endless variations on this style in fashion ranges from the top to the bottom of the market and it has also been a popular theme in some of our puzzles.
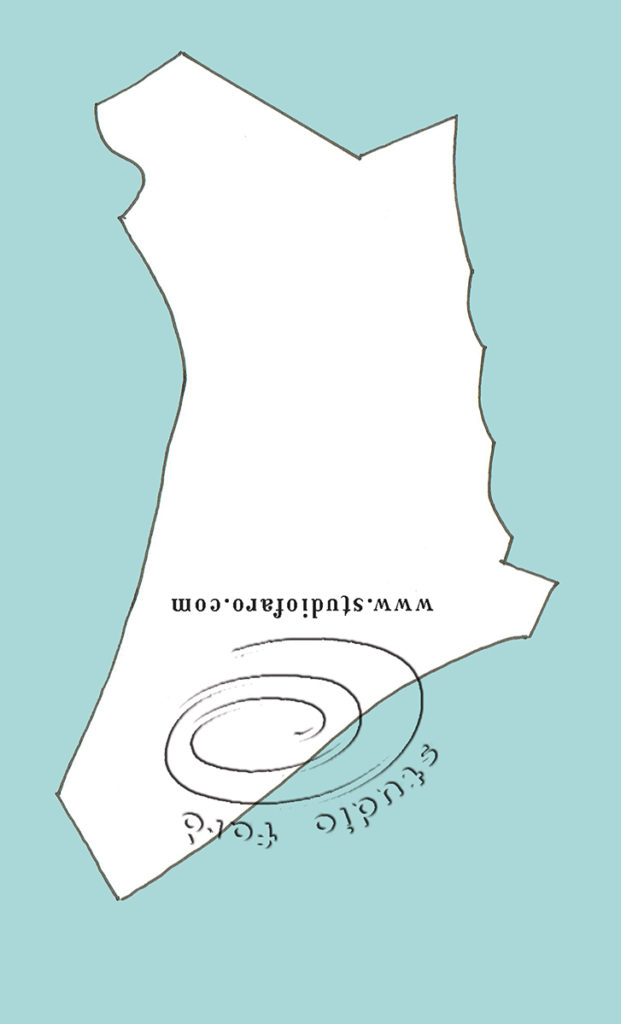
Once you turn the weird pattern shape the right way up, it does make a bit more sense. The armhole is partially visible on the top left-hand side. The peaks on the right would represent large drape tucks going into the side seam. And the lower left shape is the dipped hem of the front wrap of the dress.
The pattern plan below is based on my close-fitting, two-way stretch knit block. It includes a three-quarter sleeve with raglan styling and a CB seam to improve the fitting of the dress. The radiating lines in the front dress are where the extra fabric will be added to create the side seam drape.
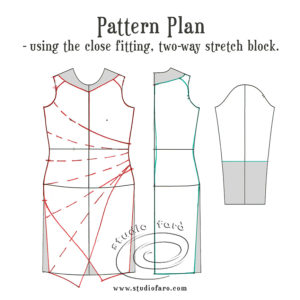
The diagram below will help when you are tracing and separating your pattern pieces. The pencil sketch included indicates the partially hidden CF seam and the waistline on the left side under-wrap. The colour coding is used to show both sides of the front dress and how much the wrap crosses over.
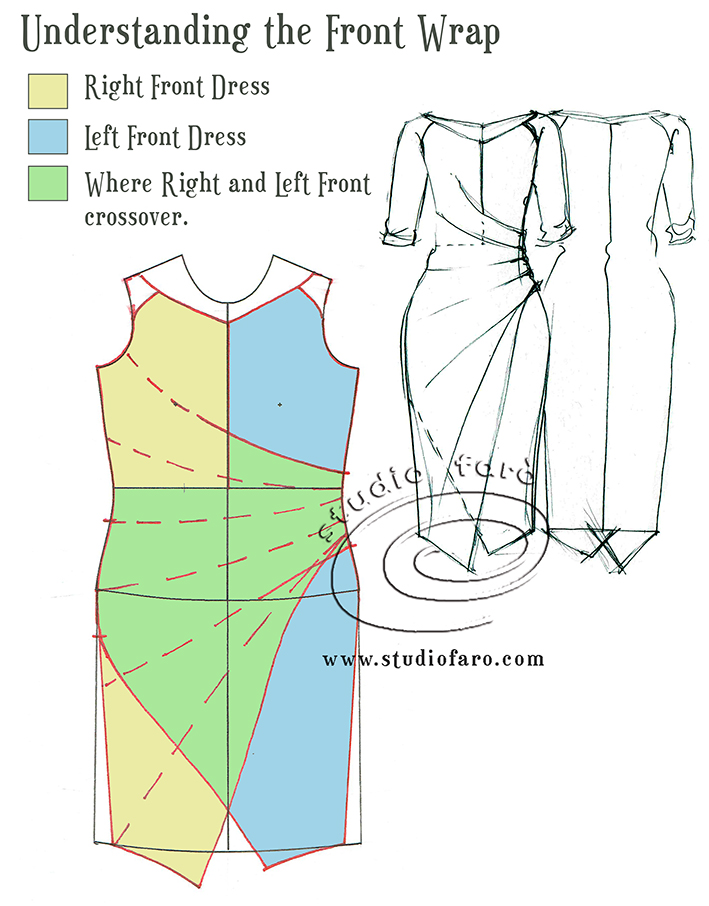
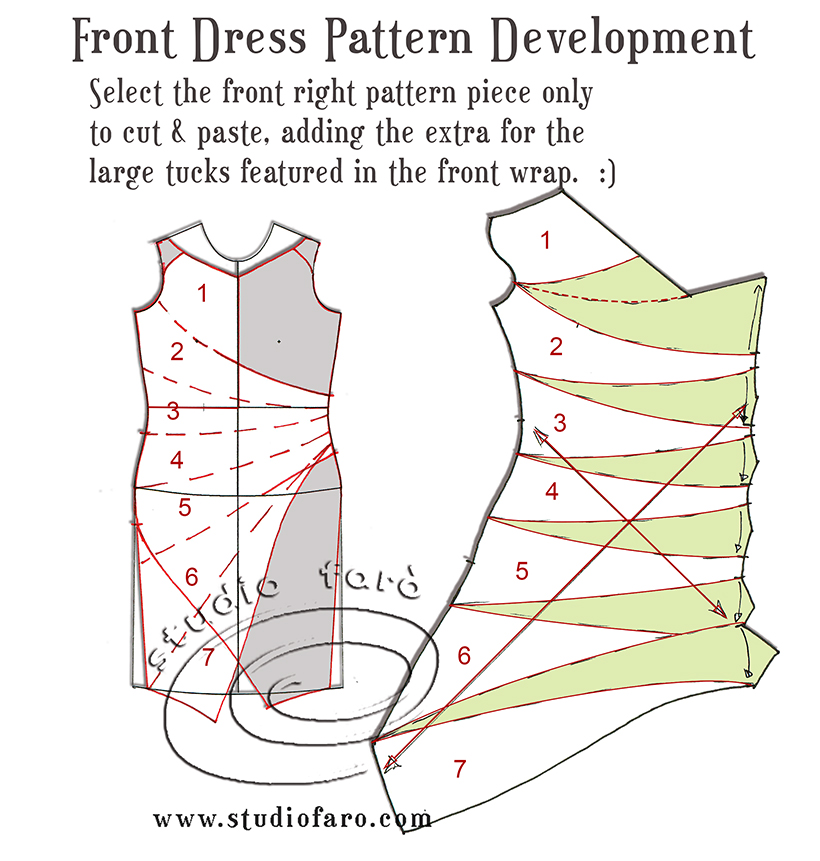
Once you identify the parts involved in the Left Front Dress it may be a good idea to number the sections you are about to expand so you can keep track of them in the process. How much fabric you add in each tuck will depend on the weight of your fabric. Lighter fabrics will require more fabric to be added to the tuck to give it a strong, substantial look (10-14cm total tuck). Medium to heavy-weight fabrics will need less (6-10cm total tuck). Please note it is important to keep the CF seam clear of the tucks between sections 1 and 2.
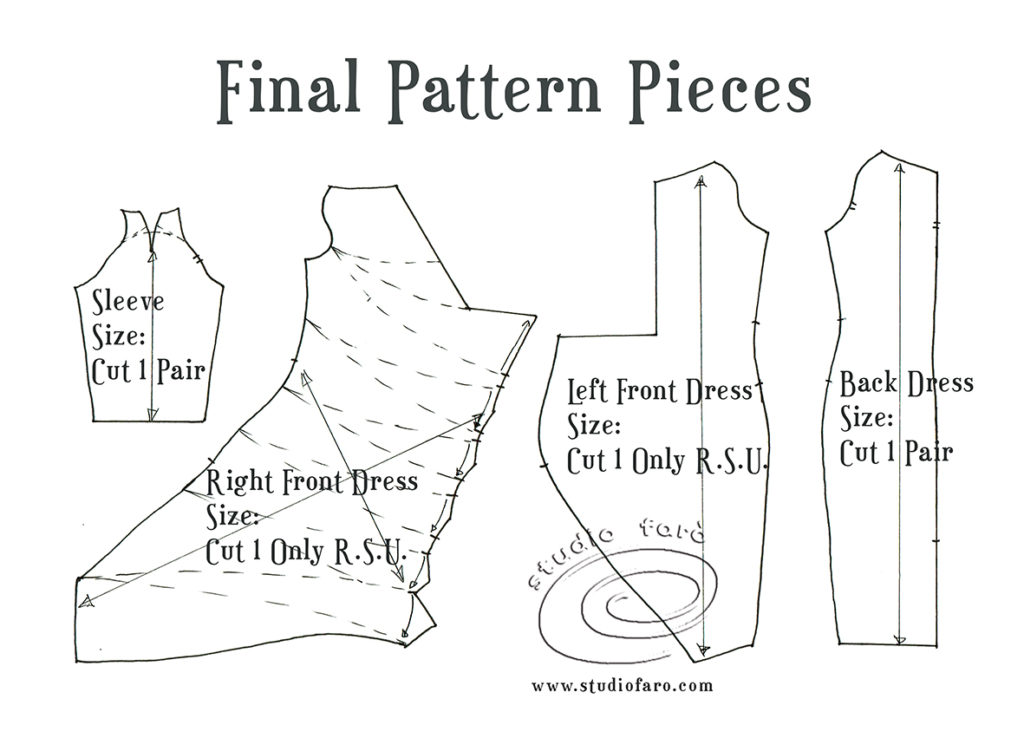
The final pattern pieces include the two front pattern pieces, one back, and one sleeve pattern piece. You may want to add some lightweight elastic to the waistline edge of the left side-dress to prevent too much stretching in the waist. The only pattern that you will need to add to this style is a binding pattern for the neckline finish. Placement of the grain on the left front dress is determined by using the bias of the fabric in the direction of the drape.
I love to hear from you so please ask your questions in the comments section below. If you’d like to buy a copy of these pattern making notes for your own personal use at home you’ll find them here: The Wrap Drape Dress – Pattern Making Instructions. Enjoy 🙂
Take this moment to sign up for my fabulous newsletter! Every month or so I send an email newsletter with new website content and always, always an enormous discount code for all my sewing patterns, garment blocks and pattern making instructions.
This discount code is for subscribers only. Don't miss out!


Adinail Santos Aragão
Posted at 21:18h, 06 JuneParabéns pela iniciativa de ajudar a muitas pessoas como eu que ama costura
Gostaria de receber um molde do vestido drapeado na frente e transpassado
Tamanho 44
Gratidão
Studio Faro
Posted at 14:38h, 07 JuneHi Adinail, thanks for getting in touch. What I offer on this website is a lot of pattern making instructions so you can make your own sewing patterns. So the above design is not currently available as PDF sewing pattern. You can use these instructions to make your own patterns: https://www.studiofaro.com/product/the-wrap-drape-dress-pattern-making-instructions/
Feel free to ask any questions as you make your own pattern. I’m always happy to help. 🙂